Debian With Openbox and Tint2 – Part 2 – Usable System
Updated on 2025-03-31
As with the first post, this post was over a month in the making and represents many hours of work. In this post, I will discuss the installation of the Openbox window manager, the Tint2 panel, and other packages to create a usable system.
All references to key or keys in this tutorial are in reference to the key or keys on your keyboard. All references to repo or repos in this tutorial are in reference to repository or repositories.
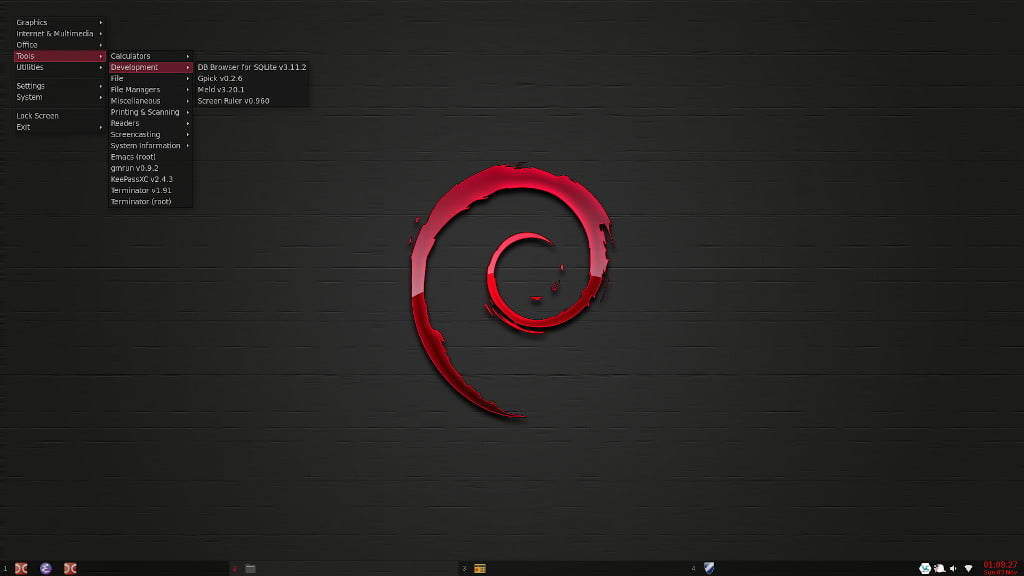
The Openbox menu is referred to throughout this tutorial. The Openbox menu is accessible by right-clicking on the desktop. After completing the Openbox configuration, the Openbox menu can also be accessed by right-clicking in the Tint2 panel or by simultaneously pressing the Windows/Super key and spacebar.
Double Commander is referred to throughout this tutorial. Double Commander is a file manager and can initially be accessed via the Openbox menu and selecting Applications – Utilities – Double Commander. Once Openbox configuration has been completed, Double Commander is then accessible via the Openbox menu and selecting Tools – File – Double Commander.
FeatherPad is referred to throughout this tutorial. FeatherPad is a text editor and can initially be accessed via the Openbox menu and selecting Applications – Utilities – FeatherPad. Once Openbox configuration has been completed, FeatherPad is then accessible via the Openbox menu and selecting Tools – File – FeatherPad.
All references to using the command line after completing installation and rebooting are in reference to using Terminator, a terminal emulator. Terminator is accessible prior to completing Openbox configuration via the Openbox menu by selecting Terminal emulator from the top. Once Openbox configuration is completed, Terminator is accessible from the Openbox menu by selecting Tools – Terminator.
Internal links are used throughout this post. To get back to where you were taken from, press the ALT-LEFT ARROW keys.
You may initially find yourself inadvertently switching desktops when using a pointing device. I find it annoying. The desktop switching functionality will be disabled once Openbox configuration has been completed.
Note: Following the steps in this tutorial will require manual installation of packages and manually editing configuration files. You may also need to research and install appropriate packages for proprietary hardware components. If you feel uncomfortable about performing any of the activities, this tutorial probably isn’t for you. I don’t mean to be blunt, but I want you to have a successful experience and I don’t want to unnecessarily cause you to dislike Linux.
Contents
- 1 – Install Packages
- 1.01 – Generate a Current Package List (optional)
- 1.02 – Check for Package Upgrades
- 1.03 – Install inxi and Obtain Hardware Info
- 1.04 – Install Packages for a Usable System
- 1.05 – Install Packages for Proprietary Components
- 1.06 – Install apt-listbugs (optional)
- 1.07 – Install/Upgrade LibreOffice from the Backports Repo (optional)
- 1.08 – Reboot
- 1.09 – Login Using the Command Line
- 1.10 – Install lightdm (optional)
- 1.11 – Login Using the lightdm Display Manager
- 2 – Rebooting and Shutting Down the Computer
- 3 – Configuration
- 3.01 – Download and Verify Configuration Files
- 3.02 – Disable Internal Mail Functionality (optional)
- 3.03 – Enable Tap-to-Click Functionality for Logitech Trackpads (optional)
- 3.04 – Openbox Configuration Files
- 3.05 – Tint2 Configuration File
- 3.06 – Terminator Configuration File
- 3.07 – Picom Configuration File
- 3.08 – Conky Configuration File
- 3.09 – XScreensaver Configuration
- 3.10 – Disable/Change Grub Timeout (optional)
- 3.11 – Select a Desktop Wallpaper (optional)
- 3.12 – Select a Login Wallpaper (optional)
- 3.13 – Enabling Wireless Connectivity
- 3.14 – Reboot
- 4 – Post-Configuration Notes
- 5 – Commonly Used Keybindings
- 6 – Conclusion
- 7 – Useful Resources
1 – Install Packages
In this section I’ll discuss activities and information related to package installation.
1.01 – Install Packages – Generate a Current Package List (optional)
I like to create a list of installed packages for reference purposes after installing Debian. To create a current list of installed packages, enter the following command:
where YYYY is the current year, MM is the current month, DD is the current day of the month, and ## is an incremental number starting with 01.
The above command pipes the output of dpkg -l to the named file under your home folder. There’s nothing magical about creating the file under your home folder. Use another folder if desired:
Following is an example of what the file contents should look like:

1.02 – Install Packages – Check for Package Upgrades
It’s a good idea to check for package upgrades before installing additional packages. Enter the following command:
You’ll be prompted for your password; enter your password and press the RETURN/ENTER key. A few lines will scroll up as the different repos are checked.
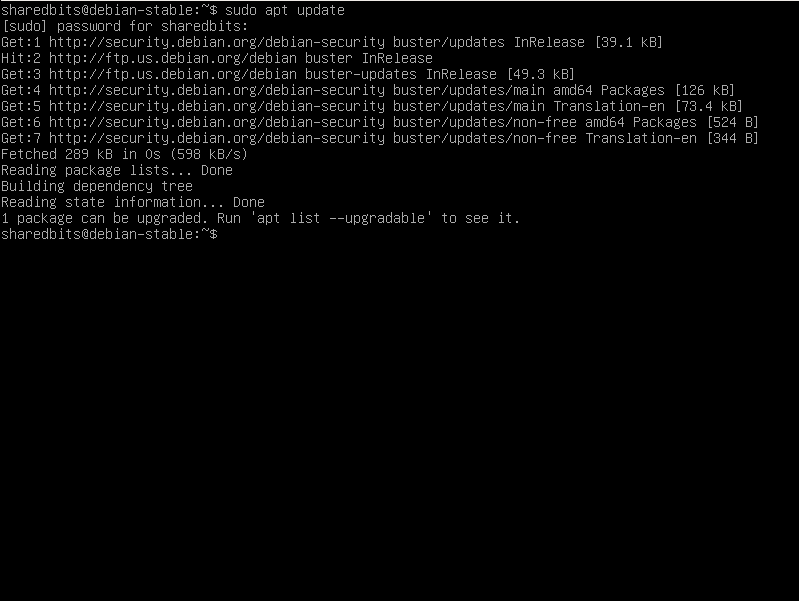
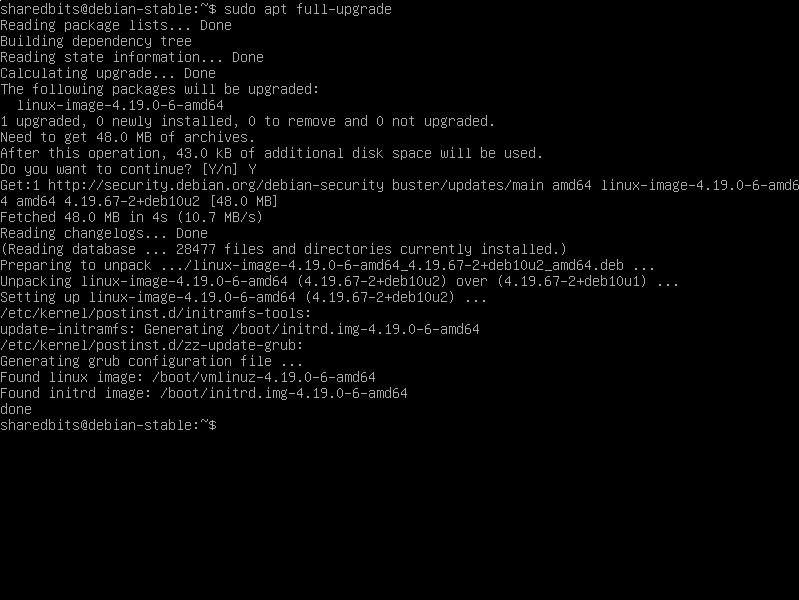
If no upgrades are available, you should see a response stating that your system is up-to-date. If upgrades are available, enter the following command:
The packages to be upgraded will be listed and you’ll be asked if you want to continue with the upgrade. Enter Y for Yes and then press the ENTER/RETURN key to allow the upgrade to proceed.
After upgrades have been installed, I like to clean up my Debian system by removing old packages. Enter the following command to remove old packages:
1.03 – Install Packages – Install inxi and Obtain Hardware Info
inxi is a nice command line app that can generate a number of details about your computer. Enter the following commands to install inxi:
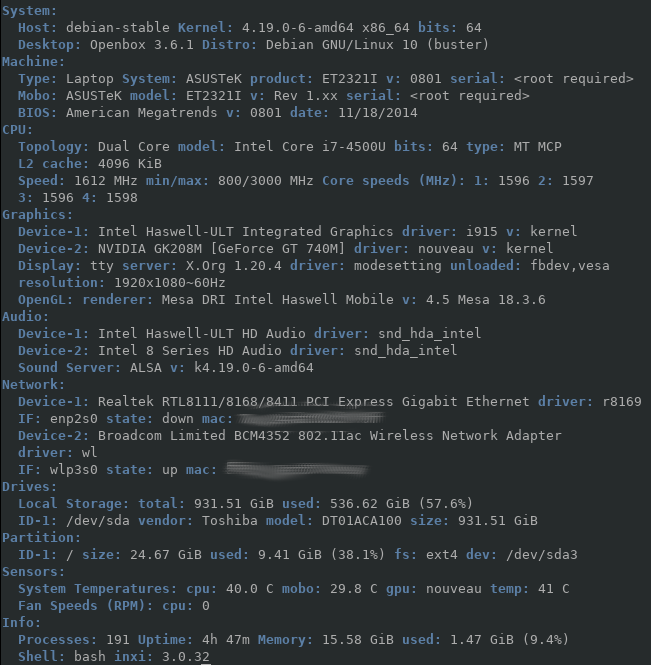
After installing inxi, run it to generate a list of your hardware component details:
where YYYY is the current year, MM is the current month, DD is the current day of the month, and ## is an incremental number, which should be 01 since this should be your first report.
The above command creates a file under your home folder from the inxi output so that you can refer to it without having to run inxi again. There’s nothing magical about creating the file under your home folder. Use another folder if desired:
Two component details in particular might be useful during the installation of packages later in this tutorial: graphics processing unit (GPU), and WiFi adapter.
Following is an example of the output generated from inxi using the -F option:
1.04 – Install Packages – Install Packages for a Usable System
Following is a list of packages to install to create a usable system:
1 Should also install the libpam-gnome-keyring package.
2 Install from the Backports repo if available and desired as it will be a newer version.
3 If you are multi-booting (booting multiple Linux distributions), only install under one distribution. Runs from GRUB menu; i.e. prior to booting.
4 Should also install the obconf, obsession, and scrot packages.
5 Should also install PulseAudio packages.
6 Necessary for a Synaptics trackpad (laptop), the Logitech T650 glass trackpad, or the Logitech Wireless trackpad to get tap-to-click functionality. Otherwise skip installation.
Enter the following command to get more information about any of the above packages:
I’ve also included the above list in PDF format with the configuration files download. The list is in single column format, which should be easier to follow.
To install a package, enter the following commands:
Note: If you will be installing all of the packages in one sitting, you only need to issue the first of the two above commands one time.
Multiple packages can be installed at once by separating each package name with a space:
However, I have ran into instances where an installation issue with one or more packages results in some of the packages not being installed. Just keep that in mind if you choose to install multiple packages at once.
1.05 – Install Packages – Install Packages for Proprietary Components
This may be the most difficult part of the tutorial. You will likely need to perform a bit of research to determine what packages to install to get some of your hardware components to work, which is why I recommended the installation of inxi and then generating a report of your hardware info.
Researching the appropriate packages to install for any proprietary hardware components would be a bit easier if you had access to Synaptic, but you do not at this point in the installation process. However, apt has a search option that can be used to query package descriptions.
For example, I have a Broadcom BCM4352 WiFi chip in my desktop computer. To find out what packages might be needed to get the chip to work, you would enter the following command:
The following information (Debian 10 Buster) is then returned:
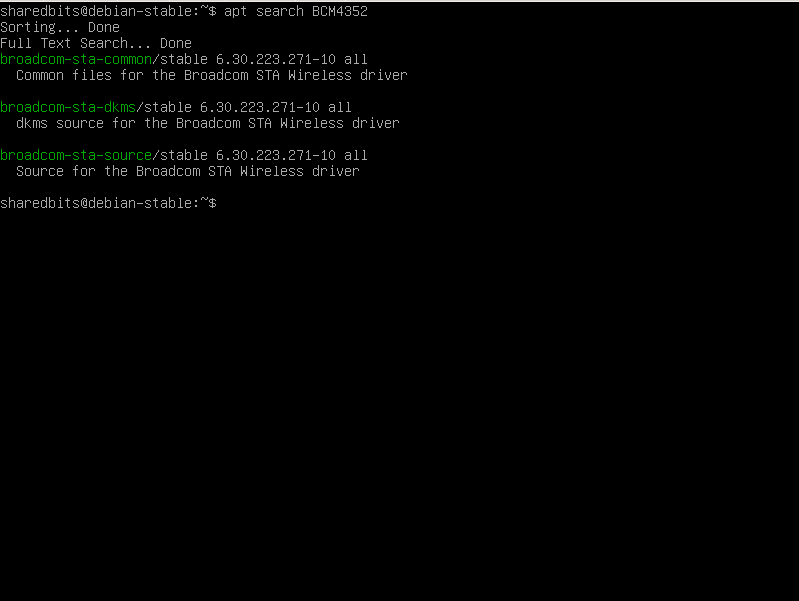
Note: You would not install the broadcom-sta-source package as that contains source code.
In my case, I would need to install the broadcom-sta-common package, which contains a binary-only device driver, and the broadcom-sta-dkms package, which loads the driver into to the Linux kernel. You would need to install the dkms package first or the broadcom-sta-dkms package, when installed, will not load the driver into the kernel.
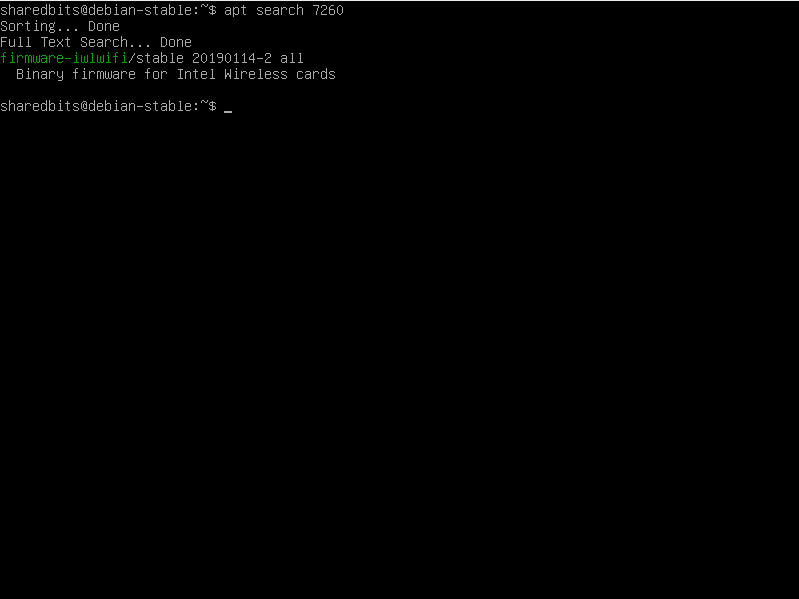
My laptop uses an Intel 7260 WiFi chip, so to locate possible packages to get that chip to work you’d enter the following command:
The following information (Debian 10 Buster) is then returned:
The Debian Wiki might be a good resource for documented procedures on getting a proprietary hardware component to work under Debian.
You could also try using your favored search engine to find information on the Internet about getting a proprietary hardware component to work under Debian. You don’t necessarily need information related to Debian. I’ve used information about other Linux distributions to successfully troubleshoot hardware issues under Debian in the past. Just be careful not to do something that breaks Debian.
WiFi chips/cards, GPUs (graphic processing units), and bluetooth chips will probably be the only proprietary components for which you’ll need to install packages based on my experience with using Debian and Debian derivatives.
1.06 – Install Packages – Install apt-listbugs (optional)
The vast majority of the time, you should not encounter packages from the Debian Stable repos that contain bugs. However, there are occasions when a bug exists in a package and the odds of encountering a bug increases if you choose to install packages from the Backports repo. Therefore, I like to install the apt-listbugs package. To install the package, enter the following commands:
sudo apt install apt-listbugs
apt-listbugs will check for bug reports for any packages that are being installed or upgraded and generate a bug report warning if there is a bug. Following is an example of a bug report:
b1 – #932659 – node: modules are not getting detected in a fresh sid chroot environment
Summary:
nodejs(1 bug)
Check the Debian Bugs page for additional details about a reported bug. You’ll need to learn how to read bug report details to determine whether a bug might require not installing a package or holding the existing version of a package when upgrading. There’s no easy way to learn how to read bug report details. It’s something that will come with experience.
1.07 Install Packages – Install/Upgrade LibreOffice from the Backports Repo (optional)
The version of LibreOffice in the Debian Stable repos soon becomes outdated. If you’d prefer to use a more up-to-date version, then you’ll need to install or upgrade LibreOffice from the Debian Backports repo.
The Debian Backports repo provides some updated versions of packages. The Backports repo should only be used to install specific packages, not to upgrade your entire Debian installation. I learned that lesson the hard way when I ran CrunchBang Linux.
First, you’ll need to edit your apt sources file. Enter one of the following commands:
— or —
sudo nano /etc/apt/sources.list.d/debian.list
Reference part 1 of this tutorial to refresh your memory about changing the apt sources file.
Add the following lines to the apt sources file:
# bookworm-backports
deb <desired repo address> bookworm-backports main contrib non-free non-free-firmware
# deb-src <desired repo address> bookworm-backports main contrib non-free non-free
Note: The Backports repo name will change for each Debian Stable release. Currently, the Backports repo name is configured as the Debian Stable release name followed by a hyphen and the word backports.
Your apt sources file should now look similar to the following:
deb http://ftp.us.debian.org/debian/ bookworm main contrib non-free non-free-firmware
# deb-src http://ftp.us.debian.org/debian/ bookworm main

deb http://security.debian.org/debian-security bookworm-security main contrib non-free non-free-firmware
# deb-src http://security.debian.org/debian-security bookworm-security main

# bookworm-updates, to get updates before a point release is made;
# see https://www.debian.org/doc/manuals/debian-reference/ch02.en.html#_updates_and_backports
deb http://ftp.us.debian.org/debian/ bookworm-updates main contrib non-free non-free-firmware
# deb-src http://ftp.us.debian.org/debian/ bookworm-updates main

# bookworm backports
deb http://ftp.us.debian.org/debian/ bookworm-backports main contrib non-free non-free-firmware
# deb-src http://ftp.us.debian.org/debian bookworm-backports main contrib non-free
Save the changes (CTRL-o, ENTER/RETURN), exit nano (CTRL-x), enter the word clear, press the ENTER/RETURN key, and then enter the following commands:
apt policy libreoffice
Determine if a newer version of LibreOffice is available in the Backports repo. In the following screenshot, a newer version is available in the Backports repo; reference the first two lines following Version table:.

If a newer version is available, install it or upgrade your existing LibreOffice installation using the following command:
You’ll also want the libreoffice-help-xx package, where xx is your desired language. Use the above procedures for installation guidance. To find the specific LibreOffice help package for your languge, enter the following command:
If the output is too long, you can use your pointing device to scroll the output upwards.
All future libreoffice and libreoffice-help-xx upgrades will now come from the Backports repo when you perform a system upgrade.
1.08 – Install Packages – Reboot
You’re now ready to reboot your system. Enter the following command to reboot your computer:
If by chance the above command doesn’t work, try a forced reboot:
1.09 – Install Packages – Login Using the Command Line
After logging in via the command line, issue the following command to start the desktop GUI, also known as the X Window System:
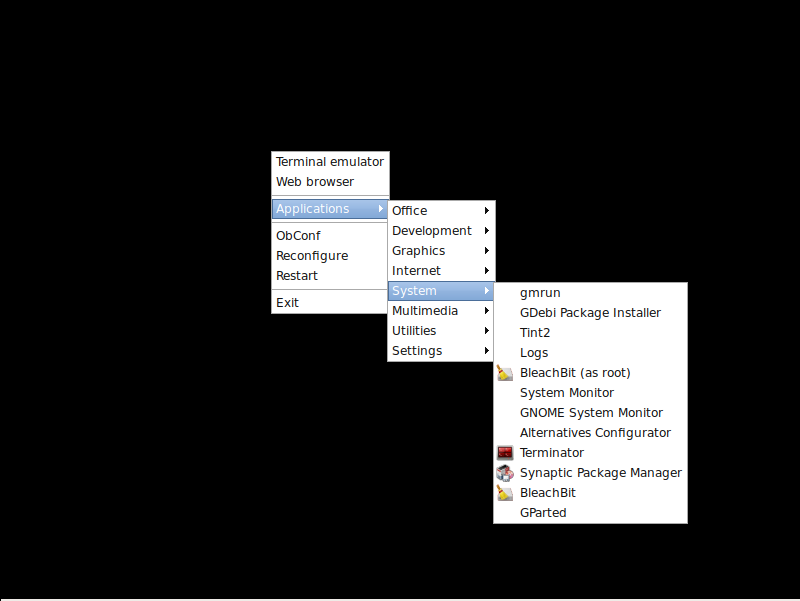
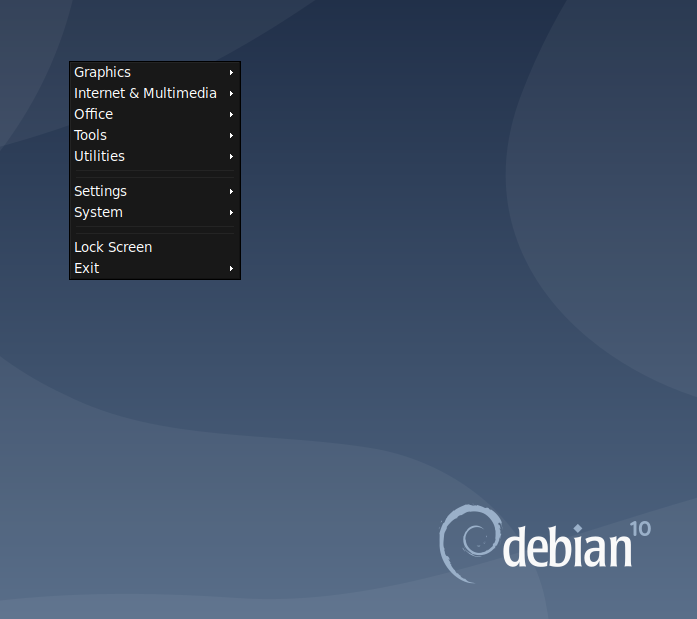
You should now see a black screen, which may be a bit disconcerting, but there is a desktop there. Right-clicking anywhere on the desktop should result in activation of the Openbox menu.
If the X Window System does not start up properly, then perhaps you haven’t installed the correct or necessary packages to get your GPU to work correctly. You’ll need to figure out what packages you’re missing to get your GPU to work. Unfortunately, I don’t have enough experience with proprietary GPUs to offer more information than what I’ve already provided in this tutorial. Feel free to go back to Install Packages for Proprietary Components for more guidance.
1.10 – Install Packages – Install lightdm (optional)
If you don’t want a GUI login screen, feel free to skip ahead.
If the X Window System started up successfully in the previous step and you want a nice GUI login screen, then consider installing the lightdm display manager. There are other display managers available, but I’m most familiar with lightdm. To install lightdm, drop to the command line and issue the following commands:
sudo apt install lightdm
Login will be different after installing the lightdm display manager. Refer to the next section for login details.
1.11 – Install Packages – Login Using the lightdm Display Manager
Skip ahead if you opted not to install the lightdm display manager.
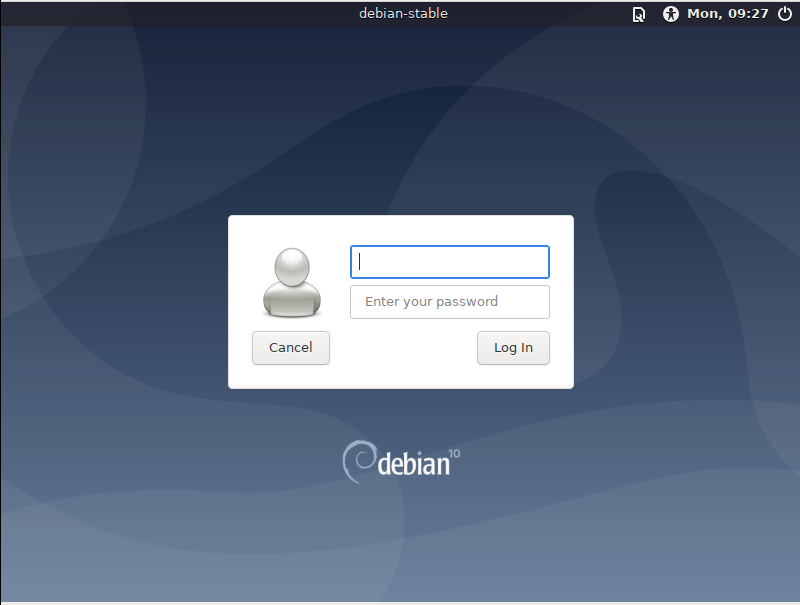
If you opted to install the lightdm display manager, then you should see something similar to the following after rebooting your computer and selecting the default entry in the GRUB boot loader screen:
2 – Rebooting and Shutting Down the Computer
Now that you have a desktop installed, shutting down or rebooting the computer will be different. The following procedures only apply until you have completed the Openbox configuration, at which time you will only need to use the Openbox menu; reference Post-Configuration Notes for additional details.
2.01 – Rebooting and Shutting Down the Computer – No GUI Login (lightdm not installed)
Activate the Openbox menu and select Exit. If you wish to reboot the computer, enter the following command:
If you wish to shutdown the computer, enter the following command:
2.02 – Rebooting and Shutting Down the Computer – GUI Login (lightdm installed)
Activate the Openbox menu and select Exit. You should now be back at the login screen. Click what looks like a power button in the upper right corner and select the following as desired:
- Restart… to reboot the computer
- Shutdown… to shutdown the computer
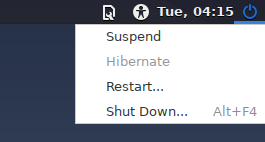
Alternatively, you can also press the ALT-F4 keys simultaneously at the login screen to shutdown the computer.
If by chance you’re not able to get to the login screen, then drop to the command line and reference B. Rebooting and Shutting Down the Computer — 01. No GUI Login for the appropriate commands to reboot or shutdown.
3 – Configuration
App and hardware configuration are discussed in this section.
3.01 – Configuration – Download and Verify Configuration Files
I’ve put together a number of configuration files for this tutorial that can be downloaded here. You should also download the GPG signature file to verify the configuration files download to insure that it hasn’t been tampered with. Verification should be performed prior to decompressing the configuration files. You’ll need to use Kleopatra (or a similar app) and the Shared Bits public key to verify the file.
Kleopatra resources:
3.02 – Configuration – Disable Internal Mail Functionality (optional)
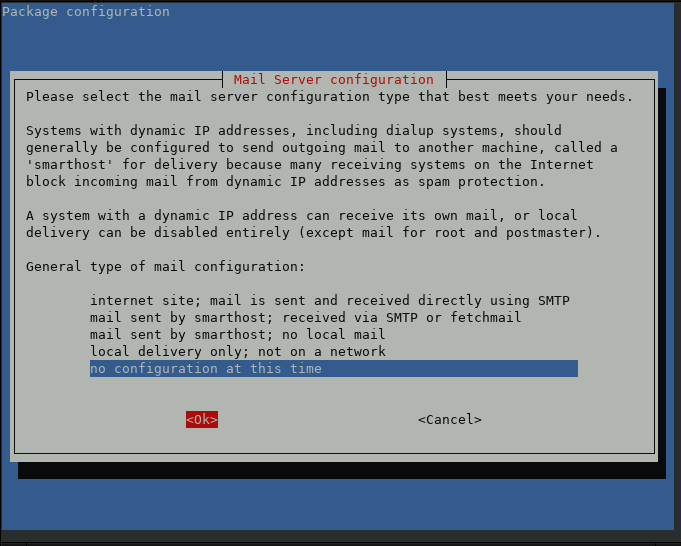
The exim mail server gets installed configured for local delivery only by default with any Debian installation. I personally find the functionality annoying for personal computing needs. If you feel the same way and you desire to disable the internal mail functionality that comes with Debian, use the following procedure:
1. From the command line, enter the following:
2. Select the option, no configuration at this time. Tab to Ok and press the ENTER/RETURN key.
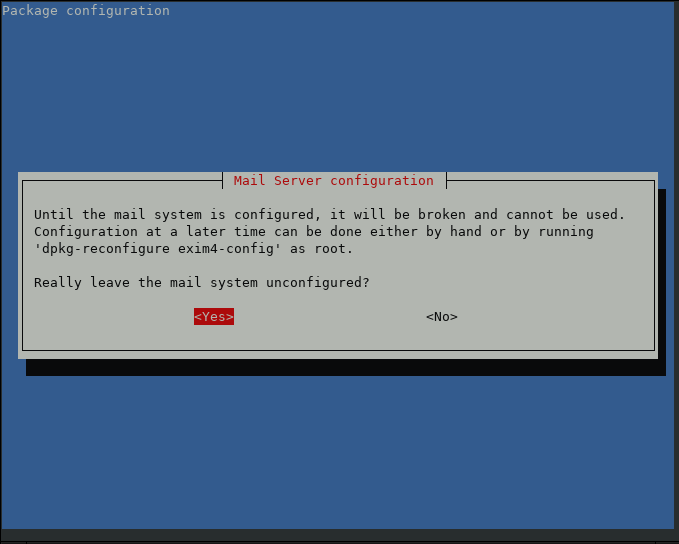
3. Confirm that you want to leave the mail system unconfigured by selecting Yes and then press the ENTER/RETURN key.
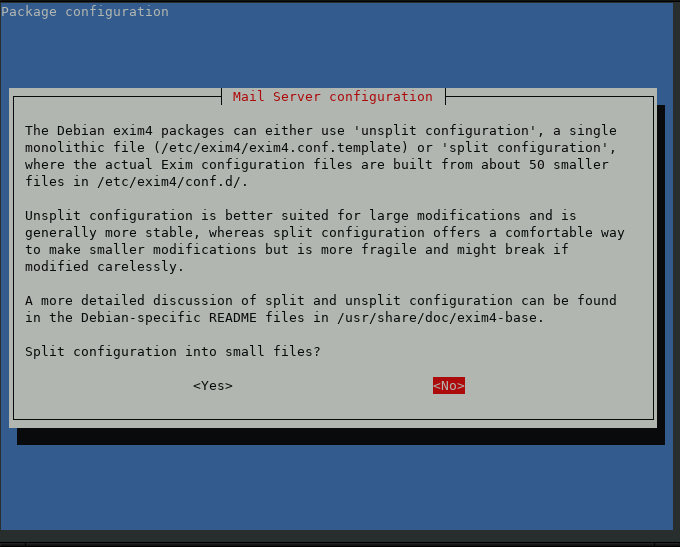
4. Select whether or not you want exim4 configuration files split into smaller files; the default is No. I recommend using the default option unless you have a reason to do otherwise. Press the ENTER/RETURN key.
You should now be returned to the command prompt.
3.03 – Configuration – Enable Tap-to-Click Functionality for Logitech Touchpads (optional)
Feel free to skip ahead if you do not have a Logitech touchpad.
Did you install the appropriate packages?
You’ll need to create and edit a Synaptics configuration file to get tap-to-click functionality for a Logitech touchpad. You’ll need to use the command line for the remainder of this section.
Determine the presence of the /etc/X11/xorg.conf.d folder:
If the xorg.conf.d folder is not shown in the contents listing, then you’ll need to create it:
Determine the name of a file to be copied:
where * is a wildcard for the beginning characters of the synaptics configuration file.
Next, you’ll need to make a copy of the file:
where * represents the beginning characters of the synaptics configuration file you located in the previous step.
Now the copied synaptics configuration file needs to be modified:
where * represents the beginning characters of the synaptics configuration file you copied in the previous step.
Under the section containing wording regarding synaptics driver, add the following two lines below MatchIsTouchpad “on”:
Option "TouchButton1" "1"
Option "TouchButton2" "3"
The synaptics configuration file should now look something like the following:
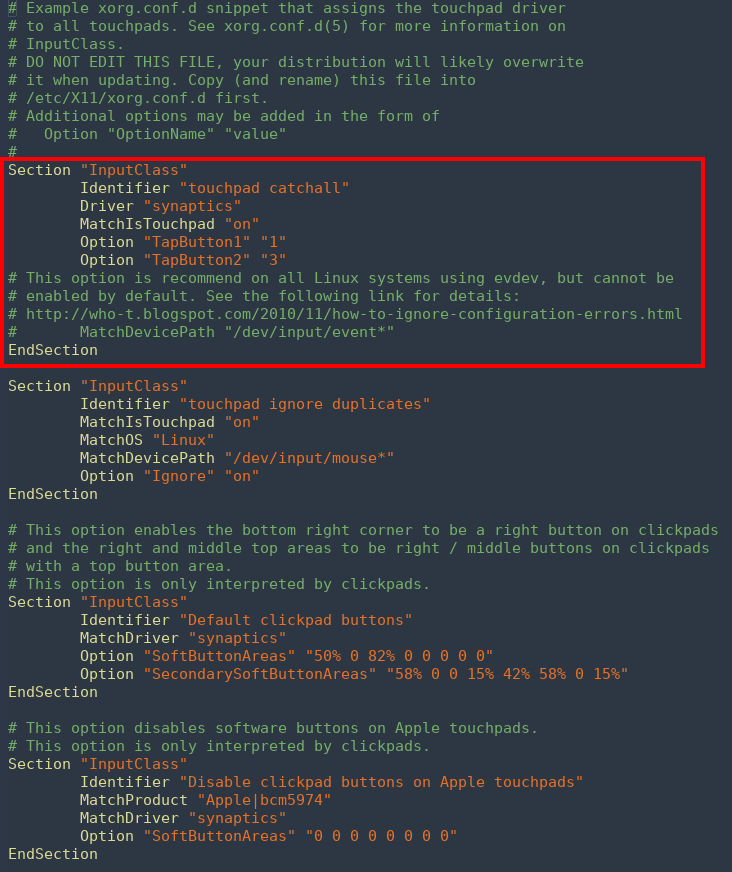
Save your changes (CTRL-o) and exit nano (CTRL-x).
If you’d like to use tap-to-click functionality now, reboot your computer and log back in; reference Rebooting and Shutting Down the Computer and Login Using the lightdm Display Manager or Login Using the Command Line earlier in this tutorial.
3.04 – Configuration – Openbox Configuration Files
Open Double Commander. Under the /home/username/.config folder, create a folder (F7) named openbox. Copy the following files to the /home/username/.config/openbox folder:
The autostart file contains commands to start programs upon login.
Using FeathePad, open the /home/username/.config/openbox/autostart file.
If you’re using a laptop with a Synaptics touchpad, uncomment (remove the pound or hash tag symbols) the following two lines in the Openbox autostart file under the TOUCHPAD section:
synclient VertEdgeScroll=1 HorizEdgeScroll=1 TapButton1=1 TapButton2=3 &
syndaemon -i .5 -K -t -R -d &
If you opted to install Redshift, uncomment the following line and add the GPS coordinates for your location:
redshift -l lat:long &
The GPS coordinates should be rounded to the nearest tenth, rounding up where applicable. For example, a latitude of 40.741895 should be rounded to 40.7 and a longitude of -96.76523 should be rounded to -96.8. The latitude and longitude for your location can be obtained by typing in your address at Google Maps or at GPS Coordinates. If you use Google Maps, the latitude and longitude will appear in the link in the browser address field.
Save your changes and exit FeatherPad.
The menu.xml file contains the entries for the Openbox menu.
The rc.xml file contains desktop settings and keybindings. A list of commonly used keybindings is provided later in the tutorial.
Restart Openbox by activating the Openbox menu and selecting Reconfigure. The Openbox menu content will now be different. Familiarize yourself with the new menu content before continuing.
3.05 – Configuration – Tint2 Configuration File
Using Double Commander, create a folder (F7) named tint2 under the /home/username/.config folder. Copy the tint2rc file to the /home/username/.config/tint2 folder.
If you’re using a desktop computer, use FeatherPad to edit the /home/username/.config/tint2/tint2rc file and change the following line near the end of the file to read as follows:
battery = 0
Save your changes and exit FeatherPad.
3.06 – Configuration – Terminator Configuration File
Using Double Commander, create a folder (F7) named terminator under the /home/username/.config folder. Copy the config file to the /home/username/.config/terminator folder.
3.07 – Configuration – Picom Configuration File
Using Double Commander, create a folder (F7) named picom under the /home/username/.config folder. Next, copy the picom.conf_debian-stable file to the /home/username/.config/picom folder. Now rename the file from picom.conf_debian-stable to picom.conf by selecting the file and pressing the F2 key under Double Commander.
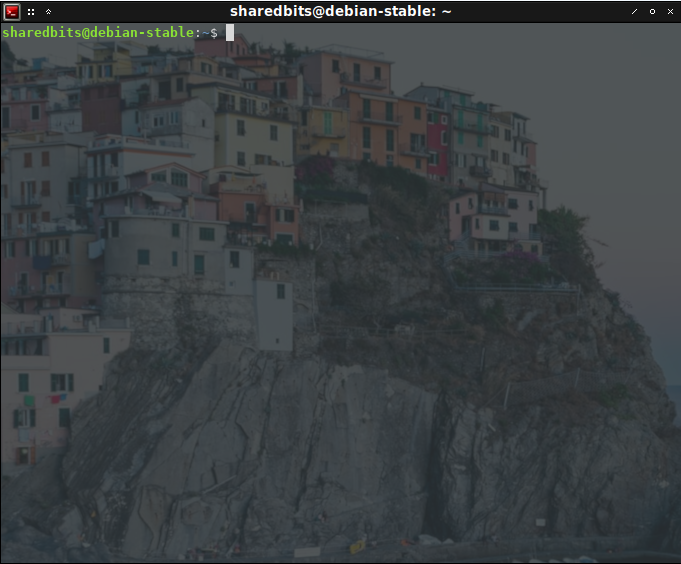
Close and then re-open Terminator. The background for Terminator should now be transparent. Transparency will be more evident if you are using a desktop wallpaper or if you open an existing text file with FeatherPad maximized.
3.08 – Configuration – Conky Configuration File
Using Double Commander, copy the .conkyrc file to /home/username, your home folder. Copy the get-external-ip.sh file to the bin folder under your home folder; e.g. /home/user/bin. The get-external-ip.sh file is a small bash script that obtains your external IP address, used by Conky to display your external IP address on the desktop.
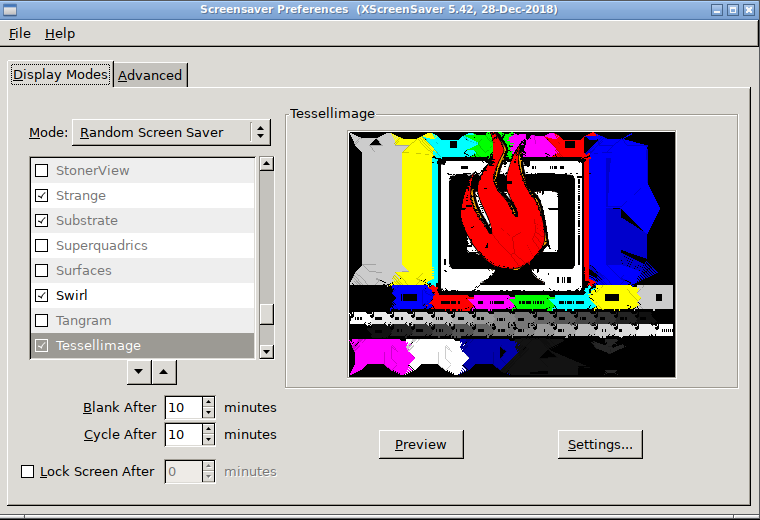
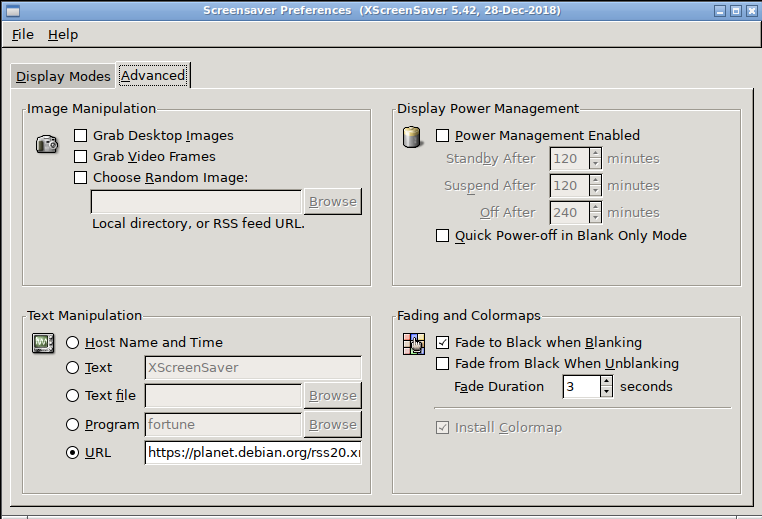
3.09 – Configuration – XScreensaver Configuration
Activate the Openbox menu and select Settings – Screensaver. Configure XScreensaver as desired. When you’re done, exit XScreensaver.
 |  |
3.10 – Configuration – Disable/Change Grub Timeout (optional)
If you’d like to have an unlimited amount of time to select an entry from the Grub boot loader screen, or you’d like to change the amount of time to make a selection, then you’ll need to edit the Grub configuration file. First, you should make a backup copy of the configuration file in case you make a mistake. Drop to the command line and enter the following command:
where YYYY is the current year, MM is the current month, DD is the current day of the month, and ## is an incremental number starting with 01.
Once you’ve created a backup, you’re now ready to change the Grub configuration file. Activate the Openbox menu and select Tools – File – FeatherPad (root). Then open the /etc/default/grub file.
Locate the GRUB_TIMEOUT line. If you want to disable the timer, change the value to -1. If you want to change the amount of time, change the value to the desired number of seconds. Save your changes and then exit FeatherPad.
You can also set the timeout value to zero resulting in the default menu entry immediately being booted. I don’t recommend doing that though because you might not be able to boot into Advanced options mode to troubleshoot and resolve any boot issues that may arise in the future.
If you’re interested, additional info about Grub 2 boot menu basics can be found here.
3.11 – Configuration – Select a Desktop Wallpaper (optional)
I enjoy using wallpapers for my computer desktop. A nice wallpaper adds to the user experience in my opinion. Following are some nice sites for desktop wallpapers:
- DeviantArt (free; some of the images on the site are not safe for work or minors)
- DigitalBlasphemy (not free, although Ryan Bliss does provide some free wallpapers in limited sizes)
- Unsplash (free)
Unfortunately, in my opinion, image categorization on the DeviantArt site has changed. You used to be able to drill down fairly easily to a wallpaper category. You can use the search feature and search for wallpaper or you can just try browsing around; click the All Categories drop down menu to get a list of separate categories.
Once you have a desired image you’d like to use as a wallpaper, locate the image using Double Commander. Right-click on the image and select Open with – Feh. In Feh, right-click on the image and select File – Background – . I normally use the Set Filled display method.
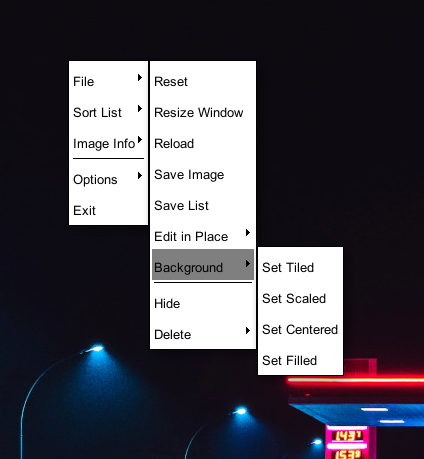
If you are using an image that is larger than your computer screen resolution, you might try the Set Scaled option. I think it is best to use an image that is the same size as your computer screen resolution. It is also best to use *.jpg images for speed and to conserve disk space.
3.12 – Configuration – Select a Login Wallpaper (optional)
If you opted to install the lightdm display manager, then you can use a wallpaper for the login page. Activate the Openbox menu and select Tools – File – FeatherPad (root). In FeatherPad, open /etc/lightdm/lightdm-gtk-greeter.conf.
Locate the background= line and append the full path and image file name to the line. The line should read something like the following:
background=/path-to-image-file/image-file-name
Save your changes and then exit FeatherPad.
Note: You should use an image that is the same size as your computer screen resolution. It is also best to use *.jpg images for speed and to conserve disk space.
3.13 – Configuration – Enabling Wireless Connectivity
Although you should have everything needed for wireless connectivity, you’ll need to modify a network configuration file as a first step to getting wireless connectivity to work.
Activate the Openbox menu and select Tools – File – FeatherPad (root). In FeatherPad, open /etc/network/interfaces.
The contents of the /etc/network/interfaces file should look similar to the following:
# This file describes the network interfaces available on your system
# and how to activate them. For more information, see interfaces(5).

source /etc/network/interfaces.d/*

# The loopback network interface
auto lo
iface lo inet loopback

# The primary network interface
allow-hotplug eth0
iface eth0 inet dhcp
Comment out the last two lines in the file by adding a hashtag or pound sign followed by a space. The contents of the /etc/network/interfaces file should now look similar to the following:
# This file describes the network interfaces available on your system
# and how to activate them. For more information, see interfaces(5).

source /etc/network/interfaces.d/*

# The loopback network interface
auto lo
iface lo inet loopback

# The primary network interface
# allow-hotplug eth0
# iface eth0 inet dhcp
Save your changes and then exit FeatherPad.
3.14 – Configuration – Reboot
Now you’re ready to reboot your computer for the changes you’ve made to take effect. Activate the Openbox menu and select Exit – Reboot.
If you need a memory refresher on logging in, refer to the following:
4 – Post-Configuration Notes
After rebooting and logging in, you should now see the Tint2 panel at the bottom of the screen; refer to the post header image at the top of this post.
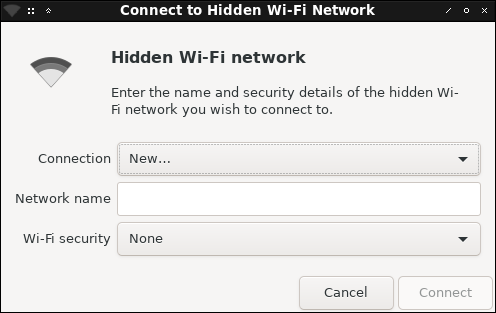
You should see an icon for the NetworkManager Applet in the system tray area of the Tint2 panel on the right side. To connect to your router, left-click on the icon and select the network SSID or network name. If the SSID or network name is hidden, then select Connect to Hidden Wi-Fi Network after left-clicking on the icon and enter the appropriate info.
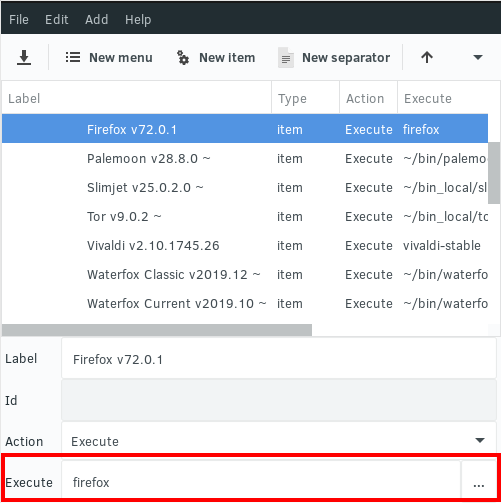
If you install additional apps, you’ll need to modify the Openbox menu to create an entry for them. The Openbox menu can be modified by using FeatherPad to edit the /home/username/.config/openbox/menu.xml file. If you need help in learning XML or how to edit XML files, see the XML and Editing XML Files section of Useful Resources near the end of the post.
Apps installed from the Debian repos should result in the placement of a binary file under /usr/bin and you should use that file name in the Execute field of the menu item in the Openbox GUI menu editor.
Always make a backup copy prior to an initial change of any configuration file and after additional changes.
If you desire to change the window decorations or theme, icons, mouse pointer, etc. activate the Openbox menu and select Settings – Openbox – GUI Config Tool. When you use the Openbox GUI Config Tool (obconf), you’re actually modifying the /home/username/.config/openbox/rc.xml file in a more user-friendly format, although not all of the options available in the rc.xml file will be available.
Additional GUI changes can be made by using lxappearance, accessible via the Openbox menu and selecting Settings – User Interface Settings.
Changes can be made to the Tint2 panel by using FeatherPad to edit the /home/username/.config/tint2/tint2rc file.
Rebooting and shutting down can now be accomplished by using the Openbox menu and selecting Exit – Reboot or Exit – Shutdown.
You should check for package upgrades on a daily basis. Packages from the Debian Stable repos usually only get security updates. If you have opted to install an app(s) from the Backports repo, there will quite possibly be version upgrades.
To check for upgrades, drop to the command line and reference A. Install Packages — Check for Package Upgrades for the commands to use.
You have the option of holding the current version of a package(s) if you encounter a bug report pertaining to the package(s) to be upgraded. To hold a package, enter the following command:
You can mark multiple packages for hold using the same command, separating each package name with a space:
To show packages currently on hold, enter the following command:
To unhold a package, enter the following command:
Multiple packages can be unheld using the same command, separating each package name with a space:
All held packages can be unheld at once using the following command:
To get the version number and installation status for a package, enter the following command:
To get the version number and installation status for more than one package, use the same command and separate each package name with a space:
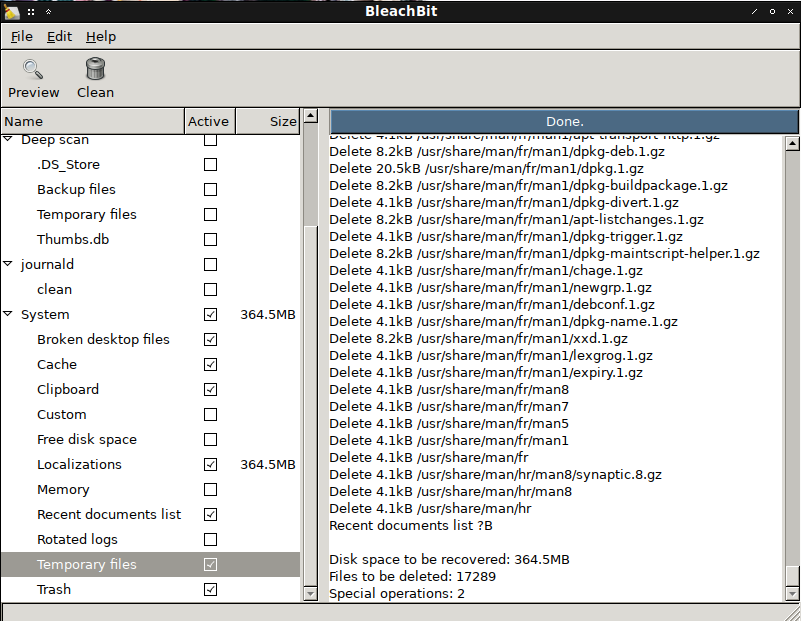
Bleachbit is a system cleaning utility and was among the list of apps to install for a usable system. Bleachbit ran in superuser (sudo) mode enables you to remove localization (language) files for different apps. Hundreds of megabytes of drive space can be saved by removing localization files. Bleachbit is accessible via the Openbox menu and selecting Utilities – System Cleaning & Mgmt – Bleachbit or Utilities – System Cleaning & Mgmt – Bleachbit (root).
If you encounter an instance where you’re unable to boot your computer, but you’re still able to access the GRUB boot loader screen, then select the Advance options for Debian GNU/Linux option. In the next screen, select the Linux kernel entry option with (recovery mode) at the end.
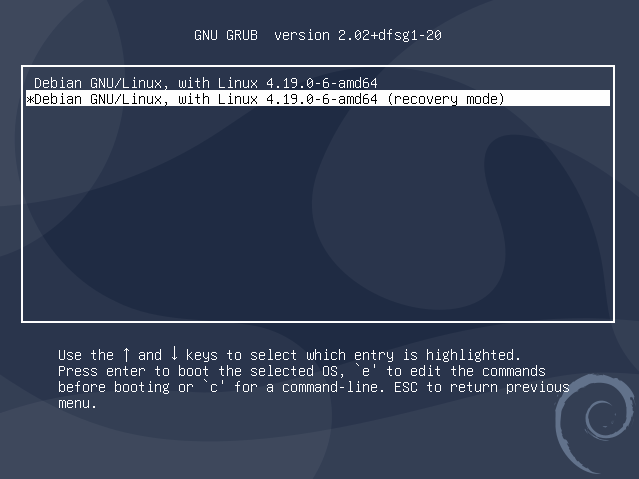
Note: The Advance options for Debian GNU/Linux option will only work if you have a root account. If you didn’t create a root account during Debian installation, the account is still there and can be enabled using the following command from the command line to create a password for the root account:
5 – Commonly Used Keybindings
Take a look at the /home/username/.config/openbox/rc.xml file for a more extensive list. The file is readable and editable using FeatherPad or any other text editor. Search for <keyboard> to find the start of the keybindings.
- Alt + Tab: produces a list of programs running on the current desktop. Release and press the Tab key to move the selector to the desired program to switch to.
- Alt + F2: Run Dialog
- Windows/Super + F#: desktop switcher; e.g. F1 for desktop 1, F2 for desktop 2, etc.
- Windows/Super + Spacebar: Openbox menu
- Windows/Super + T: Terminator
- Windows/Super + Tab: Brings up a list of all desktops and the programs running under each. The list can be traversed, using the up and down arrow keys, to switch to a desired program.
6 – Conclusion
That’s it! You’re now running one of the leanest, meanest desktop environments in the OS world. If you’re a fan of minimalistic desktop environments, I think you’ll grow to love the combination of Openbox and Tint2. Enjoy!
Once again, I’d like to thank user johnraff, one of the original and current project members for the BunsenLabs Linux distribution, from whom I learned to use the Debian Net Install method as well as the manual process of creating a desktop environment under Debian using Openbox and Tint2. He put together a how-to as an interim measure a few weeks after Philip Newborough announced the cessation of development of CrunchBang Linux in February, 2015.
If you find that you like using the Openbox window manager and the Tint2 panel as a desktop environment, also check out my Run Solus With Openbox and Tint2 post.
Once you gain enough experience using Debian Stable, try your hand at running Debian Unstable and experience the joy of up-to-date applications.
7 – Useful Resources
- Conky
- Casey’s Conky Reference with Examples
- Conky Main Site
- Conky – Calendars/Clocks/Time thread, BunsenLabs Scripts, Tutorials & Tips forum
- Conky weather+moon scripts thread, BunsenLabs Scripts, Tutorials & Tips forum
- Show us your conky thread, BunsenLabs Scripts, Tutorials & Tips forum
- Debian
- Linux in General
- .bashrc PS1 Generator (easily create a customized colored command line prompt)
- LXer Linux News
- YouTube – Chris Titus Tech
- YouTube – eznix
- YouTube – OldTechBloke
- Openbox
- Theming – GTK Themes
- Extract the downloaded theme file(s). Then using Double Commander in super user mode (sudo -i nautilus), copy the extracted folder(s) to /usr/share/themes.
- To apply or change a theme, from the Openbox menu select Settings – User Interface Settings, which is actually LXAppearance. Most theming is under the Widget tab. Some theme packages also come with theming for icons and mouse cursor, which can be accessed under the Icon Theme and Mouse Cursor tabs respectively under LXAppearance.
- Theming – Openbox
- To apply, change, or install new themes, from the Openbox menu select Settings – Openbox – GUI Config Tool, which is actually the Openbox Configuration Manager (obconf). Themes are under the Theme tab.
- Theming – Papirus Icon Theme and Papirus Folders
- Theming – Tint2
- Tint2
- Tint2 Wiki
- My tint2 config thread, BunsenLabs Scripts, Tutorials & Tips forum
- Tint2 Executors and Buttons thread, BunsenLabs Scripts, Tutorials & Tips forum
- XML and Editing XML Files (e.g. Openbox menu.xml, rc.xml)
Wallpaper in the screenshot used for the post header image courtesy of mullet at DeviantArt.
2020-001


You May Also Like

Five Ingredient Lower Oxalate Trail Mix

Shared Bits 3-Year Anniversary