Debian With Openbox and Tint2 – Part 1 – Debian Network Install
Updated on 2025-09-13
Note: As of 09/12/2025, I am no longer using the Openbox window manager and Tint2 panel to simulate a desktop environment. This post will remain for a period of time for informational purposes, but will no longer be updated except for minor changes.
Over a month in the making and many hours of work, this is part 1 of a 2 part tutorial on using the Openbox window manager and the Tint2 panel as a desktop environment under Debian, a Linux distribution. In part 1, I provide details on installing Debian using the Network Install method. As Luis F. might say, this is a ginormous post.
Some might ask, “Why install Debian using the Debian Network Install method?” First, the ISO image is very small; currently less than 400 MB. Second and most important, using the Debian Network Install method affords the opportunity to create a very bare bones operating system, allowing you to install only the packages you desire. In this case, the end goal is to be able to use the Openbox window manager and the Tint 2 panel as a desktop environment versus using Gnome, or KDE, or XFCE, etc.
All references to key or keys used in this tutorial mean the key or keys on your keyboard.
Note: Upon completion of performing the Debian Network Install as outlined in this tutorial, you will only have use of the command line; i.e. there is no GUI or desktop environment. You will need an ethernet patch cable to connect to a modem or router to perform the Debian Network Install. The Debian Network Install method usually doesn’t provide the necessary packages or files for wireless connectivity.
Part 2 of this tutorial will require manual installation of packages and manually editing configuration files. You may also need to research and install appropriate packages for proprietary hardware components.
If you feel uncomfortable with any of the above, this tutorial series probably isn’t for you. I don’t mean to be blunt, but I want you to have a successful experience and I don’t want to unnecessarily cause you to dislike Linux.
Contents
- 1 – Network Install ISO
- 2 – Debian Install
- 2.01 – Manual Boot Options Menu
- 2.02 – Debian Install Boot Menu
- 2.03 – Language Selection
- 2.04 – Location Selection
- 2.05 – Keyboard Layout Selection
- 2.06 – Network Hardware Detection
- 2.07 – Network Configuration – Host Name
- 2.08 – Network Configuration – Domain Name
- 2.09 – Root Account Password
- 2.10 – Full Name
- 2.11 – Username
- 2.12 – User Password
- 2.13 – Time Zone Selection
- 2.14. – Disk Partitioning
- 2.14.01 – Guided Entire Disk
- 2.14.02 – Manual Root Partition
- 2.14.02.01 – Select Partitioning Method
- 2.14.02.02 – Select Disk
- 2.14.02.03 – Create New Empty Partition
- 2.14.02.04 – Select New Empty Partition
- 2.14.02.05 – Create Root Partition
- 2.14.02.06 – Specify Partition Size
- 2.14.02.07 – Select Partition Type
- 2.14.02.08 – Select Partition Location
- 2.14.02.09 – Select Partition File System
- 2.14.02.10 – Select a Mount Point
- 2.14.02.11 – Add a Partition Label (Optional)
- 2.14.02.12 – Set Bootable Flag
- 2.14.02.13 – Done With Partition Creation
- 2.14.03 – Manual Swap Partition
- 2.14.04 – Finalize
- 2.15 – Repository Configuration
- 2.16 – Popularity-Contest Package
- 2.17 – Software Selection
- 2.18 – GRUB Boot Loader
- 2.19 – System Clock Check
- 2.20 – Installation Complete – Reboot
- 3 – First Boot
- 4 – Conclusion
1 – Network Install ISO
Download the Network Install ISO for small CDs or USB sticks from the Installing Debian via the Internet page. You should verify the checksum for the download to insure that it downloaded correctly. The checksum can be obtained using the same link used to download the ISO image, leaving off the file name. For example, if you’re downloading the ISO image for the AMD64 archicture, the checksums for the download can be obtained from https://cdimage.debian.org/debian-cd/current/amd64/iso-cd/. I recommend using the SHA512 checksum.
The checksum can be verified under Linux using GtkHash, available in most Linux distros, or a similar app. Windows and MacOS users can use the Checksums Calculator app from Sigma Informatics to verify the checksum. Another option for Windows users is the Hashtab app from Implbits.
After downloading the Network Install ISO image and verifying the checksum, it’s now time to copy the image to a USB thumb drive. The USB thumb drive should have a capacity of at least 512 MB. The current Debian Network Install ISO image for small CDs or USB sticks is less than 400 MB in size.
Linux users can perform the copy by entering the following command from the command line:
where sdx is the device name of the USB thumb drive.
Warning: The dd command is very powerful and you can easily wipe out the contents of an entire partition or drive (I’ve done so before). You’ll receive no warnings, so make sure you enter the correct device names when using the command.
Usually, the device name should be sdb. However, you should verify the device name by entering the following command from the command line twice; once before attaching the USB thumb drive and a second time after attaching the USB thumb drive:
The above command should produce output similar to the following:
lrwxrwxrwx 1 root root 10 2010-03-15 22:54 /dev/disk/by-id/usb-_USB_DISK_2.0_077508380189-0:0-part1 -> ../../sdb1
In the above instance, sdb is the device name you would use for an attached USB thumb drive, not sdb1. Also make sure that the USB thumb drive is not mounted. Some Linux file managers and/or Linux distributions automount USB drives. The dd command will not work if the USB thumb drive is mounted. To find out if the USB thumb drive is mounted:
- Some file managers will show mounted USB thumb drives. If you use one that does, you can check using the file manager.
- Use the findmnt command from the command line.
macOS users, check out this post on using the dd command. Windows users can try using UNetbootin to copy the Debian Net Install disk image to a USB thumb drive. However, UNetbootin doesn’t copy some Linux ISOs to a USB thumb drive correctly and I’ve never used the app to copy the Debian Net Install ISO.
2 – Debian Install
Once you have copied the ISO image file to a USB thumb drive, you’re now ready to install Debian. You’ll need to manually boot your computer and boot from the USB thumb drive in order to install Debian. There is more than one method of manually booting a computer due to hardware vendor variations, so you should consult the user manual for your specific computer or read this post. Also remember to connect your computer to your modem or router using an ethernet patch cable because you will not be able to connect to the Internet using a wireless connection.
There are a number of drive partition tables under which Linux can be installed. Two partition tables that I’m familiar with are UEFI-GPT and BIOS-MBR. While this tutorial covers installing Debian under a BIOS-MBR partition table, most of the steps should also work for the UEFI-GPT partition table. Consult the user manual for your computer, or perform an Internet search, on procedures for installing Linux under the UEFI-GPT partition table for more information. Also note that some computers are designed to only boot either using the UEFI-GPT or BIOS-MBR partition table, so you may not have the option of choosing which partition table you use.
The drive to which you are going to install Debian should also be partitioned. To prevent confusing someone who may not be familiar with drive partitioning and Linux installation, a drive needs to be partitioned prior to installing Linux, or any other operating system for that matter. To make things easy for users unfamiliar with drive partitioning, this tutorial covers drive partitioning using the Debian installer.
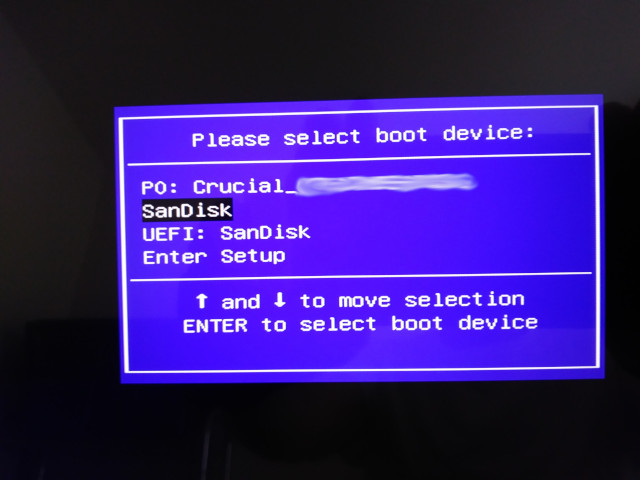
2.01 – Debian Install – Manual Boot Options Menu
Upon manually booting your computer, you should be presented with a menu of boot options similar to the following:
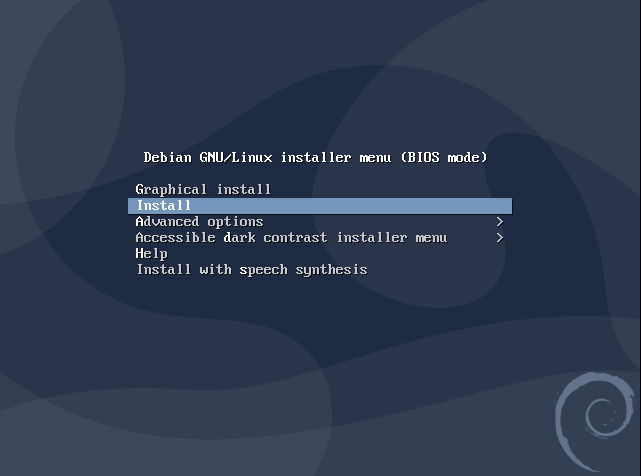
2.02 – Debian Install – Debian Installer Boot Menu
The Debian installer boot menu should now display. I’ve always used the Install option and that option will be covered in this tutorial. I’ve never used any of the other options, so I know nothing about the processes that any of those options go through. Use the UP or DOWN directional arrow keys to select the Install option and press the ENTER/RETURN key.
2.03 – Debian Install – Language Selection
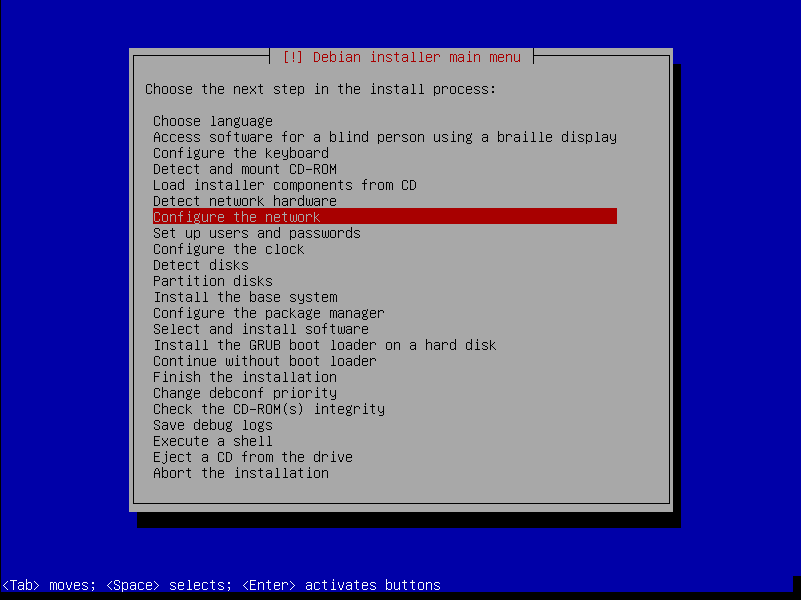
Note: From this point forward during the installation process, if you make a mistake you can always go back by tabbing to <Go Back> and then pressing the ENTER/RETURN key. Doing so will bring up a menu of installation steps. The menu may differ depending upon where you’re at in the installation process. While in the installation menu, use the directional UP or DOWN arrow keys to select the step you wish to return to and then press the ENTER/RETURN key.
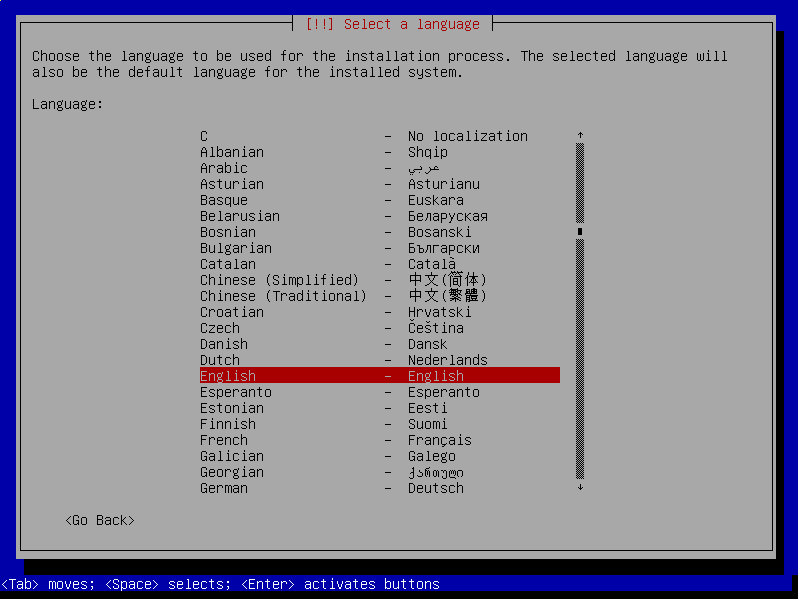
The Select a language screen should appear. To traverse the list of languages, use the UP or DOWN directional arrow keys. Select the preferred language and then press the ENTER/RETURN key. The selected language will be used for both the installation process and as the default for the Debian installation.
2.04 – Debian Install – Location Selection
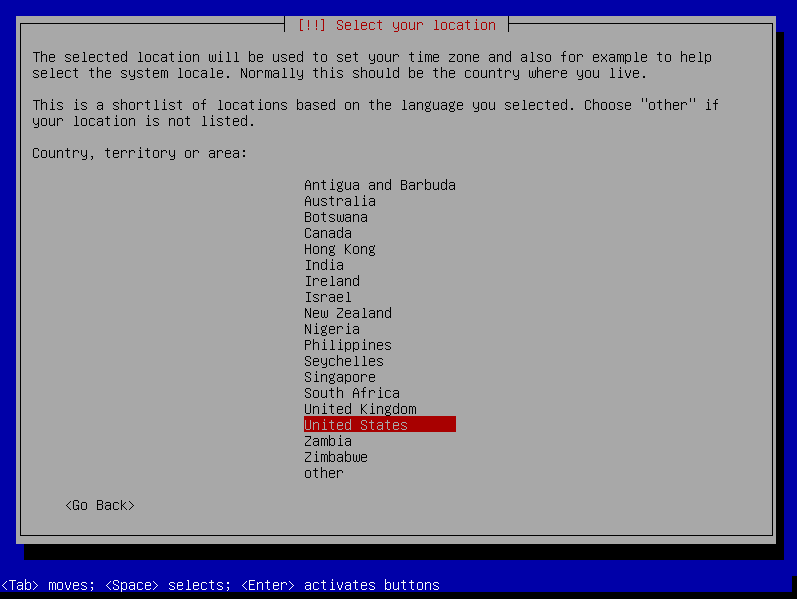
Next up should be the Select your location screen. Use the UP or DOWN directional arrow keys to traverse the list. The location selection is used to set your time zone and system locale. Select your desired location and then press the ENTER/RETURN key.
2.05 – Debian Install – Keyboard Layout Selection
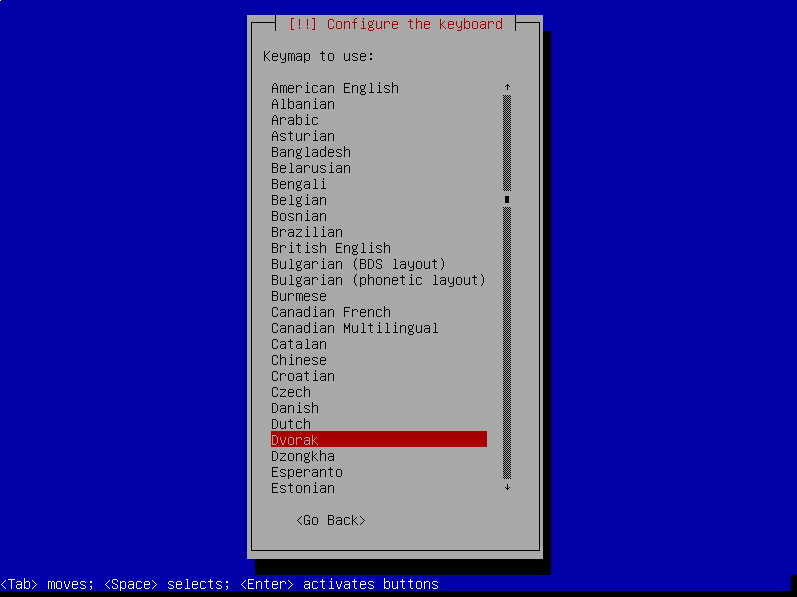
After selecting your location, you will be prompted to select a keyboard layout. Use the UP or DOWN directional arrow keys to traverse the list. The selected keyboard layout will be used for the remainder of the installation and will be the default layout for the Debian installation. Select the desired keyboard layout and then press the ENTER/RETURN key.
There will be a few seconds delay after making your keyboard layout selection while installer components are loaded and network detection is performed.
2.06 – Debian Install – Network Hardware Detection
Network hardware detection begins next. The Debian Network Install does not contain the necessary packages or files for proprietary wireless network devices. If you see the screen below, tab to <No>, and then press the ENTER/RETURN key.
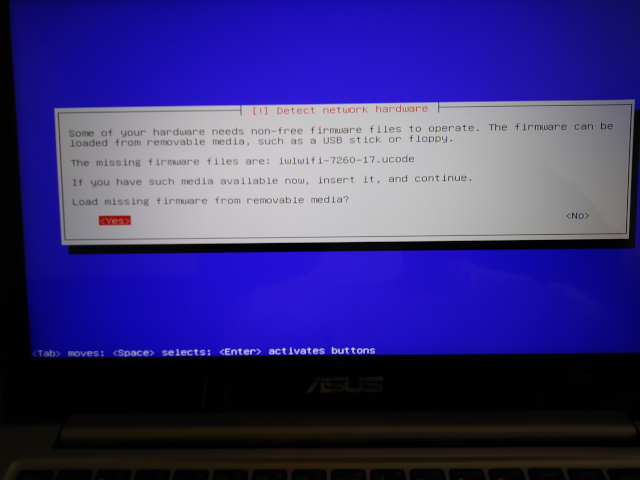
I will cover how to install the necessary packages or files to get proprietary wireless network devices to work in part 2 of the tutorial.
2.07 – Debian Install – Network Configuration – Host Name
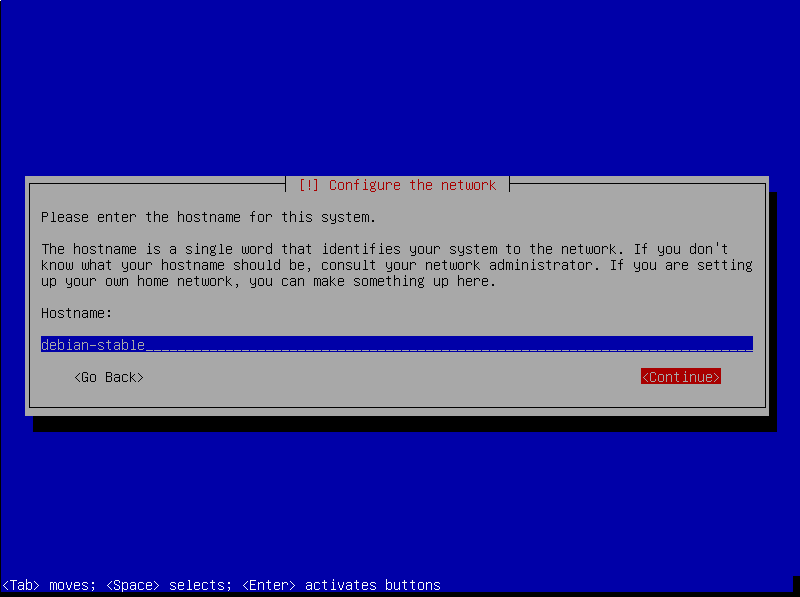
You now have the opportunity to provide a host name. Whatever you enter for the host name shows on the command line; e.g. user@hostname ~ $; reference the second screenshot here to see an example. I always use the name of the Linux distribution I’m installing; e.g. Debian-Stable, Debian-Unstable, Solus, etc. Enter a host name if desired, tab to <Continue>, and then press the ENTER/RETURN key.
2.08 – Debian Install – Network Configuration – Domain Name
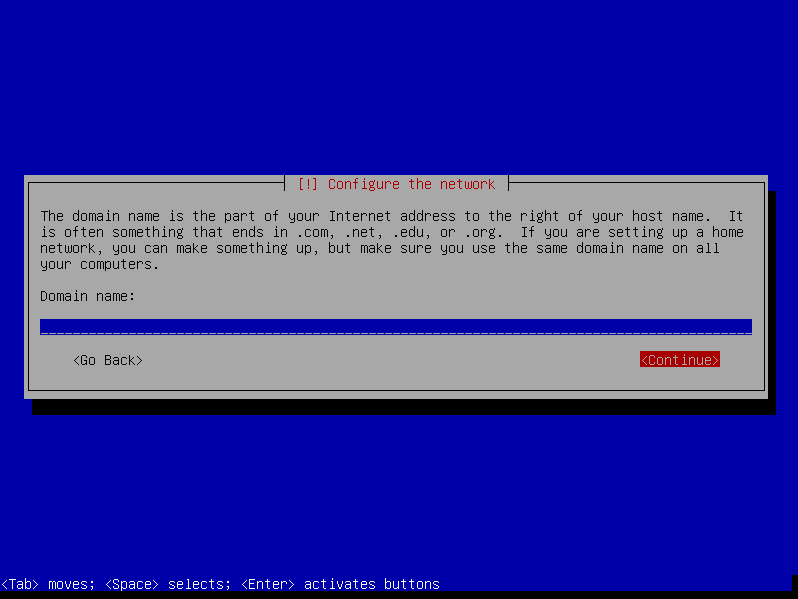
Another option for network configuration is providing a domain name. I’ve never used this option and unless you’re running a home network, leave the Domain name field blank, tab to <Continue>, and then press the ENTER/RETURN key.
2.09 – Debian Install – Root Account/User Password
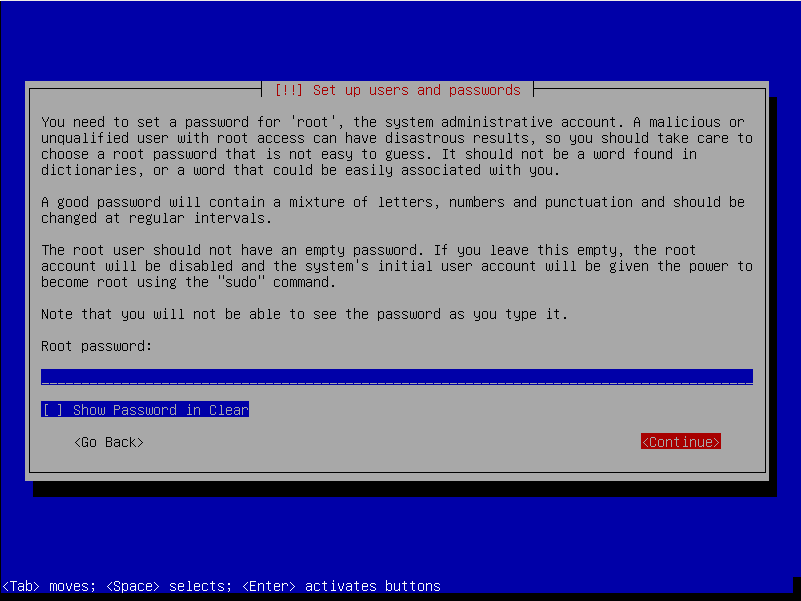
Next you have the opportunity of creating a root account. For security reasons creating a root account is generally not recommended. However, if you only have one Linux installation and something goes awry, having a root account can be useful for attempting to fix whatever is broken. There are other methods of resolving a borked Linux system, but how to do that is beyond the scope of this tutorial.
I usually do not create a root account because I multi-boot three different Linux distributions and do so in a way that allows me to access any installation from within another installation. For example, I currently multi-boot Arch Linux, Debian Stable, and Debian Unstable. If I’m currently in Debian-Stable, I can easily access my Arch Linux or Debian-Unstable installation partitions.
For the purposes of this tutorial, you’re going to skip creating a root account, so leave the Root password field blank, tab to <Continue>, and then press the ENTER/RETURN key.
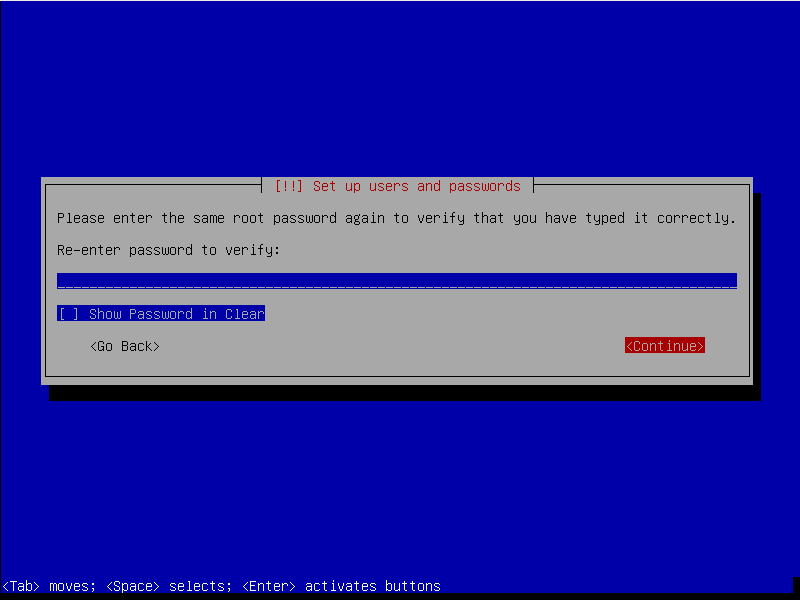
You’ll be asked to re-enter the root account password. Leave the password field blank, tab to <Continue>, and then press the ENTER/RETURN key.
If you later decide that you want a root account, it’s still there and can be enabled using the following command from the command line to create a password for the root account:
2.10 – Debian Install – Full Name
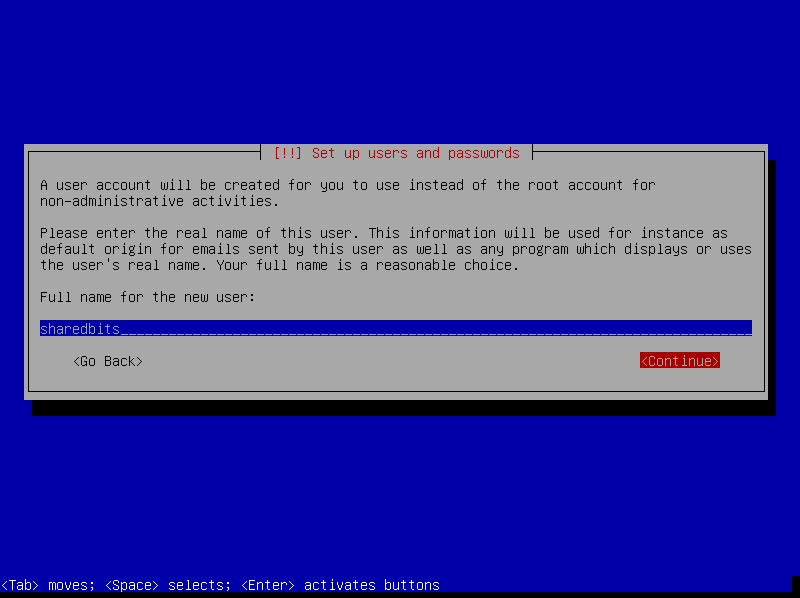
You should next be prompted for your full name. For privacy reasons, I just enter the username I’m planning to use. Enter a username, or your full name if desired, tab to <Continue>, and then press the ENTER/RETURN key.
2.11 – Debian Install – Username
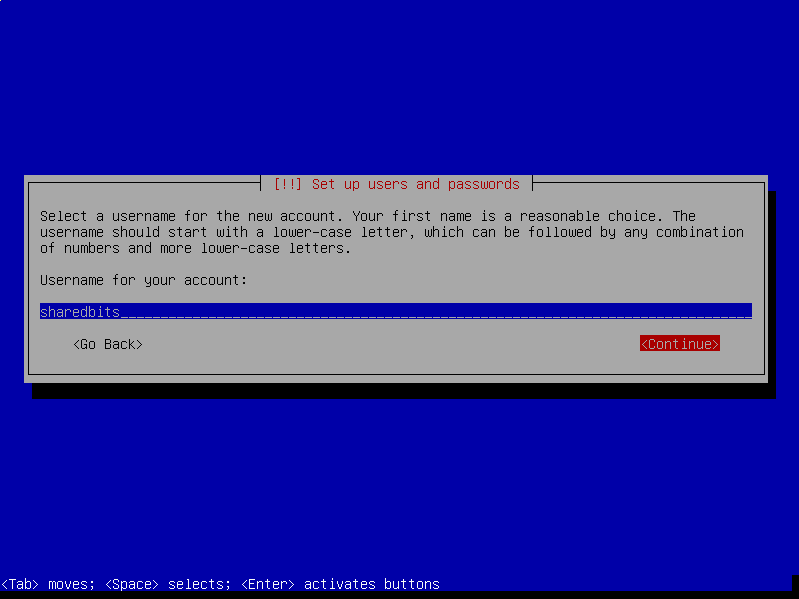
If you entered a username as your full name in the previous screen, enter the same username here. Otherwise, enter a desired username, tab to <Continue>, and then press the ENTER/RETURN key.
2.12 – Debian Install – User Password
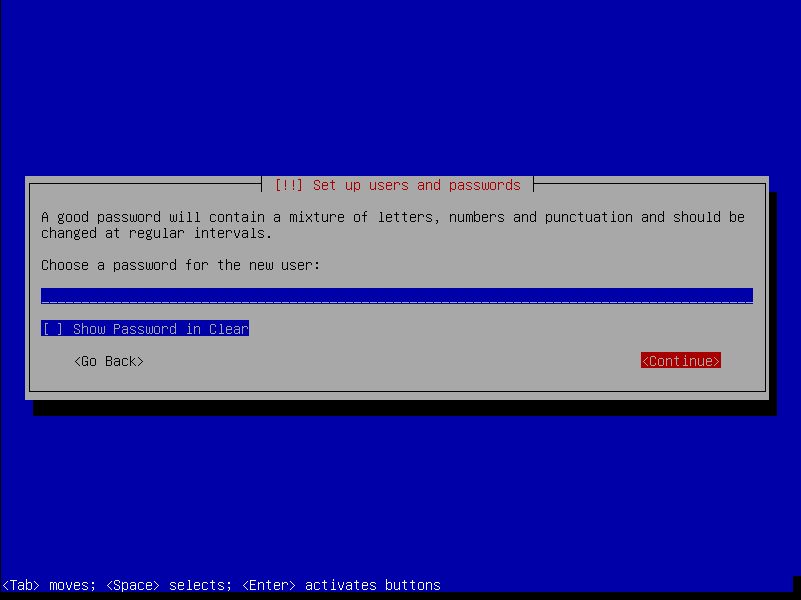
Next you’ll need to enter a password associated with the username you entered in the previous screen. Passwords are case sensitive and should be complex, but easy for you to remember. Enter your desired password, tab to <Continue>, and then press the ENTER/RETURN key.
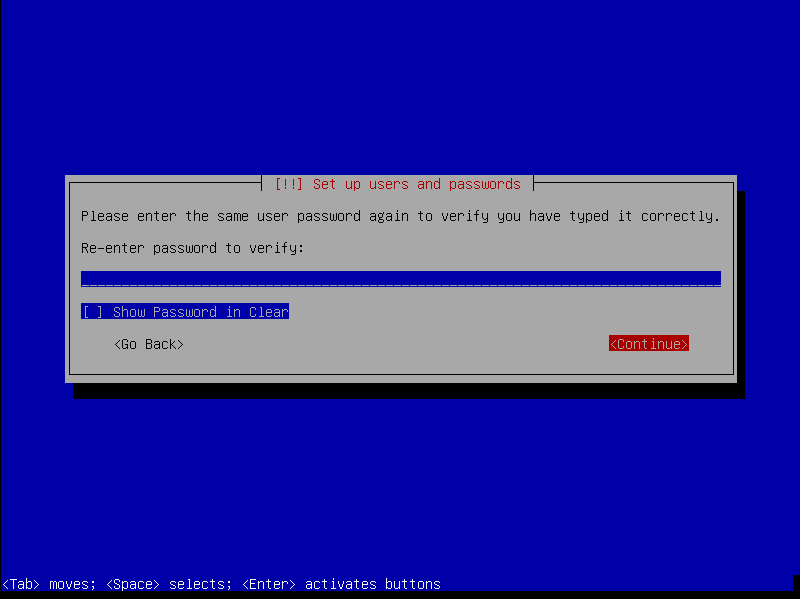
As with the root password, you’ll be prompted to re-enter your user password. This is done to insure that you have entered the password correctly. Enter your password again, tab to <Continue>, and then press the ENTER/RETURN key.
2.13 – Debian Install – Time Zone Selection
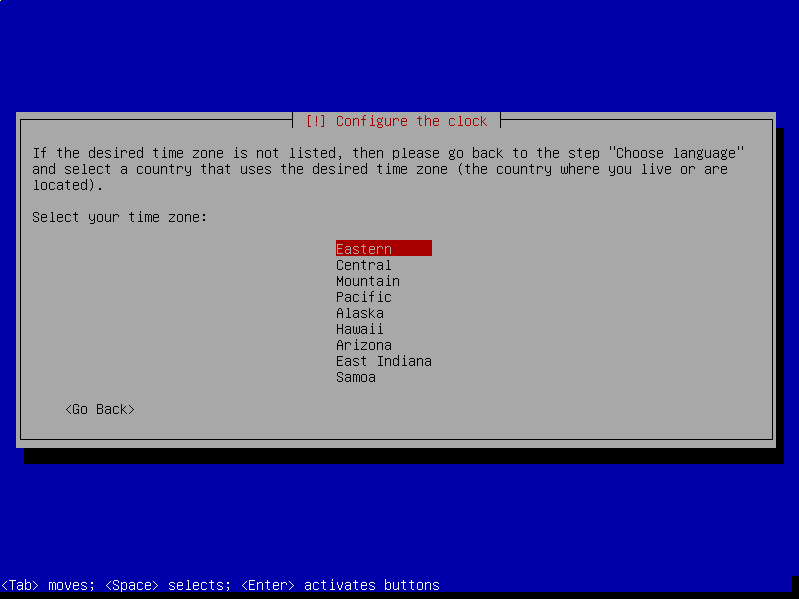
Now you’ll select a time zone for the location you selected earlier. Select the appropriate time zone using the UP or DOWN directional arrow keys, tab to <Continue>, and then press the ENTER/RETURN key.
There will be a few seconds delay after selecting the time zone while disk detection is performed and partitioning components are loaded.
2.14 – Debian Install – Disk Partitioning
There are many different ways to partition your disk for Linux installations. You can let the installer use the entire disk or you can manually partition the disk for your personal preferences.
2.14.01 – Debian Install – Disk Partitioning – Guided Entire Disk
Allowing the Debian installer to use the entire disk is the easiest method and probably the safest for users new to Linux. The Debian installer will create two partitions: one for the operating system and one for swap. The partitions will be sized based on the amount of swap space that the Debian installer determines necessary.
Before proceeding, if you’re not familiar with swap space read this post.
If you prefer to manually partition the disk for your personal preferences, skip ahead.
2.14.01.01 – Debian Install – Disk Partitioning – Guided Entire Disk – Select Partitioning Method
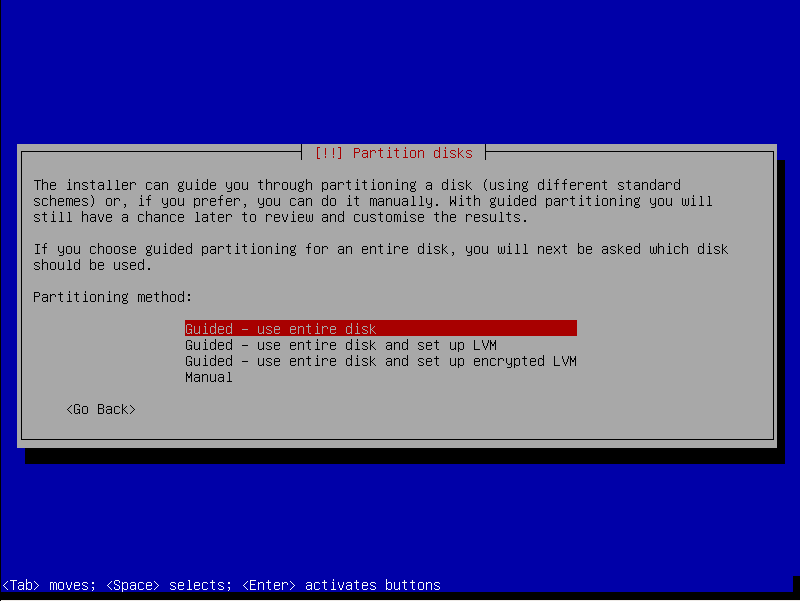
You should see the Partition disks screen, with partitioning methods listed about halfway down. The Guided – use entire disk should be selected by default. If not, use the UP or DOWN directional arrow keys to select the option and then press the ENTER/RETURN key.
2.14.01.02 – Debian Install – Disk Partitioning – Guided Entire Disk – Select Disk
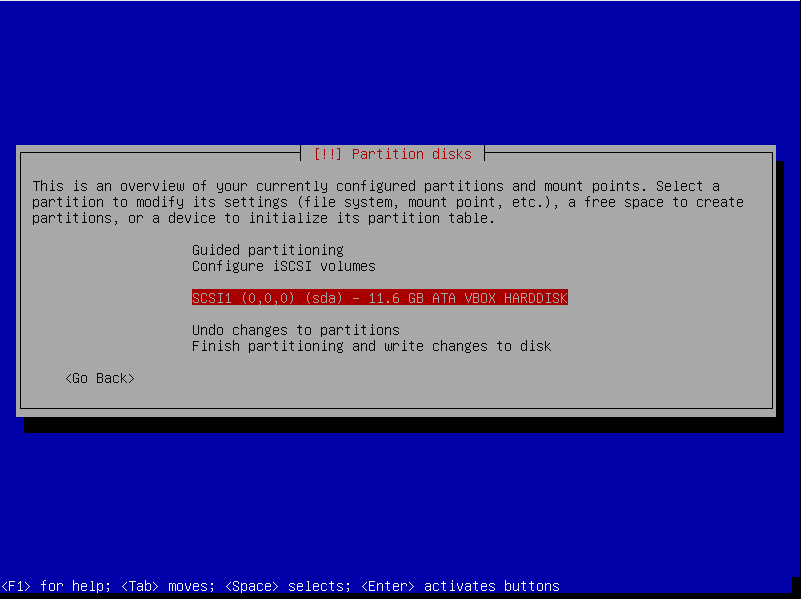
The next screen provides an overview of the currently configured partitions and mount points on your drive. Using the UP or DOWN directional arrow keys, select the drive upon which you want to install Debian and then press the ENTER/RETURN key.
The next screen is a confirmation of the disk you have selected. If this is the disk you wish to partition and install Debian on, press the ENTER/RETURN key.
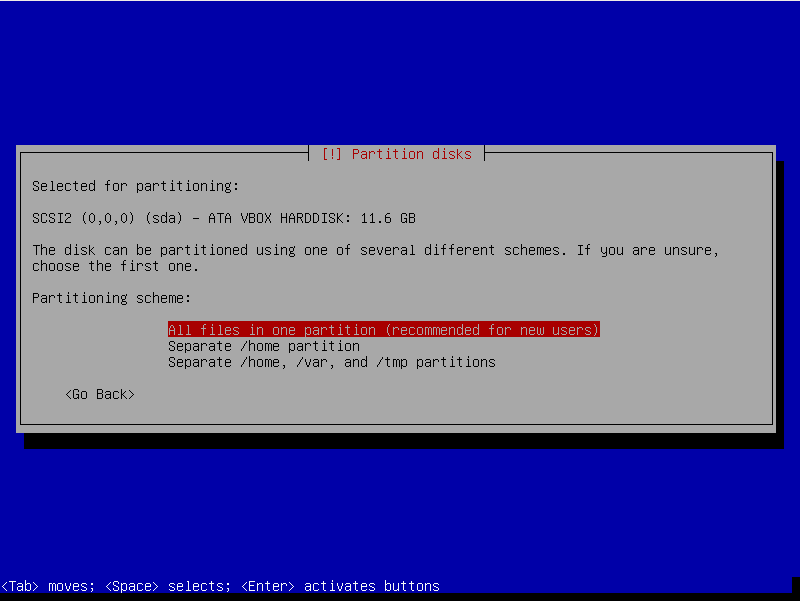
2.14.01.03 – Debian Install – Disk Partitioning – Guided Entire Disk – Select Partitioning Scheme
Now you should see a screen providing partitioning scheme options. By default, the All files in one partition partitioning scheme should be selected. If not, use the UP or DOWN directional arrow keys to select the scheme and then press the ENTER/RETURN key.
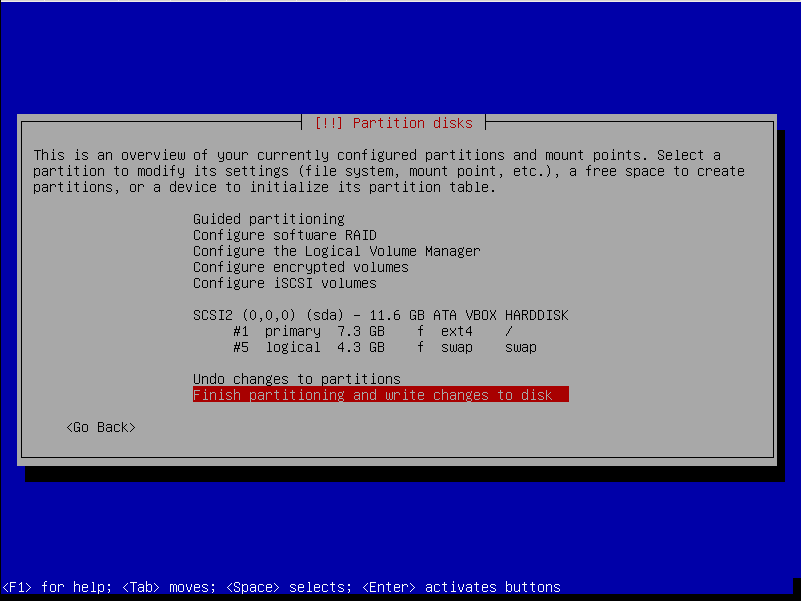
2.14.01.04 – Debian Install – Disk Partitioning – Guided Entire Disk – Done with Partition Option Selections
After a few seconds or minutes depending on the size of your disk, you should be back at the main Partition disks screen. You should see two partitions; one for Debian and one for swap. You are now finished with disk partitioning. Use the UP or DOWN directional arrow keys to select Finish partitioning and write changes to disk and then press the ENTER/RETURN key. Skip ahead to Disk Partitioning – Finalize.
2.14.02 – Debian Install – Disk Partitioning – Manual Root Partition
While the Guided – use entire disk option also creates a root and swap partition, the partitioner used by the Debian installer decides how much disk space to allocate to both partitions based on the amount of memory (RAM) you have. Using the manual method, you choose the amount of disk space to allocate for both partitions or you can choose not to have any swap space at all. Opting not to create swap space should only be done if you have enough RAM.
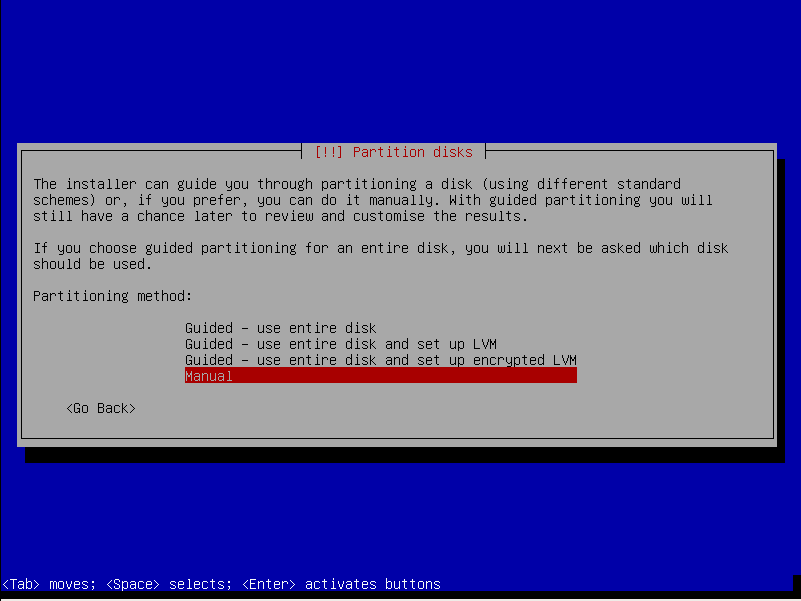
2.14.02.01 – Debian Install – Disk Partitioning – Manual Root Partition – Select Partitioning Method
You should see the Partition disks screen, with partitioning methods listed about halfway down. Use the UP or DOWN directional arrow keys to select Manual and then press the ENTER/RETURN key.
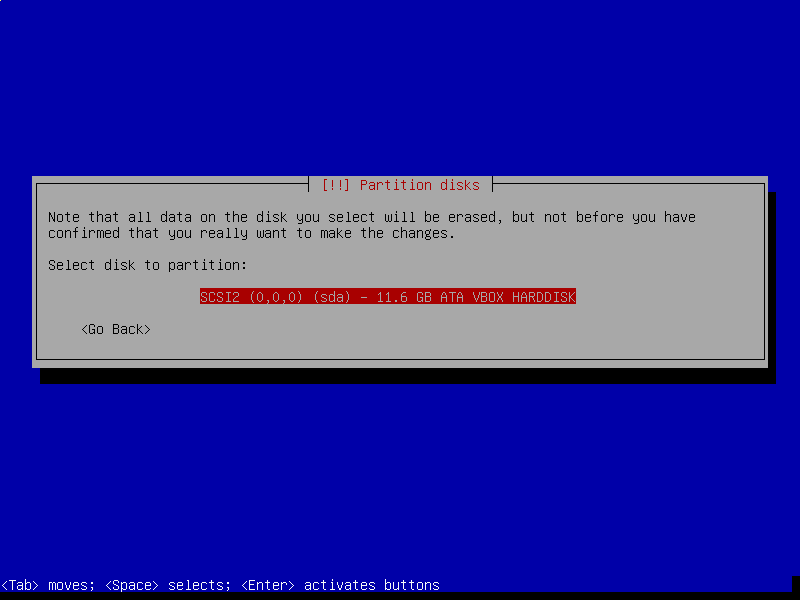
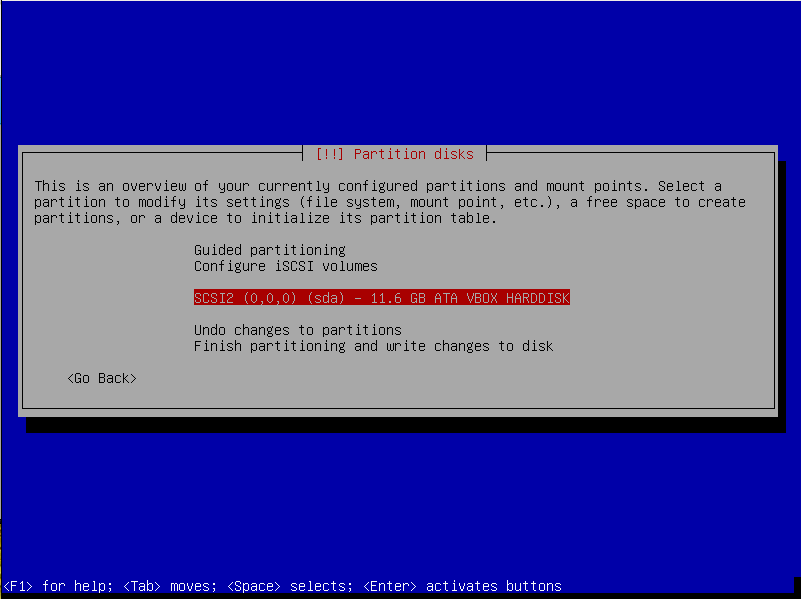
2.14.02.02 – Debian Install – Disk Partitioning – Manual Root Partition – Select Disk
The next screen provides an overview of the currently configured partitions and mount points on your drive. Using the UP or DOWN directional arrow keys, select the drive upon which you want to install Debian and then press the ENTER/RETURN key.
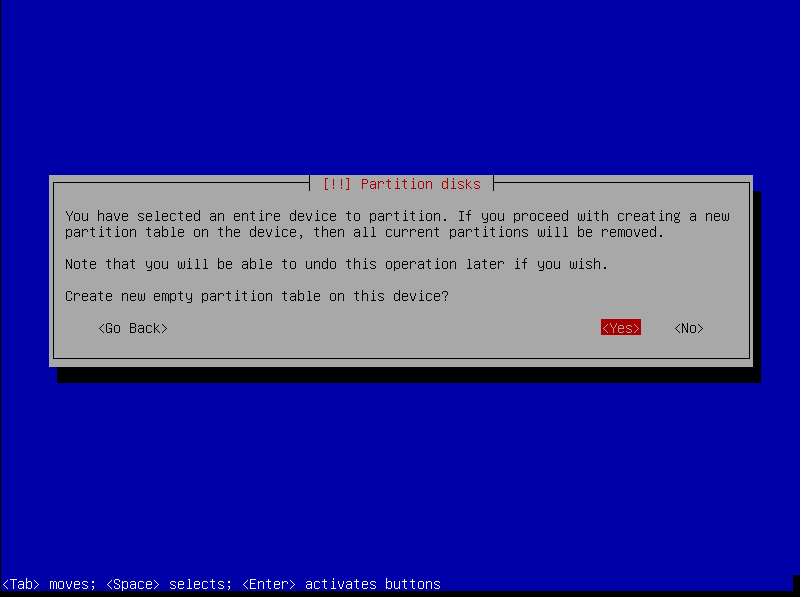
2.14.02.03 – Debian Install – Disk Partitioning – Manual Root Partition – Create New Empty Partition
You are now given the opportunity to create a new empty partition on the selected drive. <Yes> should be selected by default. If not, use the LEFT or RIGHT directional arrow keys, or the TAB key, to select <Yes> and then press the ENTER/RETURN key.
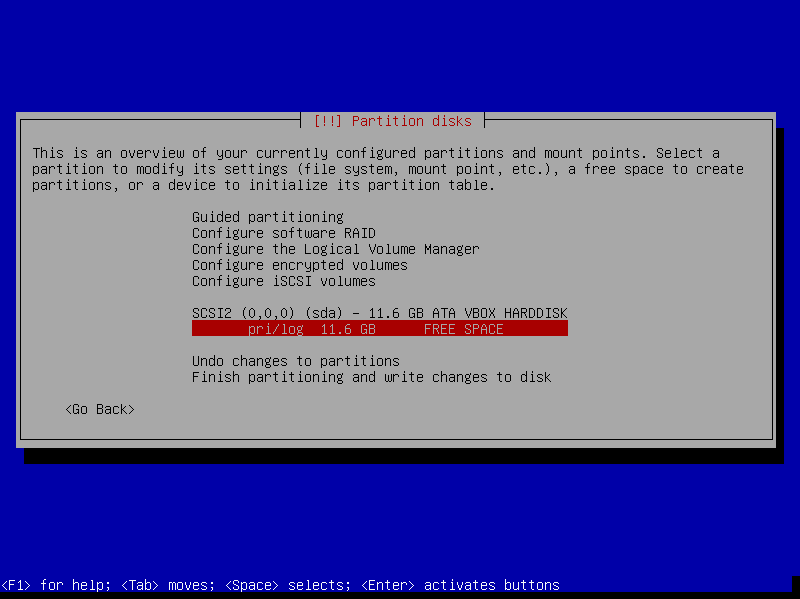
2.14.02.04 – Debian Install – Disk Partitioning – Manual Root Partition – Select New Empty Partition
You should now be back at the screen providing an overview of the currently configured partitions and mount points on your drive. There should be a new empty partition listed under the drive you selected in step 14b02. If not already selected, use the UP or DOWN directional arrow keys to select the new empty partition and then press the ENTER/RETURN key.
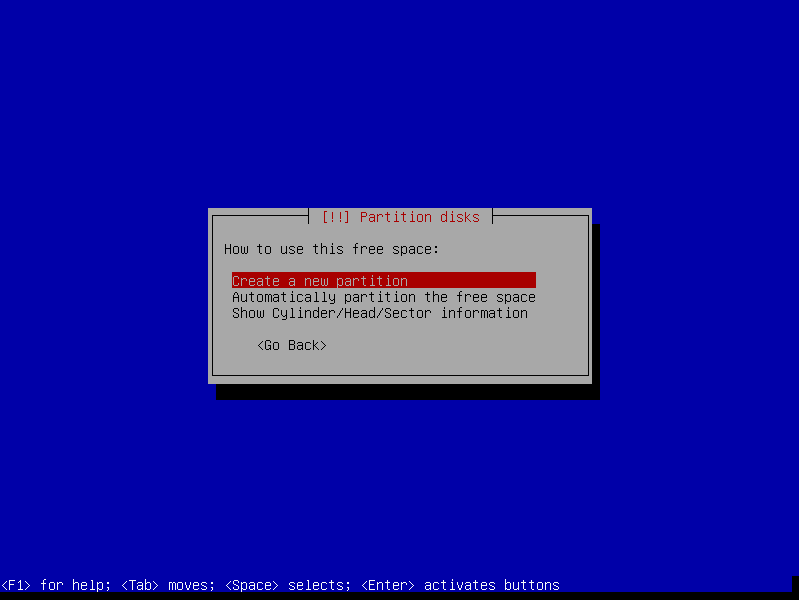
2.14.02.05 – Debian Install – Disk Partitioning – Manual Root Partition – Create Partition
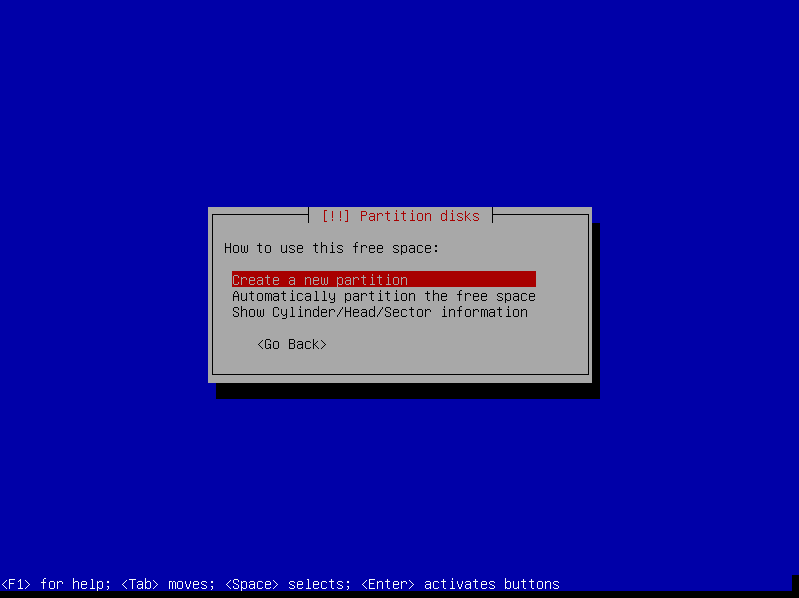
On the next screen, you’ll be asked how to use the free space. You want to create a new partition. If not already selected, use the UP or DOWN directional arrow keys to select Create a new partition and then press the ENTER/RETURN key.
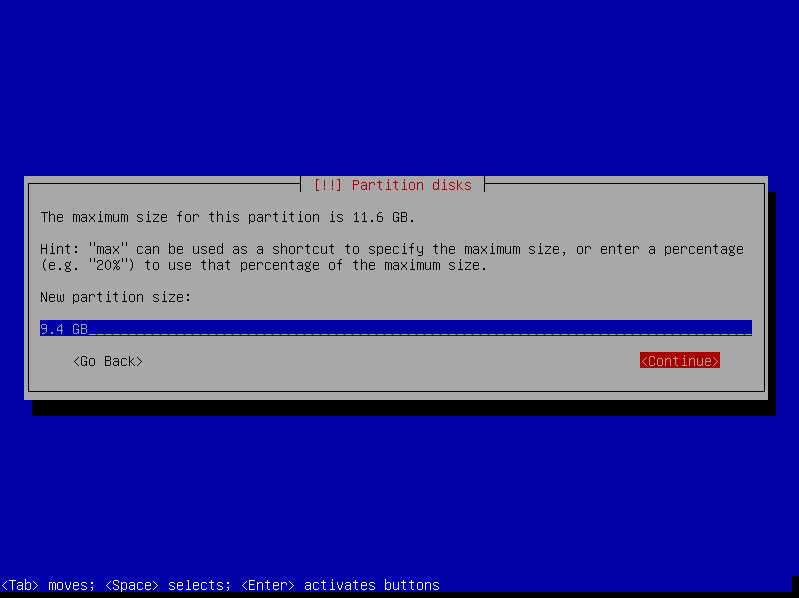
2.14.02.06 – Debian Install – Disk Partitioning – Manual Root Partition – Specify Partition Size
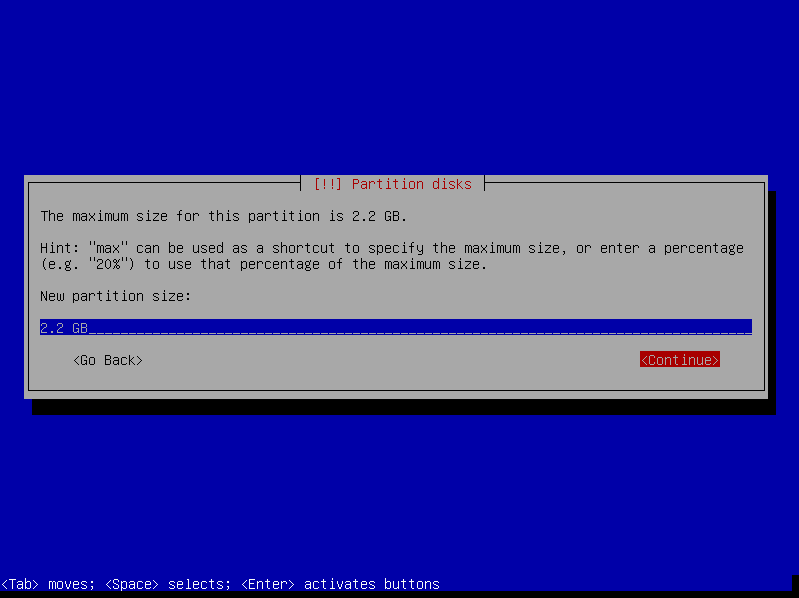
Next you’ll specify the size for the root partition. If you don’t want a swap partition, leave the New partition size: value as is, which should be all of the space on the empty partition. If you want a swap partition, subtract the desired size of the swap partition from the total amount of space on the empty partition and enter the resulting value for the New partition size:. Tab to <Continue> and then press the ENTER/RETURN key.
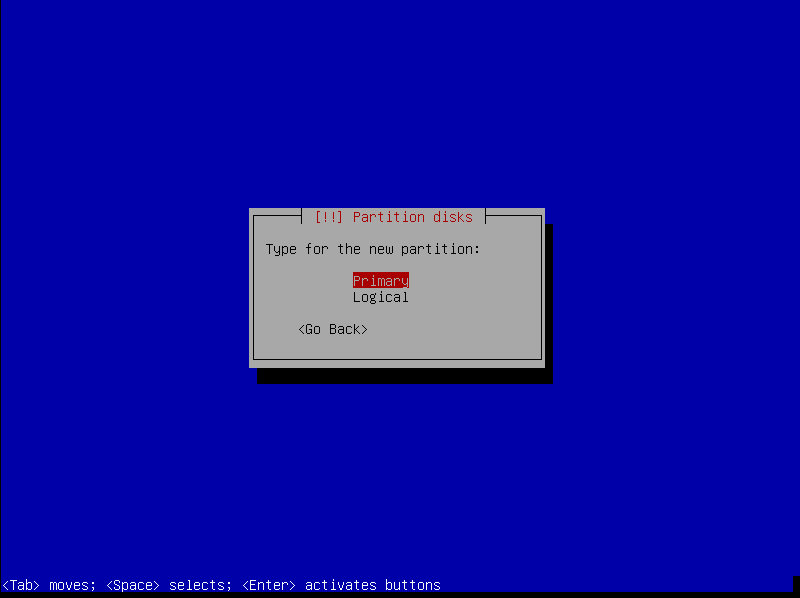
2.14.02.07 – Debian Install – Disk Partitioning – Manual Root Partition – Select Partition Type
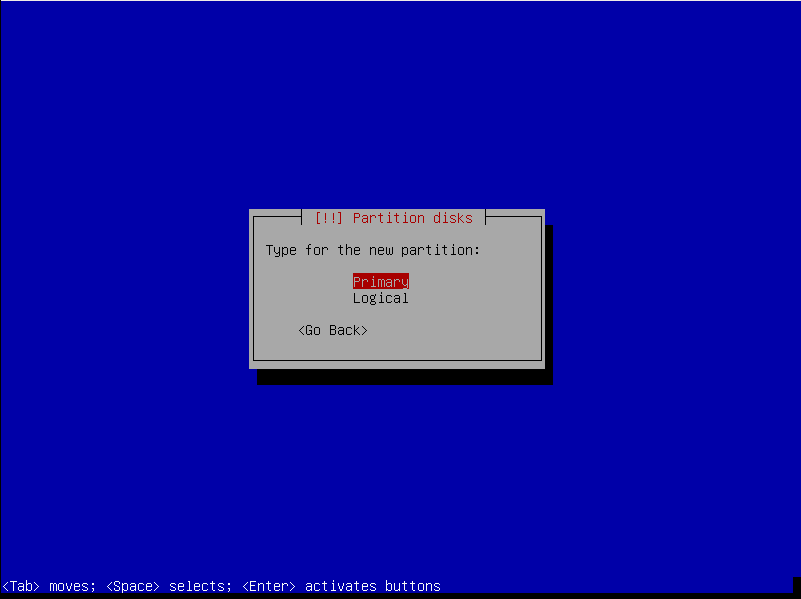
You’ll next need to select the partition type. Use the UP or DOWN directional arrow keys to select Primary, if not already selected, and then press the ENTER/RETURN key.
Keep in mind that with the MBR-BIOS partition table, you can only have 4 primary partitions, but you can have many more logical partitions. The number of primary partitions becomes more important should you later decide that you want to install additional Linux distributions.
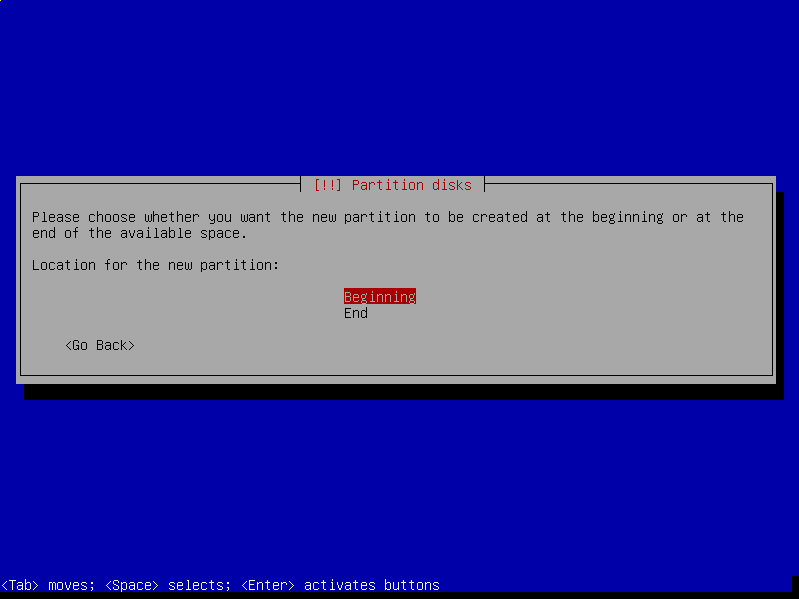
2.14.02.08 – Debian Install – Disk Partitioning – Manual Root Partition – Select Partition Location
Now you will select the location for the root partition. Use the UP or DOWN directional arrow keys to select Beginning, if not already selected, and then press the ENTER/RETURN key.
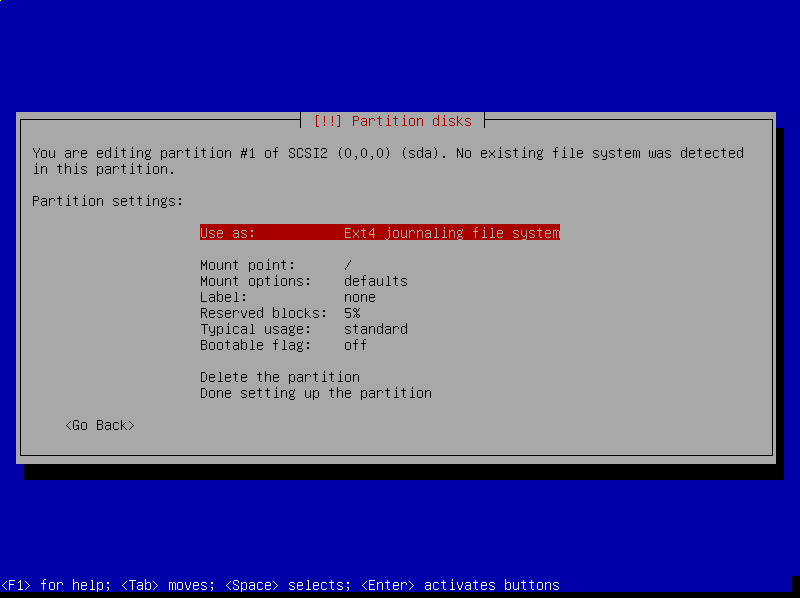
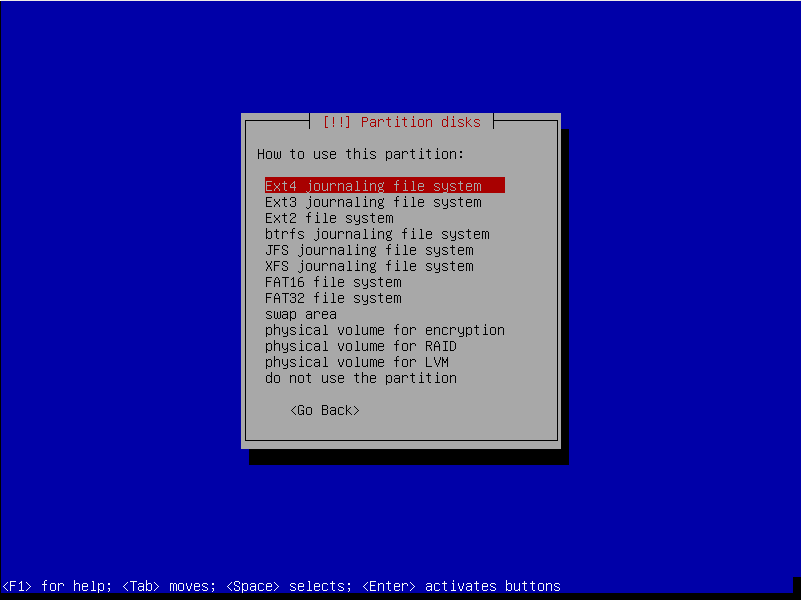
2.14.02.09 – Debian Install – Disk Partitioning – Manual Root Partition – Select Partition File System
You should now see a screen offering partition settings. The first setting, Use as:, is for selecting a partition file system. Ext4 journaling file system may already be selected. Ext4 is currently the latest and most popular file system for Linux and I recommend using it for the root partition. To see a list of other file systems that can be used, use the directional UP or DOWN arrow keys to select Use as:, if not already selected, and then press the ENTER/RETURN key.
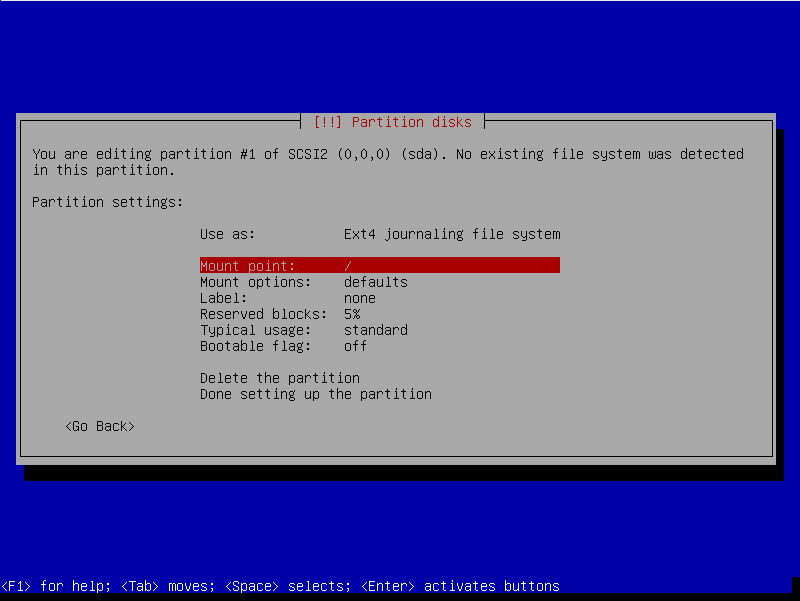
2.14.02.10 – Debian Install – Disk Partitioning – Manual Root Partition – Select a Mount Point
Next you want to select a mount point for the partition. Root (/) may already be designated as the mount point, but I want you to see the list of available mount points. Using the directional UP or DOWN arrow keys, select Mount point: and then press the ENTER/RETURN key.
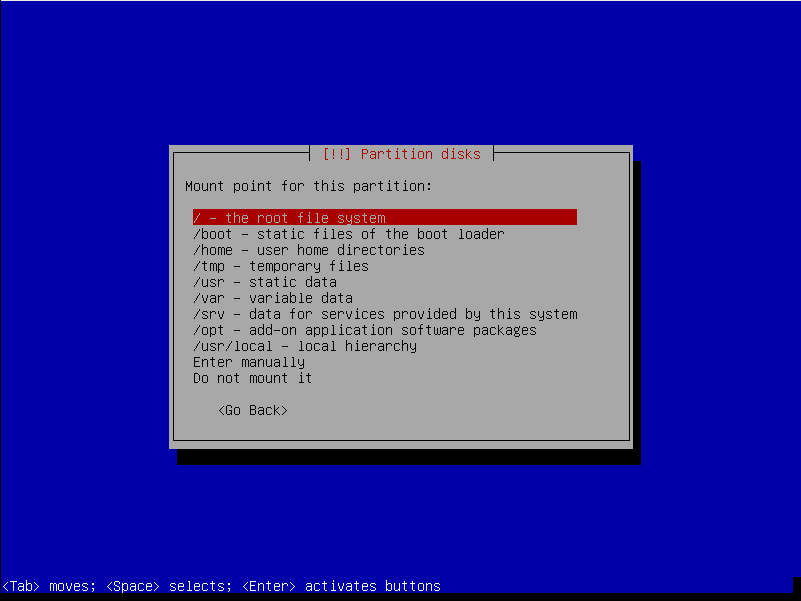
In the next screen, you should see a list of mount points. Remember that you are creating the root partition, so you want to select the root (/) mount point. Using the UP or DOWN directional arrow keys, select / – the root file system and then press the ENTER/RETURN key.
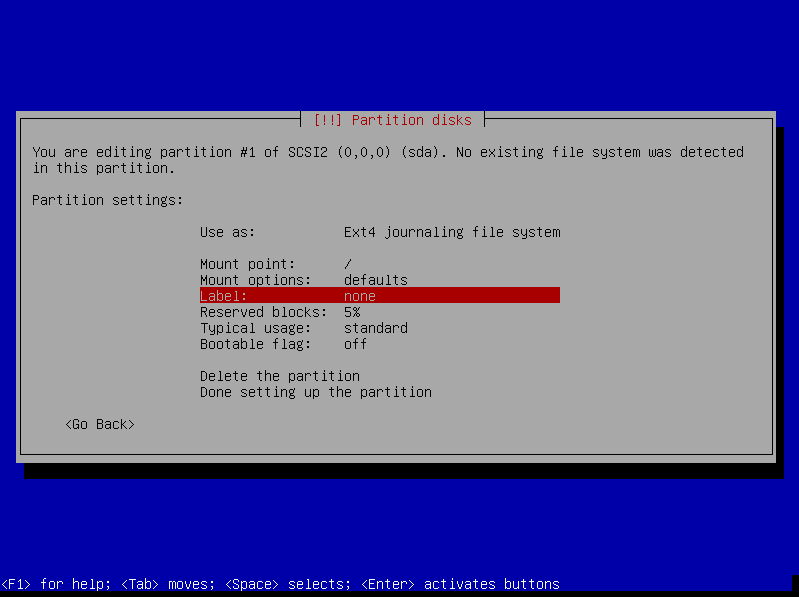
2.14.02.11 – Debian Install – Disk Partitioning – Manual Root Partition – Add Partition Label (Optional)
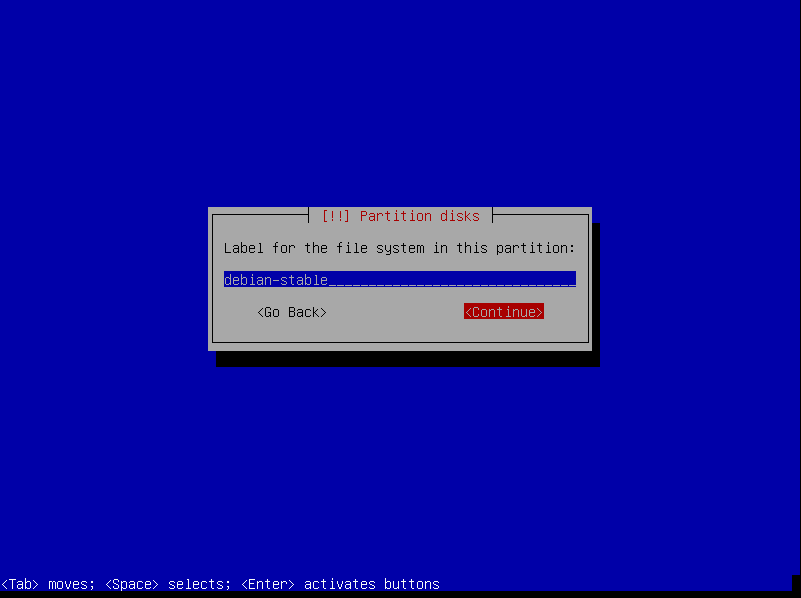
I like to create a label for the partition I’m installing to, usually the name of the distribution; e.g. debian-stable, debian-unstable, solus, etc. Creating a partition label at this point isn’t necessary because you can use GParted to change the partition label later. Let’s assume that you would like to label the root partition. Select Label: by using the UP or DOWN directional arrow keys and then press the ENTER/RETURN key.
Now enter a preferred label for the root/system partition, tab to select <Continue>, and then press the ENTER/RETURN key.
2.14.02.12 – Debian Install – Disk Partitioning – Manual Root Partition – Set Bootable Flag
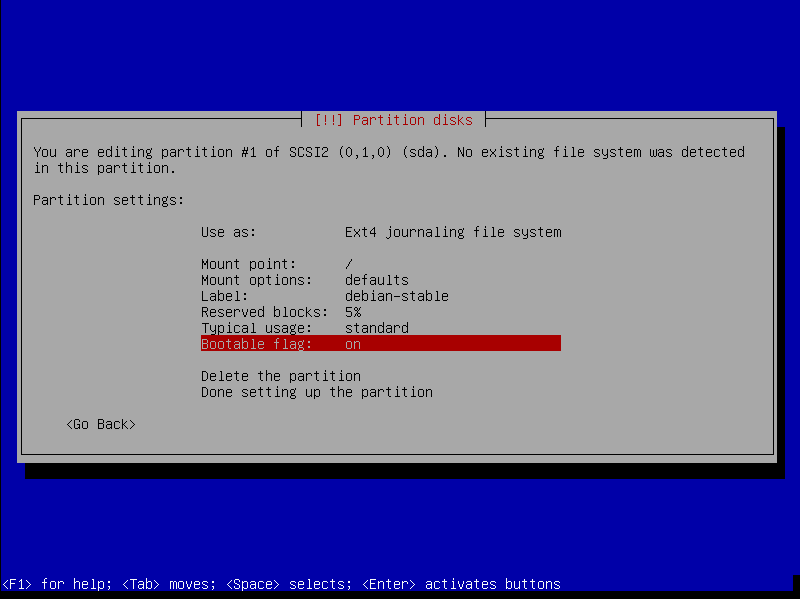
You should now be back at the screen to edit the partition. Since you are setting up the root partition, you need to make it bootable. Using the UP or DOWN directional arrow keys, select Bootable flag: and then press the ENTER/RETURN key to switch the flag from off to on.
2.14.02.13 – Debian Install – Disk Partitioning – Manual Root Partition – Done With Partition Creation
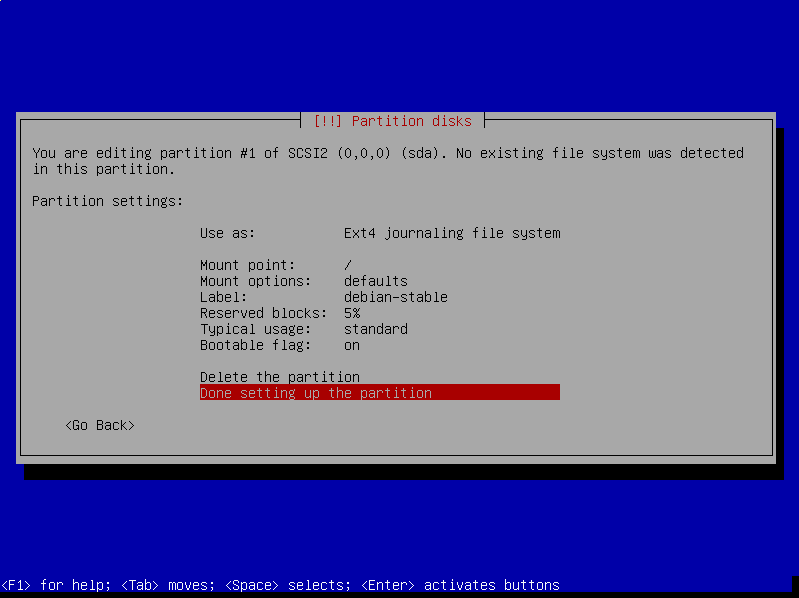
You’re now finished setting up the root partition. Using the UP or DOWN directional arrow keys, select Done setting up the partition and then press the ENTER/RETURN key.
2.14.03 – Debian Install – Disk Partitioning – Manual Swap Partition
If you aren’t creating a swap partition, skip ahead. If you’d like more information about Linux swap space, check here.
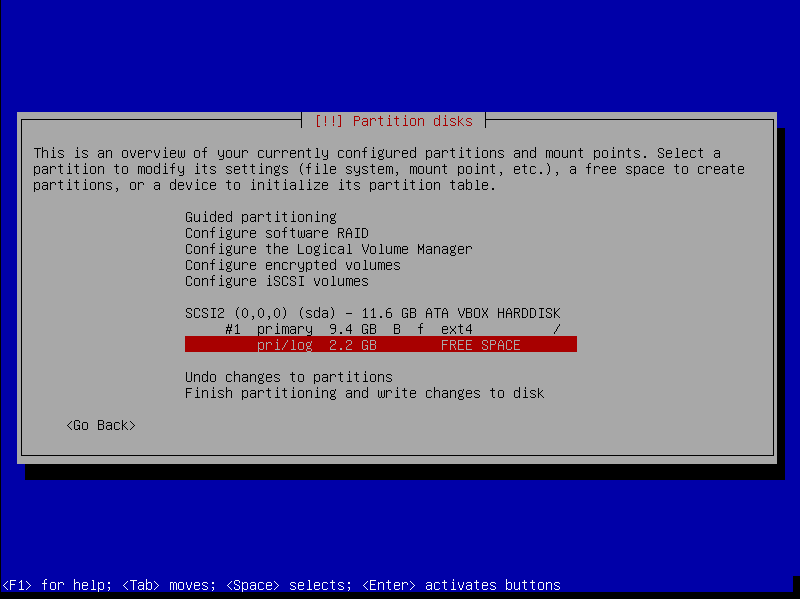
You should now be back at the overview of the currently configured partitions and mount points on your drive. The next partitioning task is to create a swap partition. Using the UP or DOWN directional arrow keys, select the partition with free space and then press the ENTER/RETURN key.
2.14.03.01 – Debian Install – Disk Partitioning – Manual Swap Partition – Create Partition
In the following screen select Create a new partition using the UP or DOWN directional arrow keys and then press the ENTER/RETURN key.
2.14.03.02 – Debian Install – Disk Partitioning – Manual Swap Partition – Specify Partition Size
You now have the option of changing the size of the partition to be created, but you made that decision back in step 14b06, so just tab to <Continue> and then press the ENTER/RETURN key.
2.14.03.03 – Debian Install – Disk Partitioning – Manual Swap Partition – Select Partition Type
Next you’ll need to select the partition type. You can use either option for a swap partition. Because you are limited to four primary partitions under the MBR-BIOS partition table, it might be better to select Logical. Use the UP or DOWN directional arrow keys to make your selection and then press the ENTER/RETURN key.
2.14.03.04 – Debian Install – Disk Partitioning – Manual Swap Partition – Select Partition Use
You should now be on the screen for editing the partition. Using the UP or DOWN directional arrow keys, select Use as: and then press the ENTER/RETURN key.
Note: Don’t worry if there is a current mount point. What you do in the next step will negate the mount point.

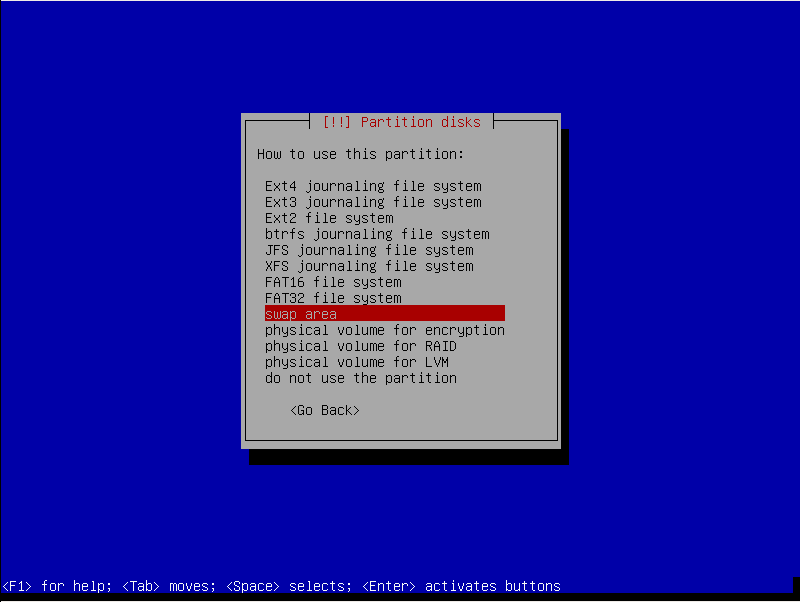
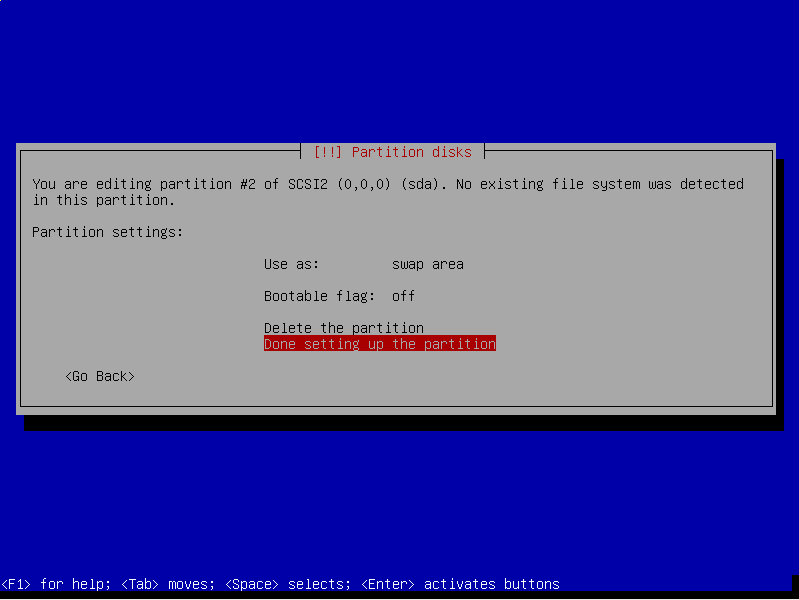
In the screen that follows, use the UP or DOWN directional arrow keys to select swap area and then press the ENTER/RETURN key.
2.14.03.05 – Debian Install – Disk Partitioning – Manual Swap Partition – Done With Partition Creation
You should now be back at the screen for editing the partition. Use the UP or DOWN directional arrow keys to select Done setting up the partition and then press the ENTER/RETURN key.
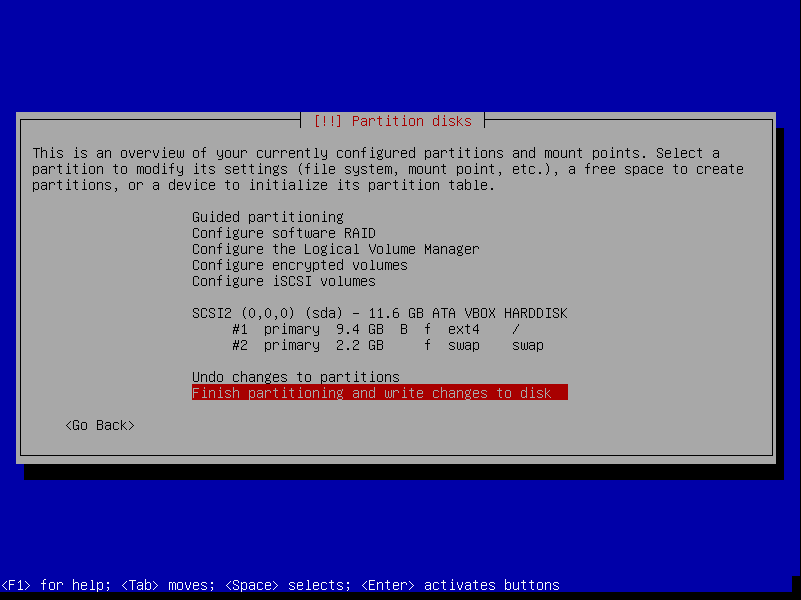
You should now be back at the overview screen of the currently configured partitions and mount points on your disk. Use the UP or DOWN directional arrow keys, or the TAB key, to select Finish partitioning and write changes to disk and then press the ENTER/RETURN key.
2.14.04 – Debian Install – Disk Partitioning – Finalize
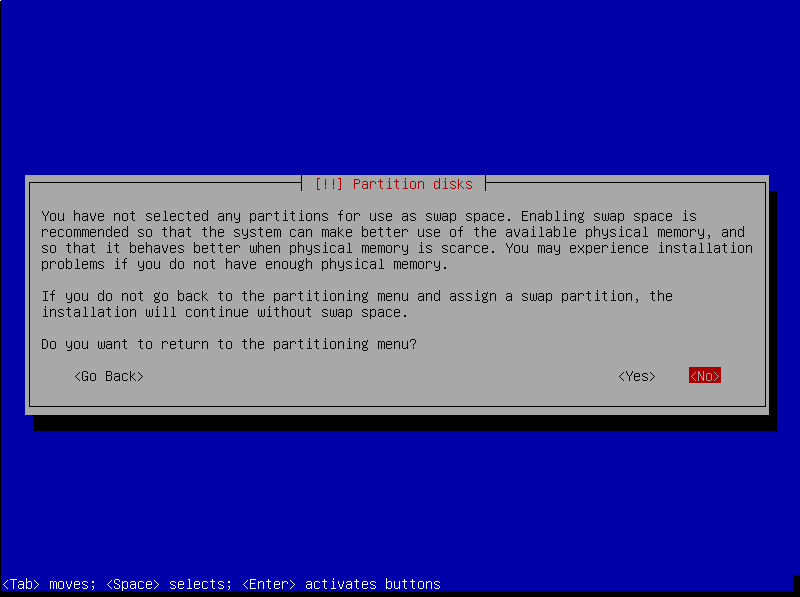
If you didn’t create swap space, you should see the following screen giving you the opportunity to go back and create swap space. If you do not want to create swap space, tab to <No> and then press the ENTER/RETURN key. If you want to create swap space, tab to <Yes> and then press the ENTER/RETURN key. You may need to start all over with the manual partitioning process if you did not create space for a swap partition.
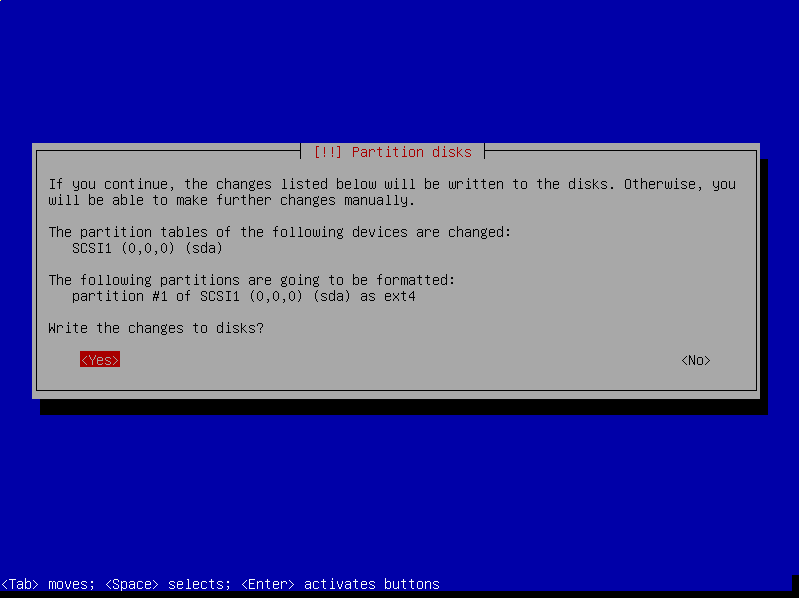
Otherwise, you can now finalize the partition changes to your drive. If not already selected, tab to <Yes> and then press the ENTER/RETURN key.
2.15 – Debian Install – Repository Configuration
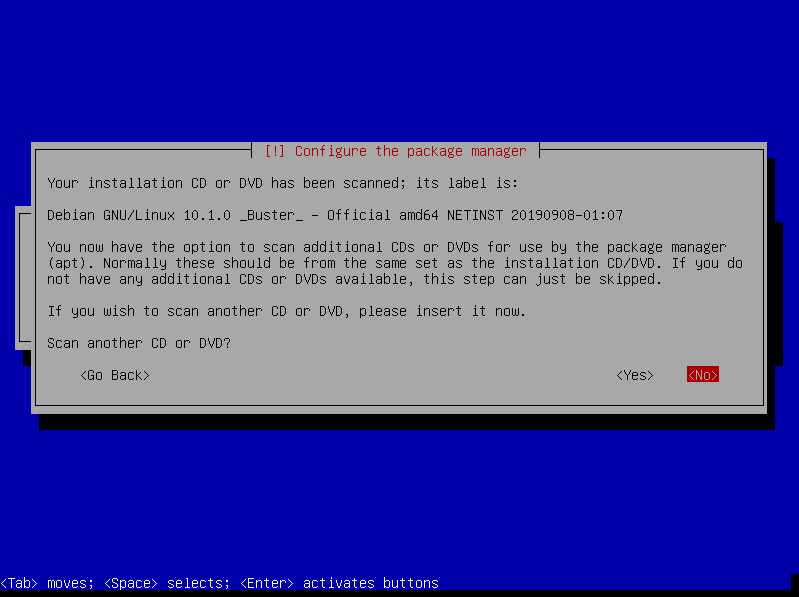
After disk partitioning has completed, you will be prompted to scan additional media for use by the package manager. I believe this is something new that was introduced with the Debian 10.2 Net Install ISO because I’ve not seen it in previous versions. For the purposes of this tutorial, you will not scan additional media, so use the LEFT and RIGHT directional arrow keys, or the TAB key, to select <No> and then press the ENTER/RETURN key.
2.15.01 – Debian Install – Repository Configuration – Country Selection
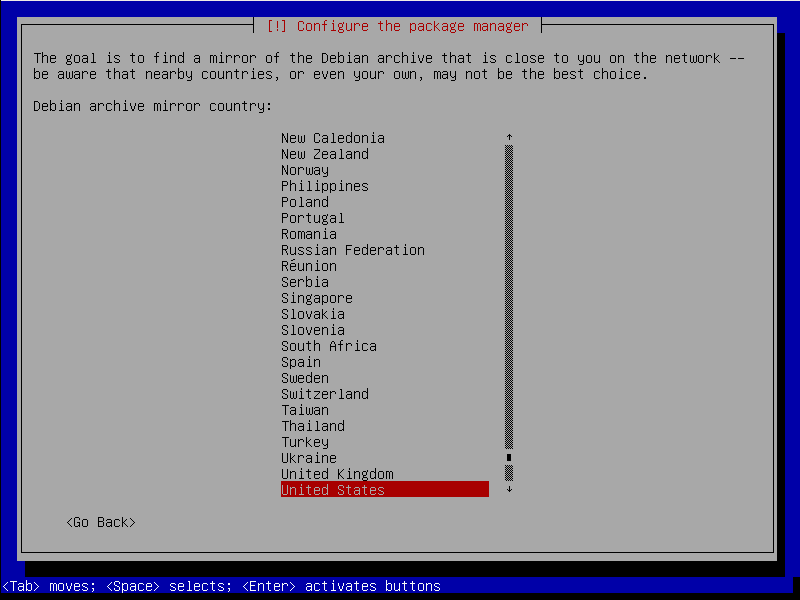
You should now be prompted to configure the package manager, or what I will call selecting a Debian package repository. A package repository is where files or packages are stored and downloaded from. Your first task will be to select a country. Generally speaking, you should select the country where you are located. Use the UP or DOWN directional arrow keys to select your desired country and then press the ENTER/RETURN key.
2.15.02 – Debian Install – Repository Configuration – Mirror Selection
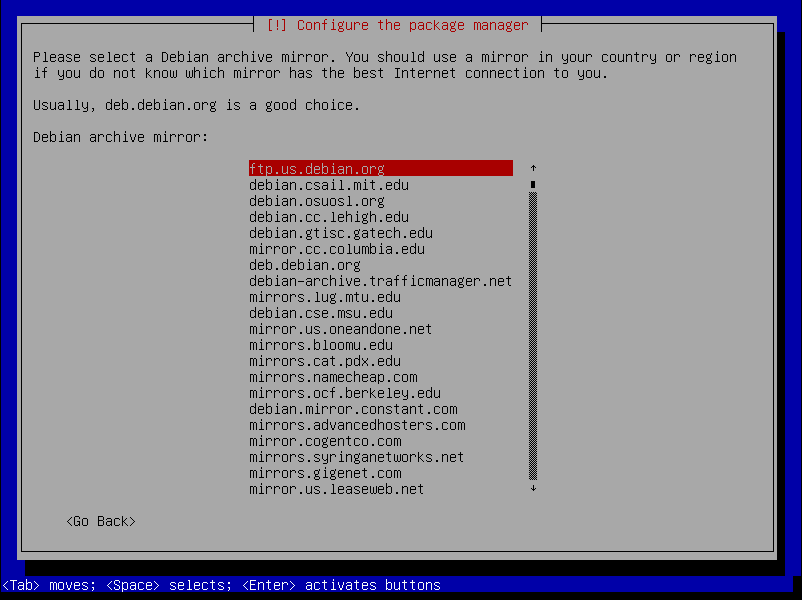
After selecting your desired country, you will next select a desired mirror within the selected country. I generally choose a mirror close to where I live, although close proximity supposedly doesn’t necessarily equate to faster speed. Select a desired mirror using the UP or DOWN directional arrow keys and then press the ENTER/RETURN key.
Later in this tutorial, I’ll provide steps on changing the repository in case you made a mistake during installation or later desire to use a different repository.
2.15.03 – Debian Install – Repository Configuration – Proxy Settings
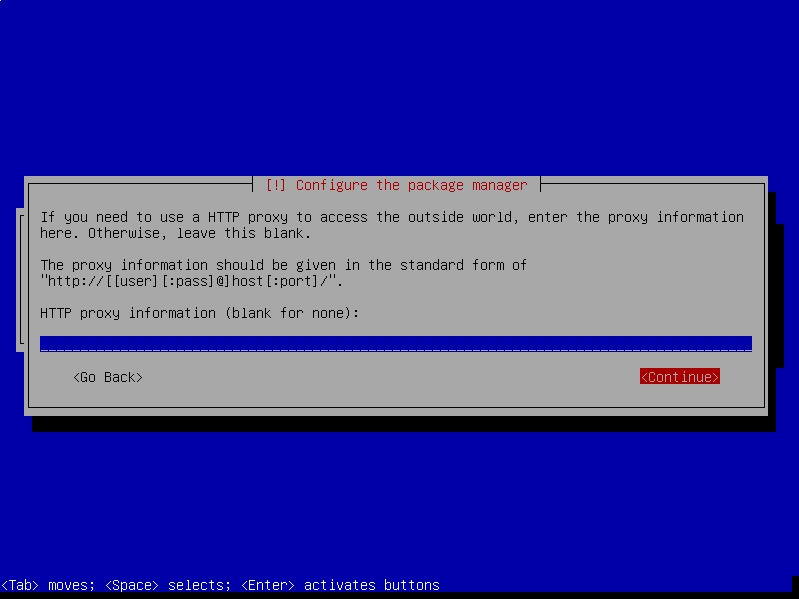
I’ve never used a proxy so I can’t speak about this part of the installation process. For the purposes of this tutorial, it is assumed you are not using a proxy, so tab to <Continue> and then press the ENTER/RETURN key.
There will be a few seconds delay while apt (the package manager) is configured and additional packages are loaded or installed.
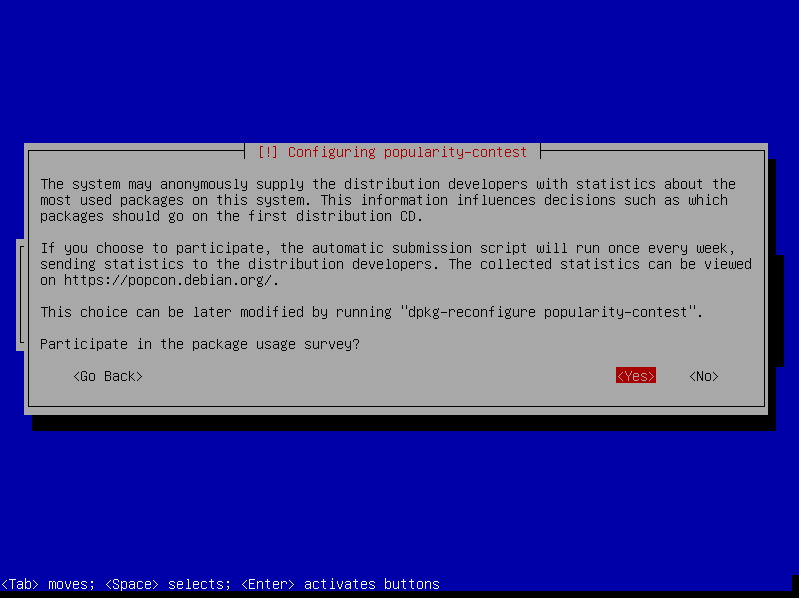
2.16 – Debian Install – Popularity-Contest Package
You next have the option of installing the popularity-contest package. The popularity-contest package helps the Debian team improve future versions of the distribution. I’ve always installed the popularity-contest package as my very small way of helping the Debian team. Tab to make your choice and then press the ENTER/RETURN key.
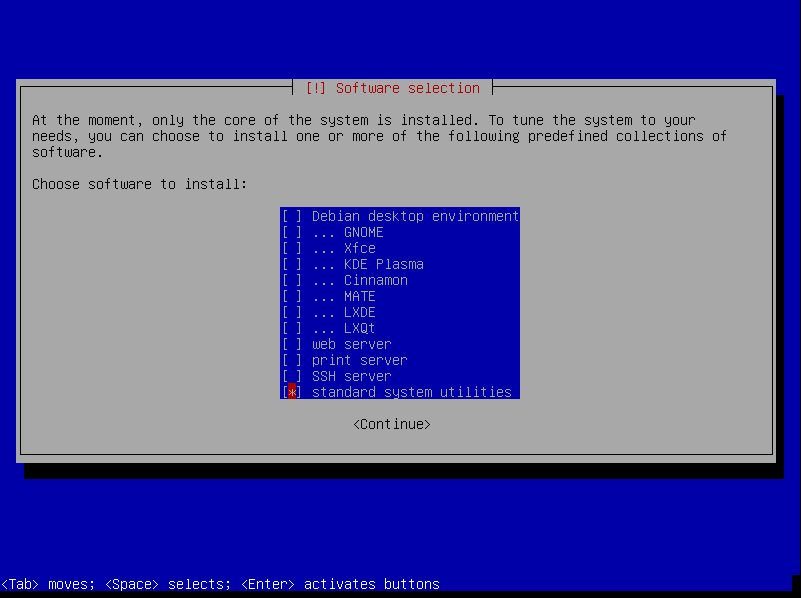
2.17 – Debian Install – Software Selection
You’re almost done with the installation! Next you should see a screen about software selection. You only want a bare bones system because in part 2 of this tutorial you’ll learn how to install and configure the Openbox window manager and the Tint2 panel as a desktop environment, as well as some other packages so that you’ll have something you can actually use. Tab to, and use the SPACE bar to deselect, Debian desktop environment and print server. The only option selected should be standard system utilities. Tab to <Continue> and then press the ENTER/RETURN key.
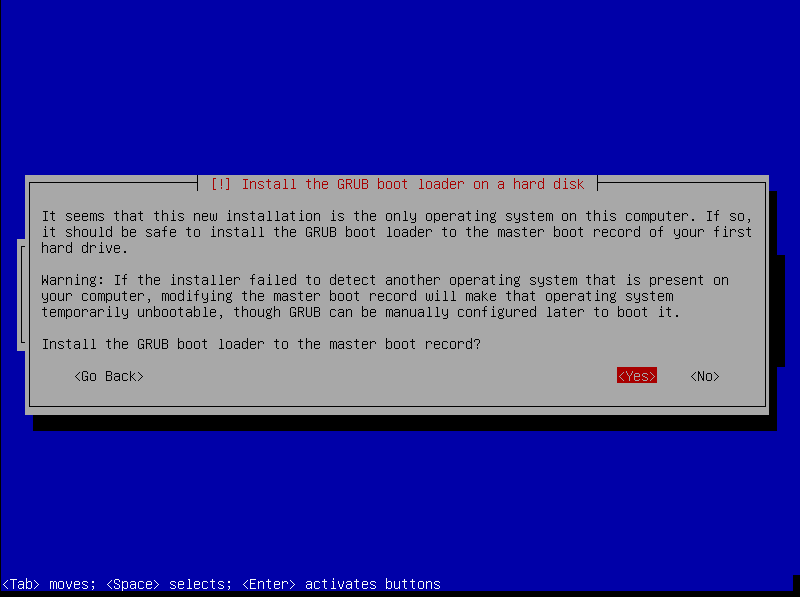
2.18 – Debian Install – GRUB Boot Loader
You should now be asked about installing the GRUB boot loader on the disk. As stated earlier in this post, this tutorial covers installation under a BIOS-MBR partition table. Therefore, tab to <Yes> and then press the ENTER/RETURN key.
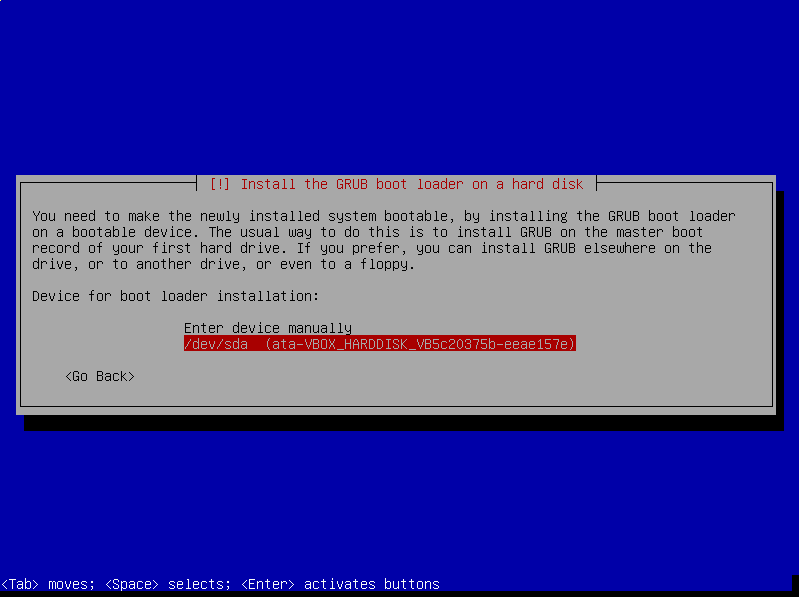
Next you’ll need to choose a device upon which to install the GRUB boot loader. Tab to select the drive upon which Debian is being installed and then press ENTER/RETURN.
2.19 – Debian Install – System Clock Check
You may or may not see the following screen. If you do, you will need to indicate whether or not your system clock is set to UTC (Coordinated Universal Time). I’ve always selected <Yes>. Tab to the applicable answer and then press the ENTER/RETURN key.
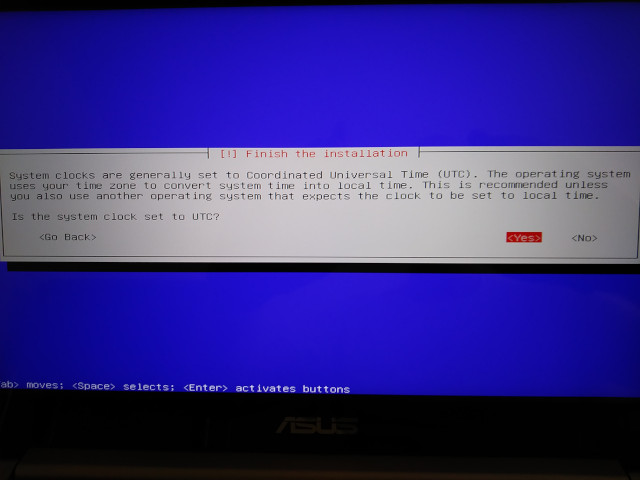
If you later learn that the time displayed under Debian is incorrect because you made the wrong selection, check out this post on using the Linux date command to change the system time.
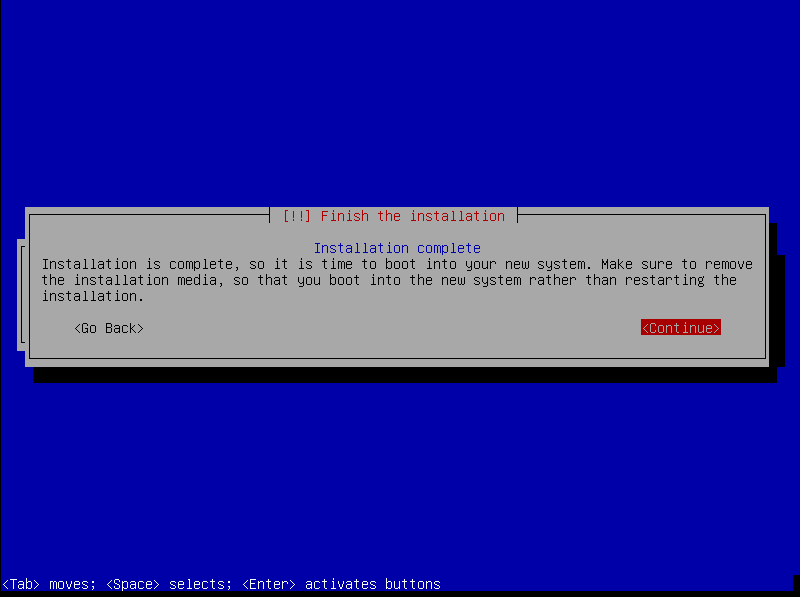
2.20 – Debian Install – Installation Complete – Reboot
You’ll now have to wait a few minutes for all of the necessary packages to be downloaded and installed.
You should see the Installation complete screen once all of the necessary packages have been installed. Tab to <Continue> and then press the ENTER/RETURN key. Wait until the computer screen goes blank before removing the USB thumb drive. If you forget and the Debian installer hangs, just simultaneously press the CTRL-ALT-DELETE keys, aka the three-finger salute, a few times. If the three-finger salute doesn’t work, just power off and then power on your computer.
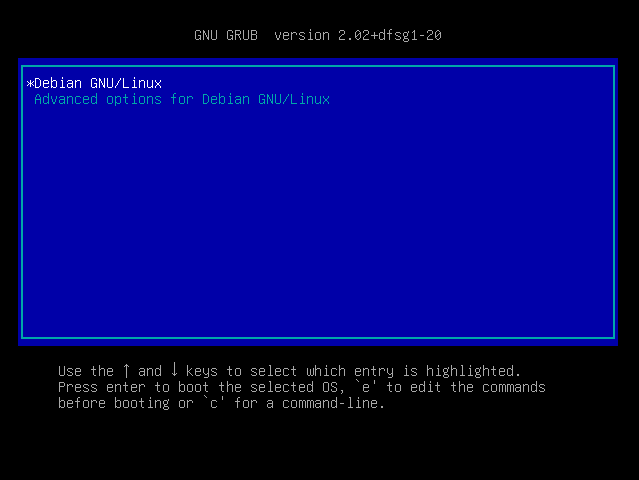
3 – First Boot
3.01 – First Boot – User Login
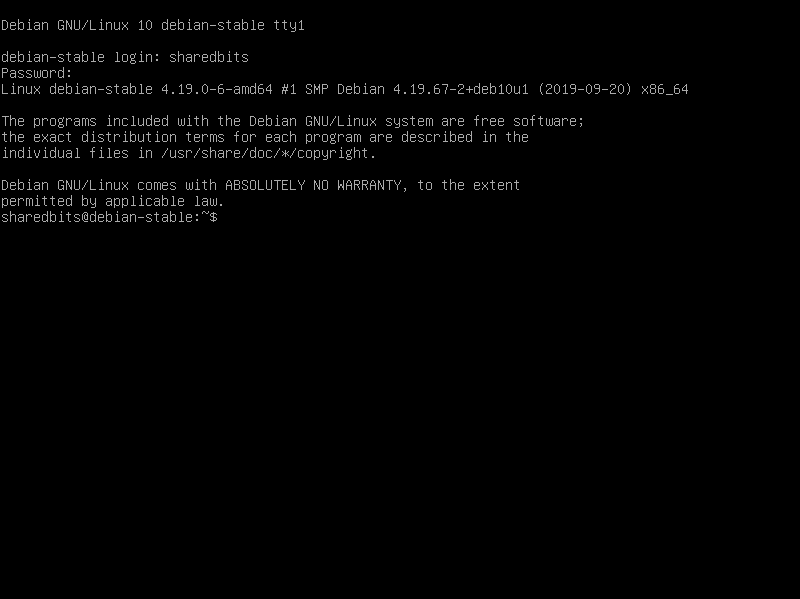
When you boot into your new Debian installation, you’ll be greeted with a very spartan terminal interface. Enter your username, press the ENTER/RETURN key, enter your password, and press the ENTER/RETURN key to login.
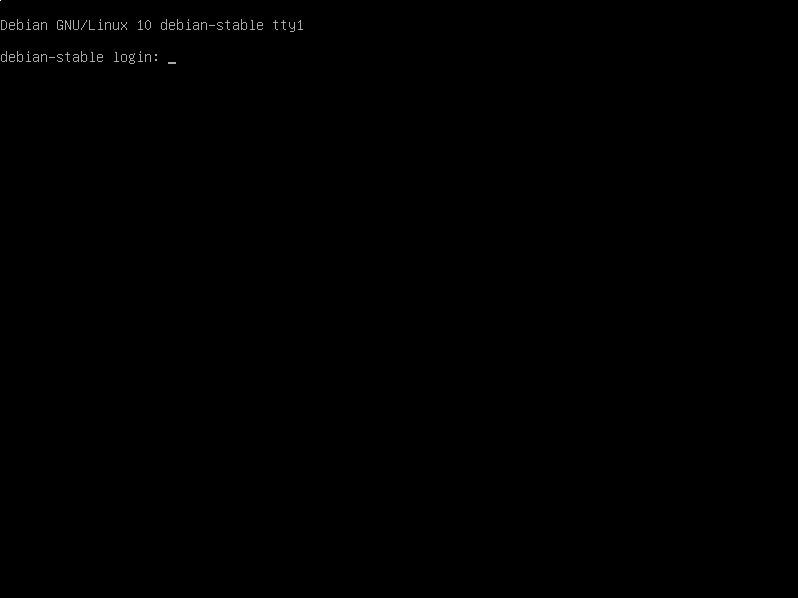
A successful login should look similar to the following.
3.02 – First Boot – Changing the Default apt Sources File
The apt sources file contains the repository addresses from which packages are downloaded. I prefer to have a file specifically for Debian and separate files for other repositories. After performing a Debian Net Install, the repository addresses are stored under /etc/apt/sources.list by default. Following is what the /etc/apt/sources.list file looks like after performing the Debian Net Install:
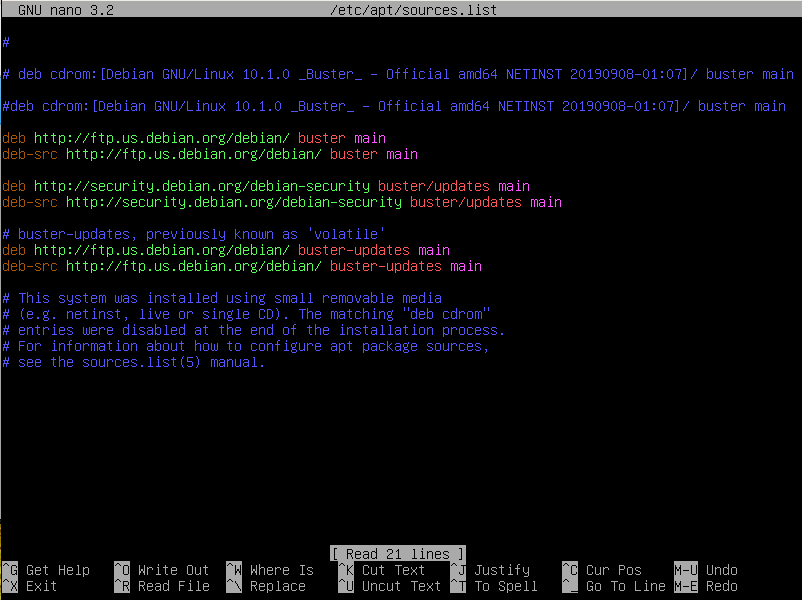
Note: buster refers to the name of the current Debian Stable release. The release name changes with each new release.
First, you may need to create the /etc/apt/sources.list.d folder or directory. To check if the folder or directory exists, enter the following command:
If sources.list.d is not listed, you’ll need to create it:
Next, make a copy of the /etc/apt/sources.list file and rename it /etc/apt/sources.list.d/debian.list:
Edit /etc/apt/sources.list.d/debian.list:
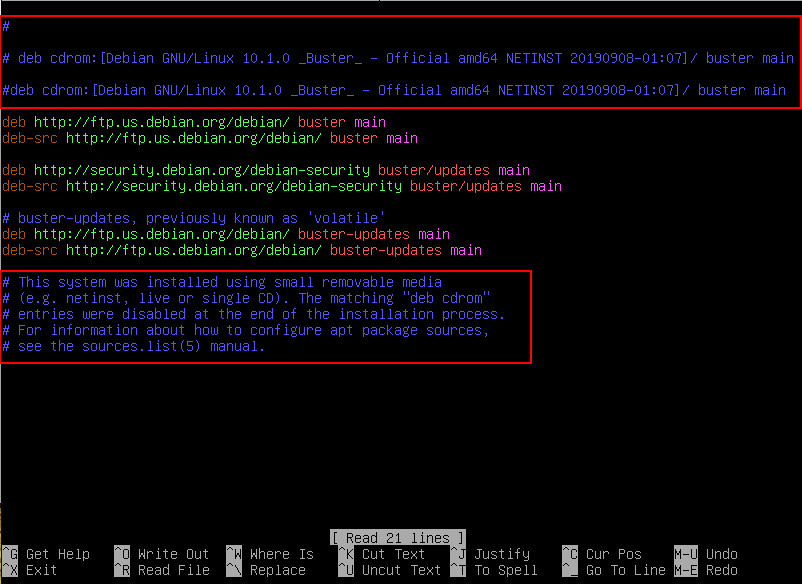
Using the SHIFT and UP/DOWN arrow keys, select and then delete all lines above and below the repository addresses beginning with a hashtag or pound sign (#), save the changes, and then exit nano. To save changes under nano, press the CTRL and O keys simultaneously and then press the ENTER/RETURN key. To exit nano, press the CTRL and X keys simultaneously. Note: The deletions are optional, but the information is not really necessary so I always remove it.
Enter the word clear and then press the ENTER/RETURN key to clear the screen.
Edit /etc/apt/sources.list:
Delete everything in the file (use the SHIFT and UP/DOWN directional arrow keys to select text), save the file, and then exit nano.
Enter the word clear and then press the ENTER/RETURN key to clear the screen.
If you forget to empty the /etc/apt/sources.list file, the apt package manager will still use it to determine the repositories to use.
3.03 – First Boot – Adding contrib, non-free, and non-free-firmware Archives
The following assumes you changed the default apt sources file. If you didn’t perform the change, then use /etc/apt/sources.list in place of /etc/apt/sources.list.d/debian.list below.
Edit the apt sources file by entering the following command from the command line:
By default, Debian only includes the main repository archive during installation. However, for a better user experience and to have components of your computer actually work or work better while using Debian, you should add the contrib, non-free, and non-free-firmware repository archives. More info about the different Debian repository archives can be found here.
To add the contrib, non-free, and non-free-firmware repository archives, append contrib, non-free, and non-free-firmware to all existing repository address lines. You should also comment out all lines beginning with deb-src by adding a hashtag or pound sign (#) and a space to the beginning of each line.
Save the changes and then exit nano. Saving a file under nano is accomplished by pressing the CTRL and O keys simultaneously and then pressing the ENTER/RETURN key. Exiting nano is accomplished by pressing the CTRL and X keys simultaneously.
Enter the word clear and then press the ENTER/RETURN key to clear the screen.
Following is an example of what your apt sources file should look like after making the changes:
deb http://ftp.us.debian.org/debian/ bookworm main contrib non-free non-free-firmware
# deb-src http://ftp.us.debian.org/debian/ bookworm main

deb http://security.debian.org/debian-security bookworm-security main contrib non-free non-free-firmware
# deb-src http://security.debian.org/debian-security bookworm-security main

# bookworm-updates, to get updates before a point release is made;
# see https://www.debian.org/doc/manuals/debian-reference/ch02.en.html#_updates_and_backports
deb http://ftp.us.debian.org/debian/ bookworm-updates main contrib non-free non-free-firmware
# deb-src http://ftp.us.debian.org/debian/ bookworm-updates main
3.04 – First Boot – Changing the Debian Repository Mirror
The following assumes you changed the default apt sources file. If you didn’t perform the change, then use /etc/apt/sources.list in place of /etc/apt/sources.list.d/debian.list below.
Suppose you chose the incorrect Debian repository mirror during installation or you now want to use another repository mirror. Changing the repository mirror is easily accomplished. Debian provides a nice list of repository mirrors here.
Once you’ve selected the Debian repository mirror that you’d like to use, make a backup of the existing /etc/apt/sources.d/debian.list file:
where YYYY is the current year, MM is the current month, DD is the current day of the month, and ## is an incremental number starting with 01.
The above command creates a copy of the debian.list file under your home folder. There’s nothing magical about copying the file to your home folder. Use another folder if desired.
Now, edit the existing /etc/apt/sources.list.d/debian.list file:
Replace the existing mirror info with your desired mirror info, save the changes, and then exit nano. Use the SHIFT and UP/DOWN directional arrow keys to select text under nano. Saving a file under nano is accomplished by pressing the CTRL and O keys simultaneously and then pressing the ENTER/RETURN key. Exiting nano is accomplished by pressing the CTRL and X keys simultaneously.
Enter the word clear and then press the ENTER/RETURN key to clear the screen.
3.05 – First Boot – Upgrade the System
I always like to perform an upgrade after installing any Linux distribution to get package upgrades, security or otherwise. Enter the following command:
You’ll be prompted for your password; enter your password and press the ENTER/RETURN key. A few lines will scroll up as the different repositories are checked.
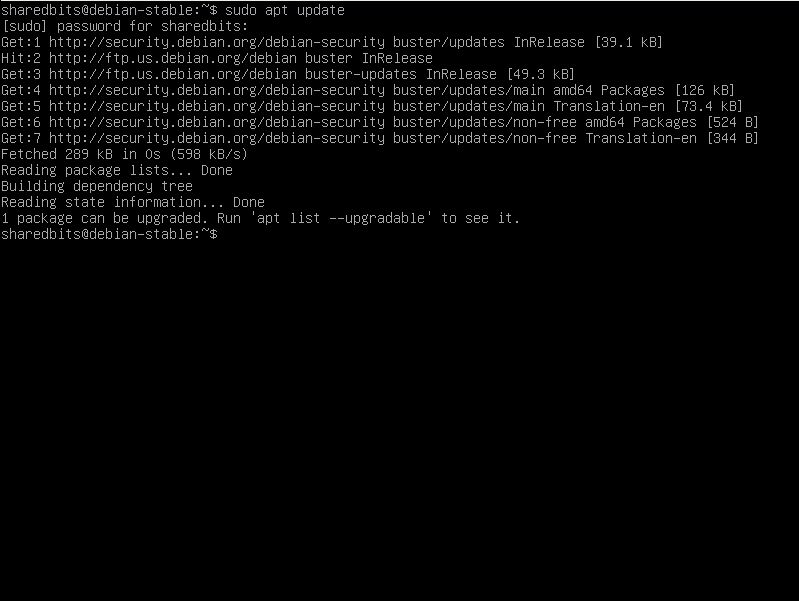
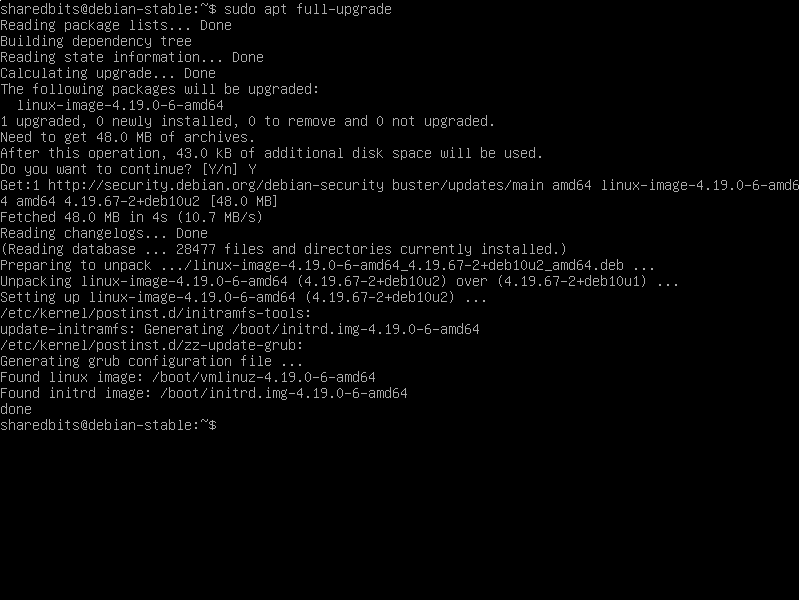
If no upgrades are available, you should see a response stating that your system is up-to-date. If upgrades are available, enter the following command:
The packages to be upgraded will be listed and you’ll be asked if you want to continue with the upgrade. Enter Y for yes and then press the ENTER/RETURN key to allow the upgrade to proceed.
3.06 – First Boot – Disable Automatic Removal of Old Kernels
On 01/08/2021, the upgrade to apt version 2.1.16 introduced new functionality to automatically remove old kernels. I recommend disabling the automatic removal of old kernels as follows:
- Locate the line VersionedKernelPackages.
- Place a hashtag (#) in front of “linux-.*”;.
- Save your changes; CTRL-O.
- Exit Nano; CTRL-X.
The above tip is courtesy of a forum member who goes by the username devil on the Siduction forums.
Why do I recommend disabling the removal of old kernels? Because a newer kernel has the potential of causing issues with your computer, especially if it is an older computer.
3.07 – First Boot – Shutting Down
You do not have a nice GUI with which you can easily shutdown your computer. Therefore, you’ll have to use the command line to shutdown. Enter one of the following commands to shutdown:
The first command will immediately shutdown your computer. The second command will shutdown your computer in about one minute.
4 – Conclusion
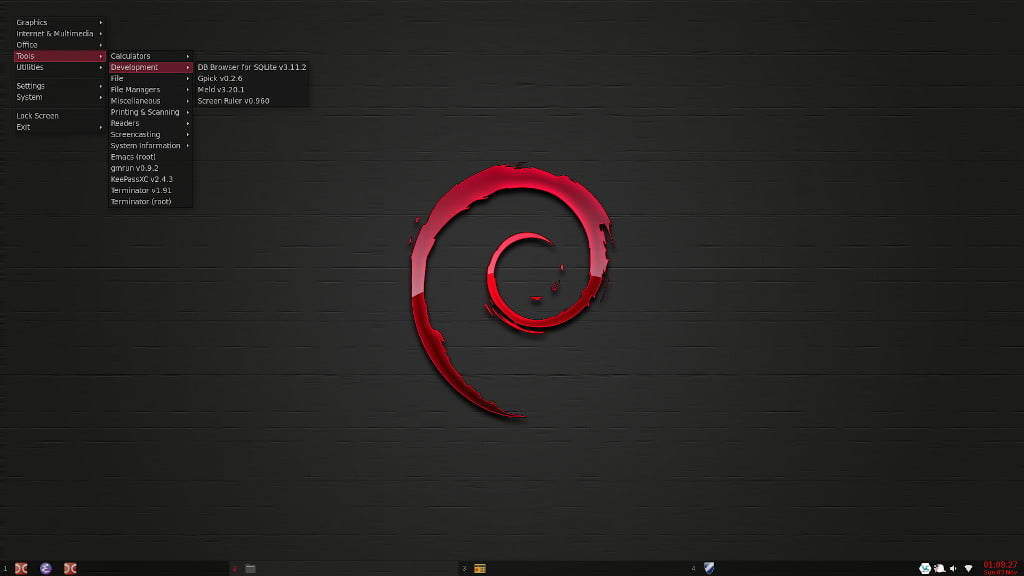
You’re now ready to add additional packages to make your Debian installation much more useful. In part 2, I’ll cover installing the Openbox window manager and the Tint2 panel to create a desktop environment as well as some other packages.
I’d like to thank user johnraff, one of the original and current project members for the Bunsen Labs Linux distribution, from whom I learned to use the Debian Net Install method. He put together a how-to as an interim measure a few weeks after Philip Newborough announced the cessation of development of CrunchBang Linux in February, 2015.
Wallpaper in the screenshot used for the post header image courtesy of mullet at DeviantArt.
2019-013