WordPress: Use Image URLs to Save Space on Your Hosting Account
Updated on 2022-01-06
Contents
- Introduction
- WordPress 5 (Gutenberg Editor) Method
- WordPress 4 (Classic Editor) Method
- Conclusion
- 2021-02-24 Update
Introduction
I recently took an online introductory WordPress course in preparation for starting my blog. In a lecture on optimizing images, the instructor recommended storing images of a certain resolution and file size. Otherwise, you risk quickly fill up your hosting space.
The first thought that came to mind was, can you store images elsewhere and use links to point to those images? I learned about using the technique through my frequent use of Linux forums. I learned about a site called Postimage from a Linux forum I used to frequent. Postimage is what I have used to store images for forum posts, utilizing forum thumbnail links. Couldn’t you use a similar technique to show images in WordPress?
I’m happy to report that yes you can, at least for posts. There are two methods for using the technique in WordPress posts.
WordPress 5 (Gutenberg Editor) Method
Note: The following procedures assume you are not using Top Toolbar mode. If you are using Top Toolbar mode, then for all references to buttons at the top of a block, you’ll be using the buttons at the top of the editor window on the far left.

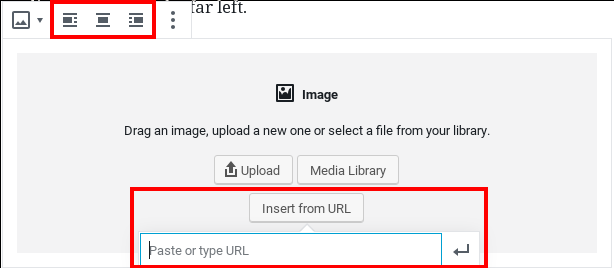
The first method involves using a media block. Create a new block and click the Add Image button, first button of the set of buttons on the far right at the top of the block.

Next, click the Insert from URL button and paste or type in the image URL and then click the Apply button on the right (looks like a Enter/Return key) to save the URL. I have found the Direct link sharing link under Postimage to work well for this method. Use the second, third, or fourth button on the left at the top of the block to align the image as desired.
If you are in the Visual Editor mode, your image should display inline.
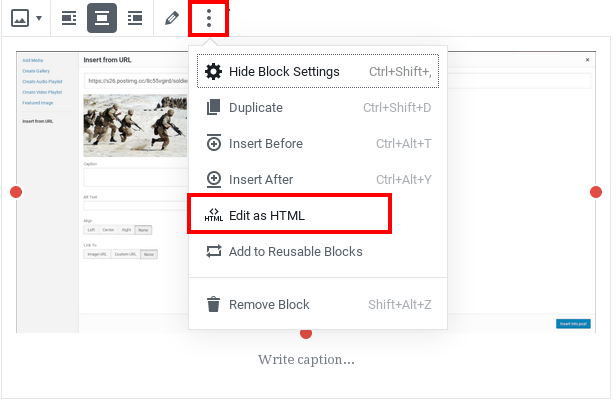
If you’d like to add additional code, say inline CSS, then click on the image, click the More Options button (vertical 3 dots/periods) at the top of the block on the far right, and select Edit as HTML from the list of choices.
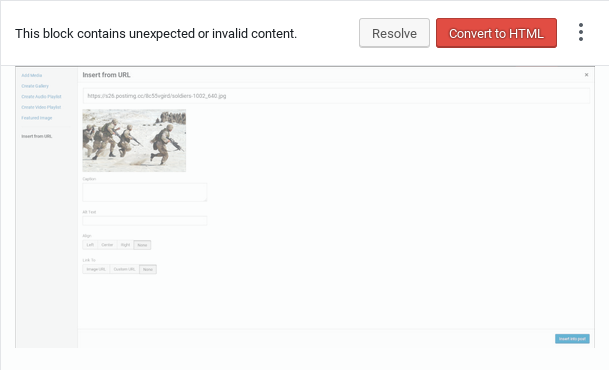
Once you are done, click out of the media block and the block should convert as shown below. Click the Convert to HTML button to convert the block to HTML.
The second method involves using a custom HTML block to enter the image URL directly, which allows you to enter extra code such as inline CSS without having to go through the extra step in the first method. I have found the Direct link sharing link under Postimage to work well for this method also.
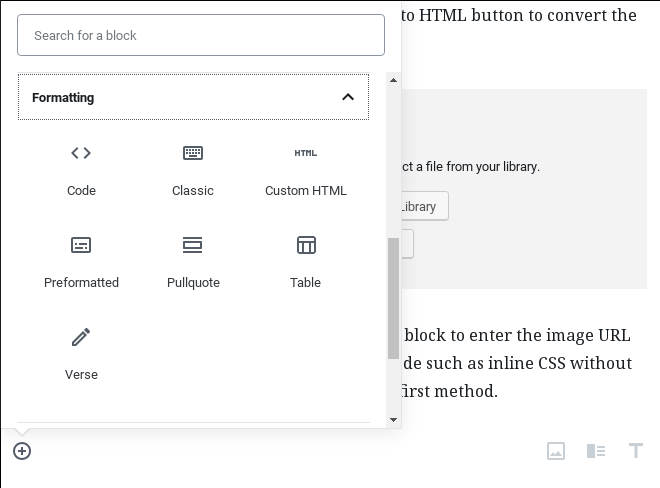
To create an HTML block, create a new block. Click the Add Block button (plus sign in a circle) at the top of the block on the far left. From the list, select Formatting and then Custom HTML.
Now enter the image URL and any other desired code in the block.

WordPress 4 (Classic Editor) Method
The first method involves the use of the Add Media button in the WordPress post editor; reference the top left corner in the screenshot below.

Position your cursor in the editing area where you would like the image to appear and then click the Add Media button. The following window should appear:

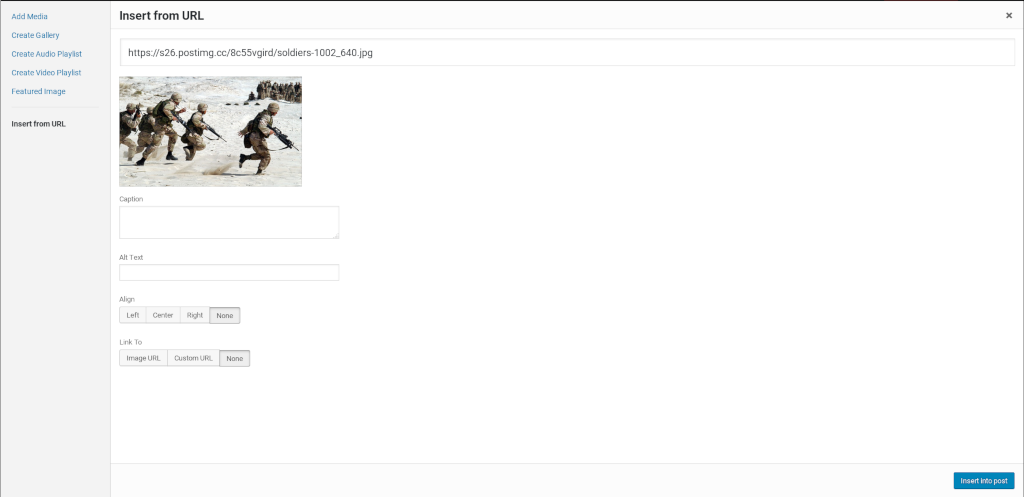
Next, click the Insert from URL link at the bottom of the left sidebar. The window should change so that you can paste the image link. I have found the Direct link sharing link under Postimage to work well using this method.

After pasting the image URL, you should now see your image with options. In the lower right corner, click the Insert into post button and the image should appear in your post.
The second method involves using HTML code to manually add image links yourself directly under the Text tab of the WordPress post editor. The HTML code is the same as what the Add Media function generates.
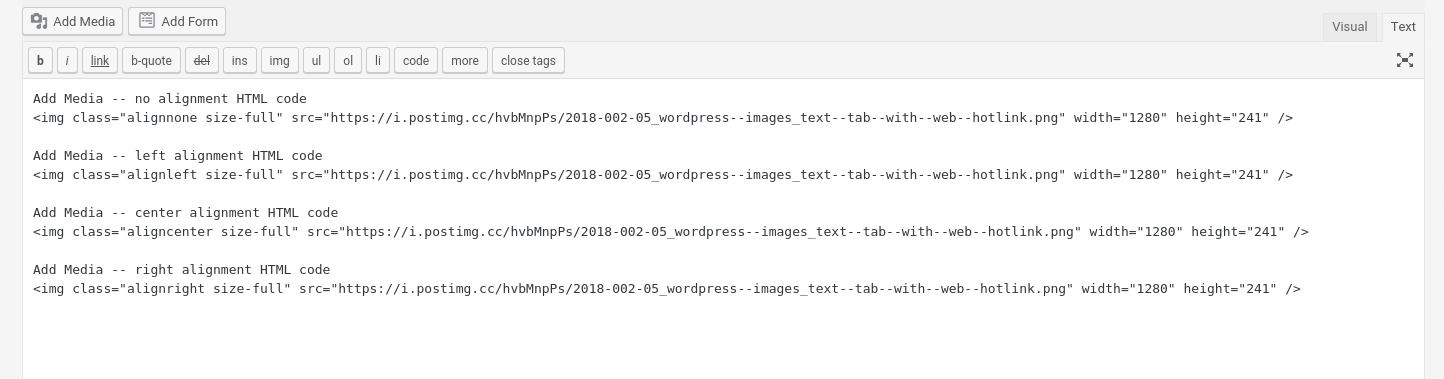
If your image is wide enough, then alignment choice has no effect.

Conclusion
Anyone can upload an image and get a list of links to the image on Postimage. However, if you lose the links, or if the links end up broken for whatever reason, you’re out of luck. Therefore, I recommend creating a Postimage account (free) and uploading your images to your account.
Now you’ll have more storage space on your hosting account for posts, post header images, files, plugins, etc.
2021-02-24 Update
On 2020-11-15, I attempted to login to my Postimage account, but the site could not be reached. The site being inaccessible concerned me because that might mean that most of the images in my blog posts might not display. I checked a sampling of posts on my site and sure enough, the images stored at PostImage did not display.
The images stored under my Postimage account were inaccessible for at least 24 hours. I wondered how often the issue may have happened in the past without my knowledge. Images are an important part of many of my posts, so it’s very important that they are always available.
Therefore, while this technique works, if the site you use to store your images goes down, your posts will not display those images. I’ve decided to store all of my images under my hosting provider account. I’ve recently discovered a tip to prevent image uploads under your hosting provider account from taking up more storage space than necessary, which I’ve detailed in another blog post.
Post header image is courtesy of pixelcreatures at Pixabay.
2018-002


You May Also Like
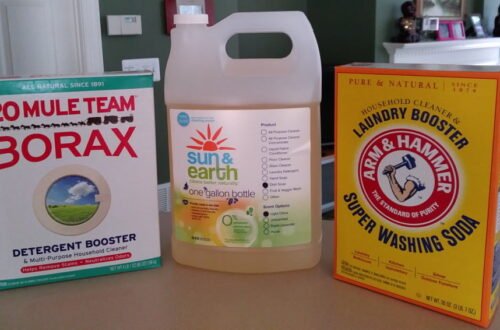
DIY Liquid Laundry Detergent
Homemade Yogurt Using Milk and Probiotic Capsules