
Run Solus With Openbox and Tint2
Updated on 2023-07-06
Note: As of 07/03/2021, I have decided to no longer use the Solus Linux distribution. This post will remain for a period of time for informational purposes, but will no longer be updated except for minor changes.
Contents
- 01 – Introduction
- 02 – Solus Budgie Installation
- 03 – Openbox and Tint2 Desktop Environment Installation
- 04 – Openbox and Tint2 Desktop Environment Configuration
- 04.01 – Configuration Files Download
- 04.02 – Conky
- 04.03 – Openbox
- 04.04 – Tint2
- 04.05 – Picom
- 04.06 – Keyboard Layout (non-QWERTY)
- 04.06.01 – Option 1 – Use localectl to Change the Keyboard Layout
- 04.06.02 – Option 2 – Use a keyboard Configuration File to Change the Keyboard Layout
- 04.07 – Touchpads
- 04.08 – Reboot
- 05 – Login Desktop Selector
- 06 – Finishing Touches
- 07 – Commonly Used Keybindings
- 08 – Issues/Missing in Action
- 09 – Conclusion
- 10 – Useful Resources
01 – Introduction
About a year ago, I chose Solus Budgie, Budgie being the desktop environment, as a Linux distribution (distro) candidate for a mid-2009 MacBook Pro for my wife’s use. I ran Solus Budgie under VirtualBox on my two computers to learn how to use it so that I could provide tech support when my wife had questions.
I grew to really admire the fact that Solus appears to be a safe rolling release Linux distro. A rolling release Linux distro means that, unless an update or user error borks something, you should never have to install the distro again. I also admired the Solus Software Center app which allows you to easily locate and install software.
I’ve been a fan of the Openbox window manager and Tint2 panel as a Linux desktop environment since I began using CrunchBang Linux and later BunsenLabs. I liked Solus so much that I began desiring to add it as one of my daily drivers; Debian Stable and Debian Unstable being my other daily drivers. I began researching the possibility of running Solus using Openbox and Tint2. After some research of the Solus repositories (repos), I determined that I might be able to pull off running Solus with Openbox and Tint2.
I initially experimented running Solus with Openbox and Tint2 in one of my Solus installs under VirtualBox. I was able to get far enough along that I decided to take the plunge and install Solus as one of my daily drivers on my desktop computer. After a few weeks of experimenting and problem solving, I now have a very nice workable Openbox and Tint2 desktop environment running on Solus. In this blog post, I will share with you how I was able to setup an Openbox and Tint2 desktop environment under Solus Budgie v3.9999. With some variation, the same procedures should also work for the same version of Solus Mate and Solus Gnome.
02 – Solus Budgie Installation
The first thing you need to do is download the Solus Budgie ISO file and install it on a thumb drive. I’m not going to cover how to install the ISO on a thumb drive or the installation process. If you would like more info about installing Solus Budgie, the Installation page of the Solus Help Center might be helpful.
02.01 – Solus Budgie Installation – Keyboard Layout Selection Tip
I will point out an issue if you select a keyboard layout other than QWERTY (the default) during installation. I use the Dvorak keyboard layout and even though I’ve selected the layout during installation, the keyboard layout doesn’t work during installation or when logging in. If you opt to choose a keyboard layout other than QWERTY, then use a simple password like 123456 when setting up your user account during installation. I’ll address how to rectify the keyboard layout during login, as well as how to change your password, later in the tutorial.
02.02 – Solus Budgie Installation – Initial Login Screen
Once you’ve installed Solus Budgie, the login screen should look something like the following, although the wallpaper will be different:
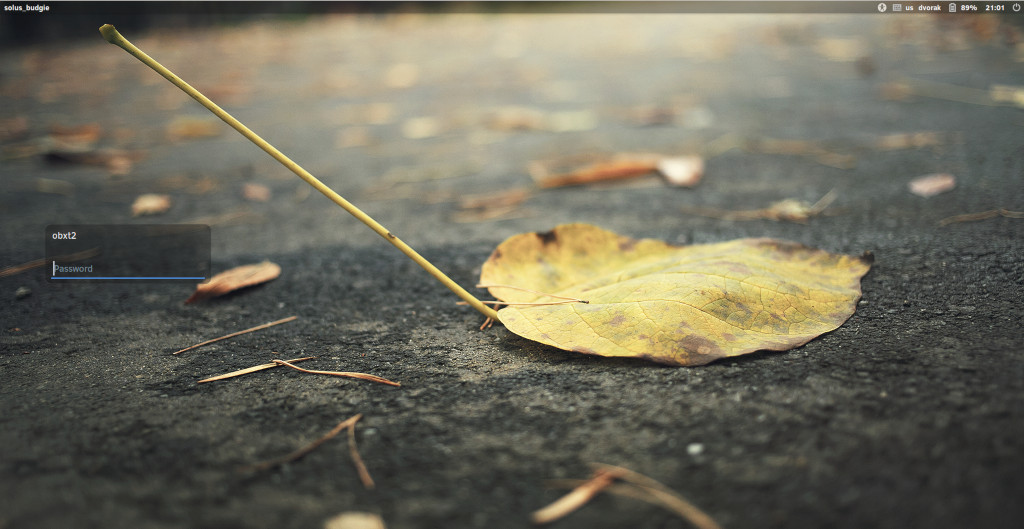
Note how the login area looks because after installing Openbox and Tint2, it will change in appearance. I’ll point out the change later in the tutorial.
02.03 – Solus Budgie Installation – Broadcom WiFi Cards/Chips
If you don’t have a Broadcom wireless card/chip or if your Broadcom wireless card/chip is working, feel free to skip ahead.
In my past experiences of installing Solus Budgie, Broadcom wireless cards/chips weren’t recognized during installation. Therefore, if you have a Broadcom wireless chip/card, you may need to temporarily use an ethernet cable for Internet connectivity after installing Solus Budgie.
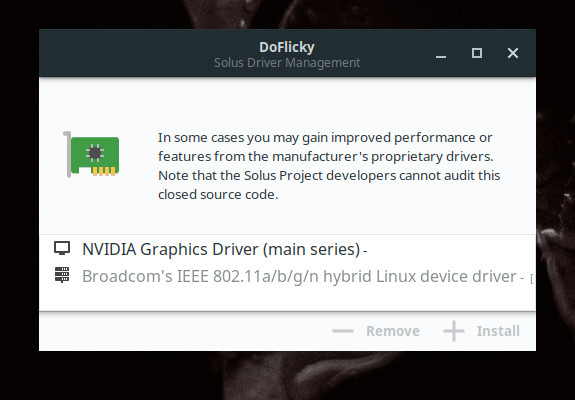
If your Broadcom wireless card isn’t working, first you need to install the appropriate driver. You can use the Solus Driver Management app (aka DoFlicky), Hardware Drivers from the Solus Budgie menu, which should present and enable you to install the appropriate driver, or you can use eopkg.
If you choose to use eopkg, drop to the command line (Terminal from the Solus Budge menu) and enter:
For the current Linux kernel…
For the legacy/stable Linux kernel…
To determine what kernel you’re using, drop to the command line and enter:
The S option in the above command is uppercased. If the value for Kernel is greater than 4.9.x, you’re using a current kernel.
After you’ve installed the Broadcom driver, drop to the command line and enter the following two commands:
Now reboot your computer. After entering the appropriate credentials for your router, you should have WiFi connectivity. Now you can put away the ethernet cable.
02.04 – Solus Budgie Installation – Update the System
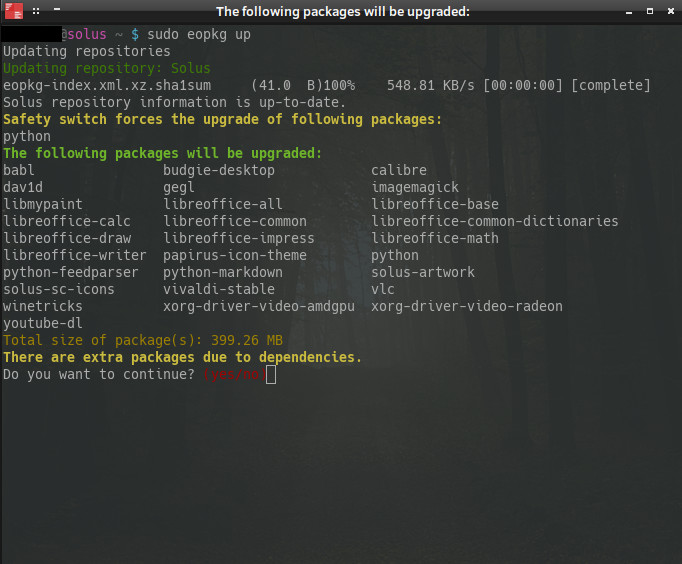
Once you have Solus Budgie installed, you should perform a system upgrade. I highly recommend using the eopkg package manager via the command line (Terminal from the Solus Budgie menu) instead of using the Solus Software Center app when performing the intial system upgrade. From the command line, issue the following command:
If extra packages need to be installed, you will be prompted and should answer yes to allow the system upgrade to continue.
03 – Openbox and Tint2 Desktop Environment Installation
Now it’s time to add the necessary packages to create an Openbox and Tint2 desktop environment. Following are the packages that need to be installed:
You can install each package one at a time or install all at once by separating each package name with a space in the eopkg install command:
–or–
03.01 – Openbox and Tint2 Desktop Environment Installation – Touchpads
For those using a touchpad, Solus uses libinput by default and it works reasonably well with the proper configuration file (explained later in the tutorial). However, I use two different Logitech touchpads and I’ve found that the touchpads aren’t as responsive when using libinput. I opted to install the following two packages that provide touchpad configuration and functionality that work better in my opinion: xorg-driver-input-evdev, xorg-driver-input-synaptics.
04 – Openbox and Tint2 Desktop Environment Configuration
At this point, you could reboot the computer and begin using the Openbox and Tint2 desktop environment. However, doing so will present you with nothing but a black screen, which might be a bit disconcerting. So, you’ll need to create folders and add/create configuration files so that things will be more user friendly when you first use the Openbox and Tint2 desktop environment.
04.01 – Openbox and Tint2 Desktop Environment Configuration – Configuration Files Download
Download the required configuration files here. You should also download and decompress the GPG signature for the compressed configuration files and verify it to insure that it hasn’t been tampered with. Verification should be performed prior to uncompressing the configuration files. You’ll need to use Kleopatra, in the Solus repos, or a similar app, and the Shared Bits public key to verify the file.
04.02 – Openbox and Tint2 Desktop Environment Configuration – Conky
Copy the .conkyrc file to your /home/username folder.
04.03 – Openbox and Tint2 Desktop Environment Configuration – Openbox
Under the /home/username/.config folder, create a folder named openbox. Copy the following files to the /home/username/.config/openbox folder:
autostart, menu.xml, rc.xml
The Openbox autostart file contains commands to start programs upon login.
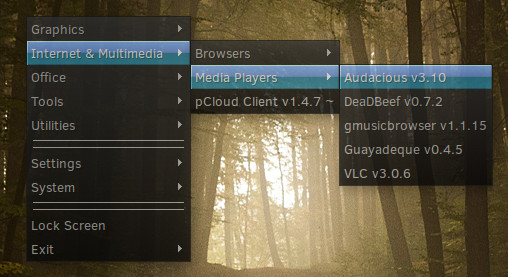
The menu.xml file contains the entries for the Openbox menu, accessible by right-clicking on the desktop or in the Tint2 panel, or by simultaneously pressing the Windows and Space keys.
Note: obmenu has been removed from Solus as of 02/15/2020; reference task T8671 on the Solus Development Portal. As of this moment, there is no GUI program in the Solus repo allowing you to easily edit the Openbox menu (/home/username/.config/openbox/menu.xml). Changes can be made using a text editor. The menu.xml file available in the configuration file download has been updated to use Gedit (Gnome editor) to edit the menu.xml file. Once you’ve made and saved the desired change(s), right-click on the desktop and select Settings – Openbox – Reconfigure.
Resources on editing the Openbox menu.xml file:
- Openbox Wiki – Help:Menus
- What Is an XML File? – How-to-Geek
- XML Tutorial for Beginners – Clever Techie YouTube channel
- How to write a simple XML document – tutvid YouTube channel
You could also try obmenu-generator (Perl script) or jgmenu and see if either is an acceptable replacement for obmenu. jgmenu would require compiling for use under Solus.
The Openbox rc.xml file contains desktop settings and keybindings. I will provide a list of commonly used keybindings later in the tutorial. The desktop setting entries are usually modified using the Openbox Configuration Manager (obconf).
04.04 – Openbox and Tint2 Desktop Environment Configuration – Tint2
Next, create a folder named tint2 under the /home/username/.config folder. Copy the tint2rc file to the /home/username/.config/tint2 folder.
04.05 – Openbox and Tint2 Desktop Environment Configuration – Picom
Create a folder named picom under the /home/username/.config folder. Copy the picom.conf file to the /home/username/.config/picom folder.
04.06 – Openbox and Tint2 Desktop Environment Configuration – Keyboard Layout (non-QWERTY)
If you are using the QWERTY keyboard layout (the default) under Solus Budgie, feel free to skip ahead.
If you chose to use a keyboard layout other than QWERTY during the Solus Budgie installation, the layout will not be available in the Openbox and Tint2 desktop environment.
To obtain a list of keyboard layout names, drop to the command line and enter:
The first screen of output should look similar to the following:
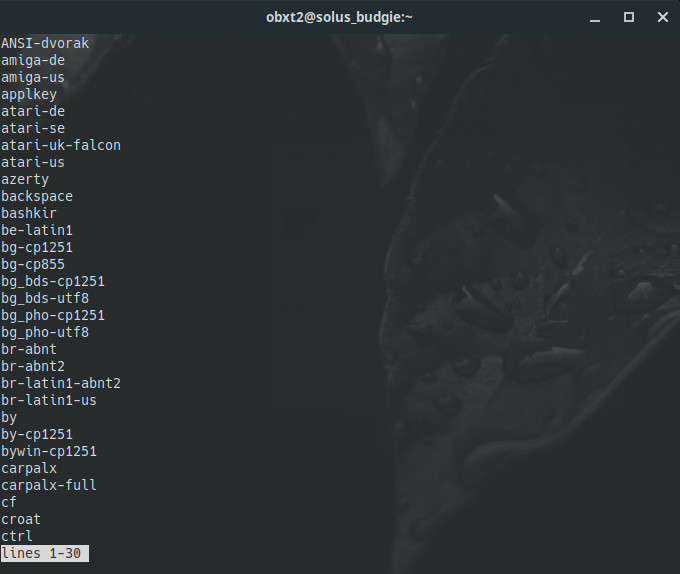
Use the spacebar to advance screens, CTRL-C to quit. To search for a specific keyboard layout name:
For example, to search for Dvorak keyboard layout names or keymaps:
To see your current keyboard layout or keymap info:
04.06.01 – Openbox and Tint2 Desktop Environment Configuration – Keyboard Layout (non-QWERTY) – Option 1 – Use localectl to Change the Keyboard Layout
Once you know the correct name of the keyboard layout(s) you desire to use, you are now ready to make the layout(s) permanent. From the command line enter the following command:
I use the U.S. Dvorak keyboard layout, so the command I would use to make the U.S. Dvorak keyboard layout permanent would be:
Note: I’m not quite sure of the benefit of the grp option setting in the above command, but for now it seems to work okay for my needs. I basically modified the localectl command for my needs based on the Xorg/Keyboard Configuration page on the Arch Wiki.
For more info about the localectl command, issue the following on the command line:
The only issue I’ve experienced so far using localectl to permanently set the keyboard layout is that the keyboard repeat rate gets reset periodically to a default of 660ms auto repeat delay and a repeat rate of 25 characters per second. To change the keyboard delay and repeat values, enter the following command on the command line:
Example (my preferred settings):
To check the current xset settings, issue the following command on the command line:
Enter the following command on the command line to see usage options for the xset command:
If you chose a keyboard layout other than QWERTY during installation and used a simple password when setting up your account, you can now change your password to something stronger. From the command line, enter the following and respond to the prompts:
04.06.02 – Openbox and Tint2 Desktop Environment Configuration – Keyboard Layout (non-QWERTY) – Option 2 – Use a keyboard Configuration File to Change the Keyboard Layout
Once you know the correct name(s) of the keyboard layout(s) you desire to use, use your favored text editor and use the following example as a guide to entering the appropriate information for your desired keyboard layout(s):
# KEYBOARD CONFIGURATION FILE
XKBMODEL="Use the /X11 Model/ value obtained from the output of /localectl status/"
XKBLAYOUT="Use the /X11 Layout/ value obtained from the output of /localectl status/"
XKBVARIANT="Use the name of your desired keyboard layout(s), using a comma to separate multiple values"
XKBOPTIONS=""
BACKSPACE="guess"
Following is an example of the keyboard configuration file I have used under Solus and currently use under my Debian installs:
# KEYBOARD CONFIGURATION FILE

XKBMODEL="pc105"
XKBLAYOUT="us"
XKBVARIANT="dvorak"
XKBOPTIONS=""

BACKSPACE="guess"
Also reference the Keyboard page on the Debian Wiki.
After you have entered the above text, save the file as keyboard. Then as super user, copy the keyboard configuration file to /etc/default.
Note: Upgrades can sometimes result in the keyboard layout reverting to QWERTY. If that happens, enter the following command on the command line:
For example, I use the Dvorak keyboard layout, so if an upgrade reverts the keyboard layout to QWERTY, I enter the following command on the command line to change the layout to Dvorak:
If you chose a keyboard layout other than QWERTY during installation and used a simple password when setting up your account, you can now change your password to something stronger. From the command line, enter the following and respond to the prompts:
04.07 – Openbox and Tint2 Desktop Environment Configuration – Touchpads
If you use a touchpad and are happy with libinput (default under Solus Budgie v3.9999), then as super user copy the 20-touchpad.conf file to the /etc/X11/xorg.conf.d folder. If you opted to install xorg-driver-input-evdev and xorg-driver-input-synaptics, then as super user copy the 50-synaptics.conf file to the /etc/X11/xorg.conf.d folder.
04.08 – Openbox and Tint2 Desktop Environment Configuration – Reboot
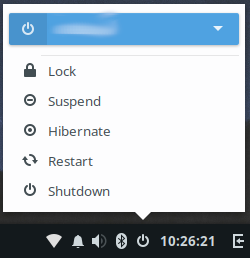
Now you’re ready to reboot. Are you excited? You should be. To reboot, click the power icon in the system tray in the lower right and then select Restart from the menu.
05 – Login Desktop Selector
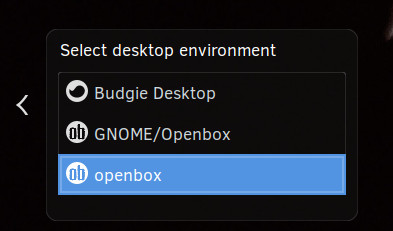
Earlier in the tutorial, I asked you to pay attention to the login area because it would change after installing Openbox and Tint2. When you reboot your computer, a bird will appear in the login area, representing the Budgie desktop. If you look closely, you should be able to see that the bird is a desktop selector switch. When you click to the right of the desktop selector switch, you get a list of installed desktop environments. Click to the right of the desktop selector switch, select openbox from the list, and then login.
 |
06 – Finishing Touches
The information that follows will add some eye candy to your desktop experience.
06.01 – Finishing Touches – Desktop Wallpaper
I enjoy using wallpapers for my computer desktop. A nice wallpaper adds to the user experience in my opinion. Following are some nice sites for desktop wallpapers:
- DeviantArt (free; some of the images on the site are not safe for work or minors)
- DigitalBlasphemy (not free, although Ryan Bliss does provide some free wallpapers in limited sizes)
- Unsplash (free)
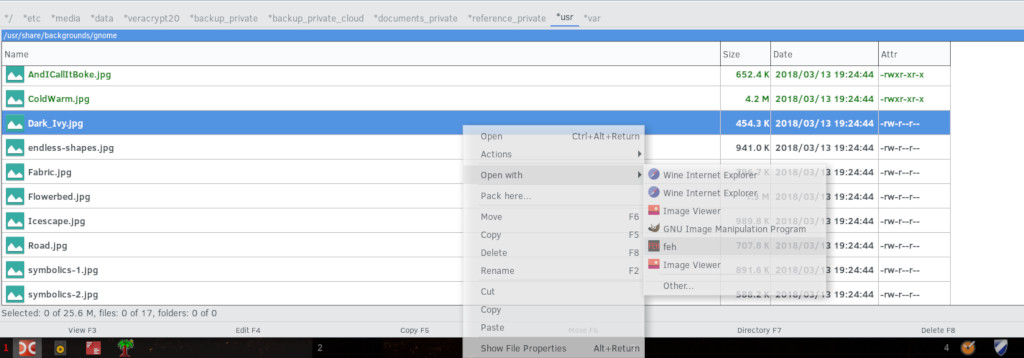
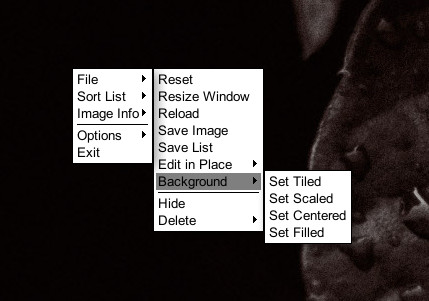
If you would like to have a wallpaper for your desktop, use Nautilus (Tools – File Manager in the Openbox menu) and navigate to the /usr/share/backgrounds folder or a folder containing an image you wish to use. Look through the folder(s), right-click on a desired image to use as a wallpaper, and select Open with feh. In feh, right-click on the image and select File-Background-Set Scaled/Set-Filled from the menu.
 |  |
06.02 – Finishing Touches – User Interface Settings
If you’d like to change the window decorations, icons, pointer, etc. select Settings – User Interface Settings from the Openbox menu and make the desired changes.
06.03 – Finishing Touches – Login Screen Background Image
To change the login screen background image, start gnome-terminal and enter the following:
Next, open gedit as superuser [gedit (root) under the openbox menu category Tools-Editors] and enter the following lines:
[Greeter]
draw-user-background=false
full-path-to-desired-image-file
Make sure to enter a line feed or carriage return (press the RETURN key) at the end of the last line. Save the file as /etc/lightdm/slick-greeter.conf. The selected image should be used as the login screen background image on the next reboot.
A big thank you goes out to users Lorien and yursan9 in the Solus forums for the login screen background image tip.
07 – Commonly Used Keybindings
Take a look at the ~/.config/openbox/rc.xml file for a more extensive list. The file should be readable and editable in any text editor. Search for <keyboard> to find the start of the keybindings.
- Alt + Tab: produces a list of programs running on the current desktop. Release and press the Tab key to move the selector to the desired program to switch to.
- Alt + F2: Budgie Run Dialog (click in the box to enter a command/program name)
- Windows + F#: desktop switcher; e.g. F1 for desktop 1, F2 for desktop 2, etc.
- Windows + Spacebar: Openbox menu
- Windows + T: Gnome Terminal
- Windows + Tab: Brings up a list of all desktops and the programs running under each. The list can be traversed, using the up and down arrow keys, to switch to a desired program.
08 – Issues/Missing in Action
While you now have a very usable, working desktop environment and applications, there are a few issues and missing functionality when running Openbox and Tint2 on top of a Solus Budgie installation.
08.01 – Issues/Missing in Action – Settings App
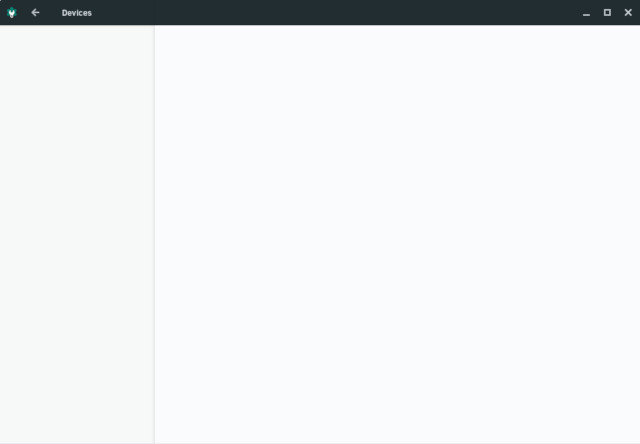
The Settings app (gnome-control-center) that comes with Solus Budgie doesn’t work under Openbox and Tint2. You can run Settings, but you will not see much or be able to navigate within the app. However, since the Settings app is geared for the Budgie desktop, I’m not sure if any settings would work or work well under Openbox and Tint2.
08.02 – Issues/Missing in Action – Audio Volume Control Applet
There is no audio volume control applet for the Tint2 panel. On Debian, I use PNMixer, but that isn’t available in the Solus repos and I wasn’t able to locate anything familiar to me in the Solus repos that could be used as an audio volume control applet. My future plans are to attempt to compile PNMixer for use on Solus.
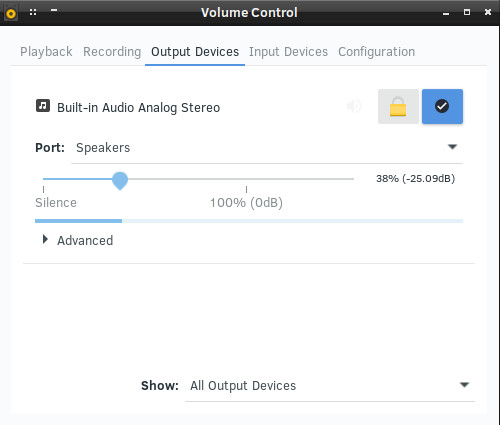
I currently use PulseAudio Volume Control (pavucontrol) to control audio volume. Click the third tab, Output Devices, click on the Speakers volume slider selector, and use the left and right arrow keys on your keyboard to control volume; left arrow decreases, right arrow increases. I leave PulseAudio Volume Control open and minimized so that I have ready access to change the volume; kind of kludgy, but it works.
08.03 – Issues/Missing in Action – Power Management
There is no power management app. As of this blog post, I’m unaware of an existing text-based configuration file under Solus Budgie that might be usable for changing/setting power management options. Since there is no power management option, a period of inactivity will result in screen blanking.
To change the screen timeout period, start gnome-terminal and enter the following command:
where xx represents the number of idle seconds before the screen goes blank. Thanks goes to Joshua Strobl for the tip on changing the screen timeout.
On Debian, I use xfce4-power-manager, but that isn’t available in the Solus repos. My future plans are to attempt to compile xfce4-power-manager for use on Solus, unless I find something in the Solus repos between now and then.
08.04 – Issues/Missing in Action – Budgie Run Dialog
The Budgie Run Dialog (ALT-F2) does not have focus when you run it. You must click in the box to enter a command or program name.
09 – Conclusion
That’s it! You’re now running one of the leanest, meanest desktop environments in the OS world. If you’re a fan of minimalistic desktop environments, I think you’ll grow to love the combination of Openbox and Tint2. Enjoy!
I’d like to thank Philip Newborough, the sole developer and creator of CrunchBang Linux (#!), the CrunchBang Linux community members who continued CrunchBang Linux as BunsenLabs, and the many members of the forums of both distros. This tutorial would not have happened without you.
A thank you also goes out to the Solus developers for creating a really nice rolling release Linux distro and for providing Openbox and Tint2 in the repos.
To user pvsage who was a long time moderator in the CrunchBang Linux forums and a moderator for some time in the BunsenLabs forums, wherever you are, know that you are thought of and know that I and others hope you are doing okay.
Also check out a similar series of posts on running Openbox and Tint2 under Debian GNU/Linux:
10 – Useful Resources
- Conky
- Casey’s Conky Reference with Examples
- Conky Main Site
- Conky – Calendars/Clocks/Time thread, BunsenLabs Scripts, Tutorials & Tips forum
- Conky weather+moon scripts thread, BunsenLabs Scripts, Tutorials & Tips forum
- Show us your conky thread, BunsenLabs Scripts, Tutorials & Tips forum
- Linux in General
- .bashrc PS1 Generator (easily create a customized colored command line prompt)
- LXer Linux News
- YouTube – Chris Titus Tech
- YouTube – eznix
- YouTube – OldTechBloke
- Openbox
- Picom
- Theming – GTK Themes
- Extract the downloaded theme file(s). Then using Nautilus in super user mode (sudo -i nautilus), copy the extracted folder(s) to /usr/share/themes.
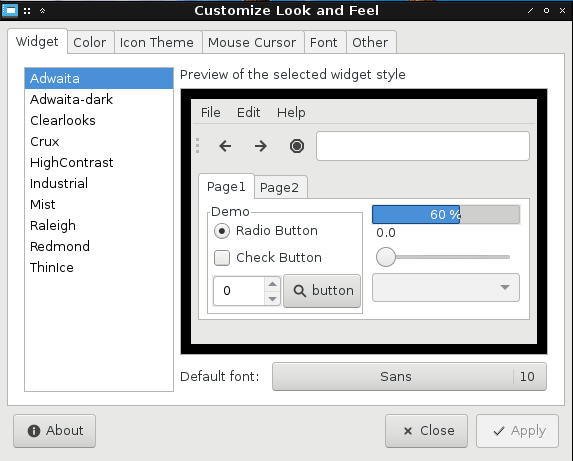
- To apply or change a theme, from the Openbox menu select Settings – User Interface Settings, which is actually LXAppearance. Most theming is under the Widget tab. Some theme packages also come with theming for icons and mouse cursor, which can be accessed under the Icon Theme and Mouse Cursor tabs respectively under LXAppearance.
- Theming – Openbox
- To apply, change, or install new themes, from the Openbox menu select Settings – Openbox – GUI Config Tool, which is actually the Openbox Configuration Manager (obconf). Themes are under the Theme tab.
- Theming – Papirus Icon Theme and Papirus Folders
- Main Site Note: Papirus Icon Theme is available in the Solus repos (papirus-icon-theme).
- Theming – Tint2
- Tint2
- Tint2 Wiki
- My tint2 config thread, BunsenLabs Scripts, Tutorials & Tips forum
- Tint2 Executors and Buttons thread, BunsenLabs Scripts, Tutorials & Tips forum
Post header image courtesy of awpolop in the old Solus forums.
2019-003