Gluten Free Oat Bread
Updated on 2024-10-25
Contents
- 1 – Introduction
- 2 – Equipment
- 3 – Ingredients
- 4 – Directions
- 5 – Notes
- 6 – Conclusion
1 – Introduction
Just over three years ago, I watched a video on the Fy Nyth YouTube channel. In the video, Ariel McGlothin mentioned a gluten free oat bread recipe that she planned to do a video of in the future.
At the time, I was buying Canyon Bakehouse Mountain White gluten free bread from Walmart. The bread was just okay, the loaves were very small, and the bread was quite pricey; $5.99 per loaf and that was three years ago.
I waited…and waited…and waited, but no video ever materialized. Therefore, I decided to perform an Internet search in early April 2021 to see if I could find a gluten free oat bread recipe and I discovered Gluten Free Honey Oat Bread Recipe Without Yeast (hereinafter referred to as the original recipe) on the Mind Over Munch blog. My recipe is an adaption of the original recipe.
2 – Equipment |
- Bread loaf pan, if baking in an oven
- Large mixing bowl (I use a 6-quart stainless steel mixing bowl)
- Bowl large enough to scramble an egg
- Small microwave-safe container if using butter, coconut oil, ghee, or lard
- 1-quart glass measuring cup
- 1 cup measuring cup
- 1/2 cup measuring cup
- 1/3 cup measuring cup
- 1 Tablespoon measuring spoon
- 1/4 teaspoon measuring spoon
- Large, sturdy spoon (I use a large sturdy plastic spoon)
- Wire cooling rack
- 1 dinner spoon
- 1 dinner fork
- 1 dinner knife if using ghee, lard, or solid coconut oil
3 – Ingredients |
- 1 1/3 cups Pamela’s All-Purpose Flour Mix or similar (reference Notes)
- 1 cup oat flour (reference Notes if you have celiac disease)
- 1 Tbsp baking powder
- 1/4 tsp baking soda
- 1/2 tsp salt
- 1 cup rolled oats (reference Notes if you have celiac disease)
- 1/3 cup butter, ghee, lard or your preferred oil (reference Notes)
- 1 cup plain whole fat yogurt
- 1 egg
- 1 cup whole fat milk
- 2 Tbsp rolled oats for topping (optional)
- 1 Tbsp ghee, lard, or solid coconut oil to grease a loaf pan if baking in an oven
4 – Directions |
- 01. In the large bowl, whisk together oat flour, baking powder, baking soda, and salt.
- 02. Whisk the rolled oats into the flour mixture.
- 03. Scramble the egg with a dinner fork in a bowl and set aside.
- 04. If baking in an oven, grease the loaf pan, making sure to only grease no further than halfway up the pan to prevent a ridged edge when the bread bakes.
- 05. If baking in an oven, preheat the oven to 350°F (180°C).
- 06. If using butter, ghee, lard, or solid coconut oil, heat in a small microwave-safe container in the microwave for about 25 seconds and set aside.
- 07. Combine milk and yogurt in the glass 1-quart measuring cup and heat in a microwave for about 75 seconds.
- 08. Remove the heated milk and yogurt from the microwave and stir with a dinner spoon.
- 09. Add the beaten egg, milk and yogurt mixture, and then the butter, ghee, lard, or oil to the dry ingredients.
- 10. Using a sturdy large spoon, combine the wet and dry ingredients until well combined.
- 11. Transfer the batter to a prepared loaf pan or a breadmaker baking pan and smooth the top with the back of a dinner spoon.
- 12. If desired, sprinkle additional rolled oats on top.
- 13. For oven baking, bake 40-45 minutes, until golden brown and a toothpick comes out clean. For a breadmaker, follow the instructions for baking a quick bread.
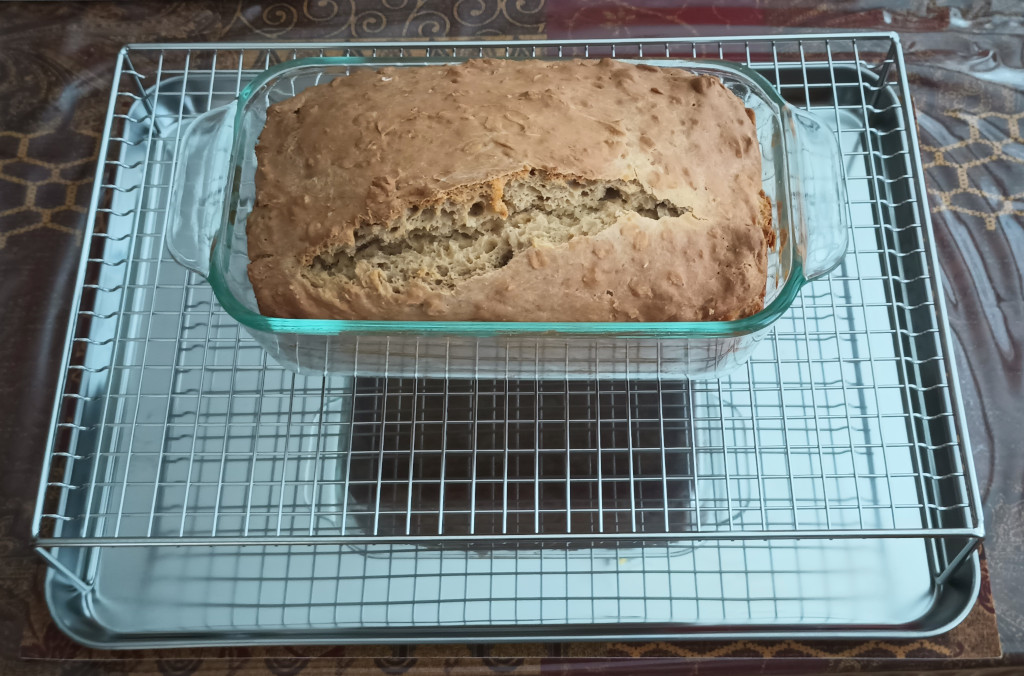
- 14. Allow the loaf to cool in the pan on the wire cooling rack for 10-20 minutes.
- 15. Carefully transfer the loaf to the wire cooling rack and allow to cool completely; usually about 2-3 hours.
- 16. Wrap the cooled loaf in plastic and store overnight in the refrigerator.
- 17. Remove the loaf from the refrigerator, unwrap, and then cut into slices.
5 – Notes |
I have only used Pamela’s All-Purpose Flour Mix for this recipe. Other gluten free flour brands should work, but I can’t guarantee it.
If you are using ghee, lard, or solid coconut oil, I have found that using a dinner knife to transfer ghee from a container to a measuring cup or spoon works well. You scrape some out from the container and then scrape across the inside edge of the measuring cup or spoon to transfer from the dinner knife. Continue until you fill the measuring cup or spoon.
I found heating the milk and yogurt helps when mixing with the dry ingredients. Mixing cold liquids with the dry ingredients results in a very stiff batter, to the point that it is very difficult to stir, even with a sturdy spoon.
Refrigerating the bread is necessary because it is a quick bread; i.e. no yeast. Quick breads will fall apart if cut right after baking. Refrigerating the bread overnight helps firm up the bread so that it holds together when cut.
If you have celiac disease, look for oat flour and rolled oats that are certified gluten-free. As far as I know Bob’s Red Mill is the only source for certified gluten free oat flour and certified gluten free rolled oats.
Slices can be eaten as is, heated for a few seconds in the microwave before eating, or stored in the refrigerator or freezer.
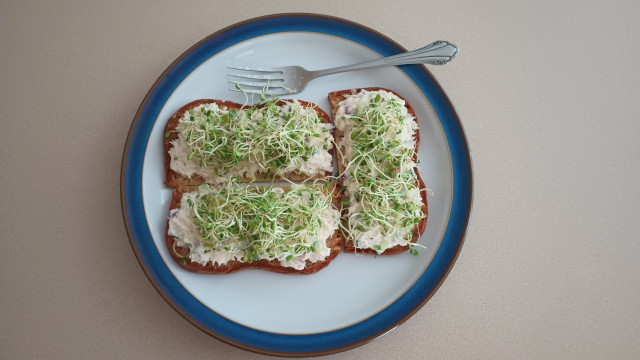
I like to use this bread for open-faced meat salad sandwiches topped with sprouts and I also like to spread fruit preserves on heated slices.
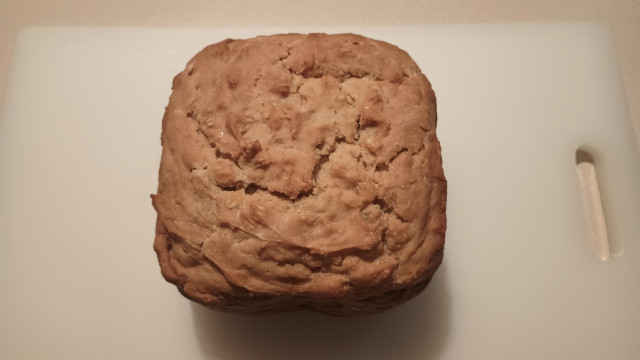
Because this is a gluten free bread that contains no yeast, you’ll find that the bread is dense and crumbly. I don’t recommend using it for sandwiches unless you use it for open-faced sandwiches.
I used the original recipe initially, but I changed a number of things after making a few loaves.
I didn’t care for the sweetness that the honey provided when I used the bread for open-faced sandwiches, so I began leaving out the honey.
The original recipe called for using all oat flour, which made me too gassy. Therefore, I came up with the idea of substituting gluten free flour for some of the oat flour.
My wife said she thought the bread was a bit too salty and I agreed with her. Therefore, I consulted some of the other quick bread recipes that I use from a Better Homes and Gardens cookbook and I adjusted the amount of baking soda and salt used, which resulted in the bread being less salty.
The original recipe called for the use of solid coconut oil and the author stated that she wasn’t sure the recipe would work with other oils. However, I used avocado oil once by mistake, and I also now use melted ghee, and the recipe has always turned out fine.
I also thought the amount of milk and oil called for in the original recipe resulted in a bread that was a bit dry, so I increased the amount of both. The bread is still kind of dry when eaten right from the refrigerator, but heating the bread in the microwave helps quite a bit to make it more moist.
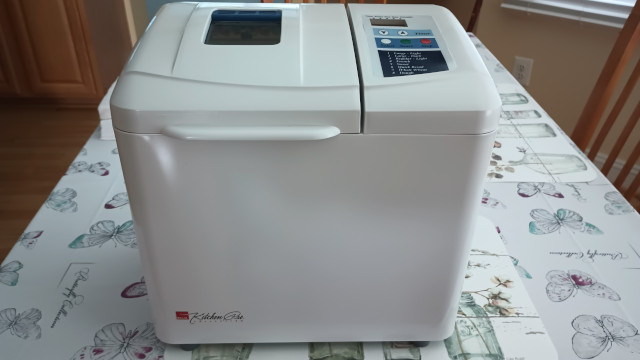
I make this bread recipe using both an oven and a Regal Kitchen Pro model K6743 breadmaker using the Quick Bread setting. The bread turns out fine using either baking method.
 |  |
6 – Conclusion
This recipe is a bit time consuming for both preparation and cleanup. However, the results are well worth the time and effort. There’s nothing like the smell of bread baking in the kitchen.
Did you make this recipe? What did you think about it? Let me know in the Comment box at the bottom of the page and thank you for visiting.
Equipment icon courtesy of Icons8.
Ingredients icon courtesy of Icons8.
Directions icon courtesy of Icons8 via IconArchive.
Notes icon courtesy of IconsMind via IconArchive.
2024-007


You May Also Like

Creating a WordPress Staging/Testing Site
Homemade Yogurt Using Milk and Probiotic Capsules