
Creating a WordPress Staging/Testing Site
Updated on 2021-08-25
Contents
- Introduction
- Step 1 – Create a Subdomain
- Step 2 – Add a Let’s Encrypt Certificate to the Subdomain
- Step 3 – Create an FTP Account for the Subdomain
- Step 4 – Clone Your Live Site
- Step 5 – Add and Remove Plugins, Plugin Settings, Change WordPress Admin Password, Test
Introduction
This is a lengthy tutorial, so grab your favorite beverage before commencing.
Initially, I was going to follow guidance from two different sources for setting up a staging/testing site under my SiteGround account, but then I looked around in cPanel and noticed a site cloning feature and thought that might be easier, which turned out to be true.
What are some of the reasons for creating a staging/testing site? First, to test new features, plugins, or themes you may be considering for your live site. Second, to test plugin, theme, and WordPress updates to make sure nothing breaks your live site. Third, to experiment without interrupting or breaking your live site.
I used the process outlined below to create a WordPress staging/testing site using the GrowBig hosting plan on SiteGround. SiteGround offers a one-click automatic staging feature with their GoGeek hosting plan, but I opted to save money for the time being. I’m not sure if you can setup a staging/testing site with SiteGround’s StartUp hosting plan since you are limited to one domain with that plan.
There are plugins that will enable you to setup and use a staging area as well, but the one or two I looked at require an annual license; i.e. they cost money.
In a nutshell, you’ll be creating a WordPress staging/testing site by creating a subdomain of you’re main domain. For example, my main domain is sharedbits.net, so I created a subdomain of my main domain by adding a desired prefix to my main domain; e.g. testing.sharedbits.net.
While the procedures that follow were performed on SiteGround, most or all of the same procedures can be used on other hosting providers.
Step 1 – Create a Subdomain
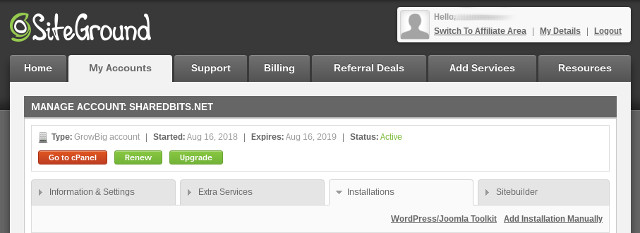
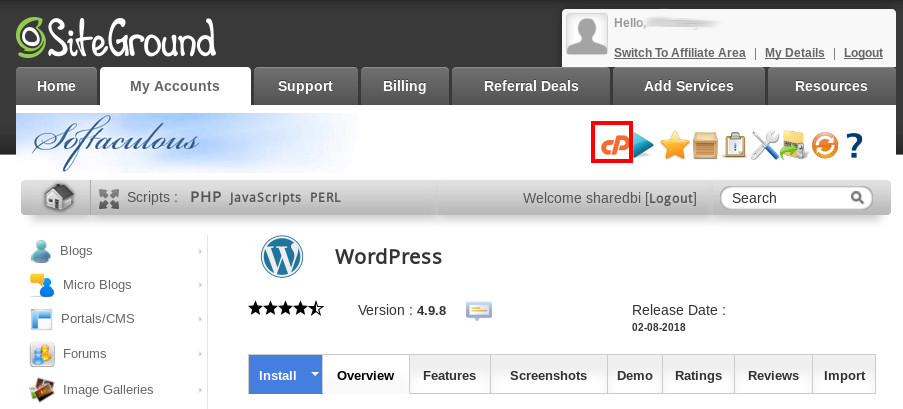
Access cPanel in your SiteGround account by clicking the red Go to cPanel button under the My Accounts tab.
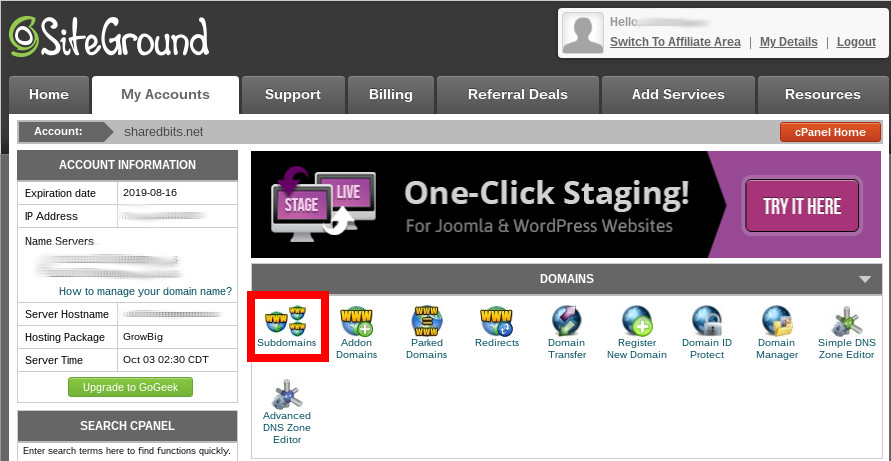
You want to create a subdomain, so click the Subdomains link under the Domains section in cPanel.
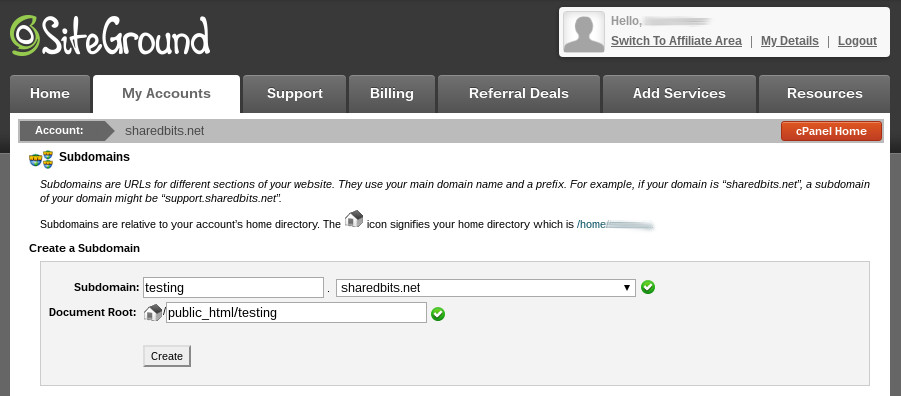
Enter the desired prefix in the Subdomain field.

Once you tab out of the field, the Document Root field should automatically populate with the required entry. Click the Create button below the Document Root field to create your subdomain.
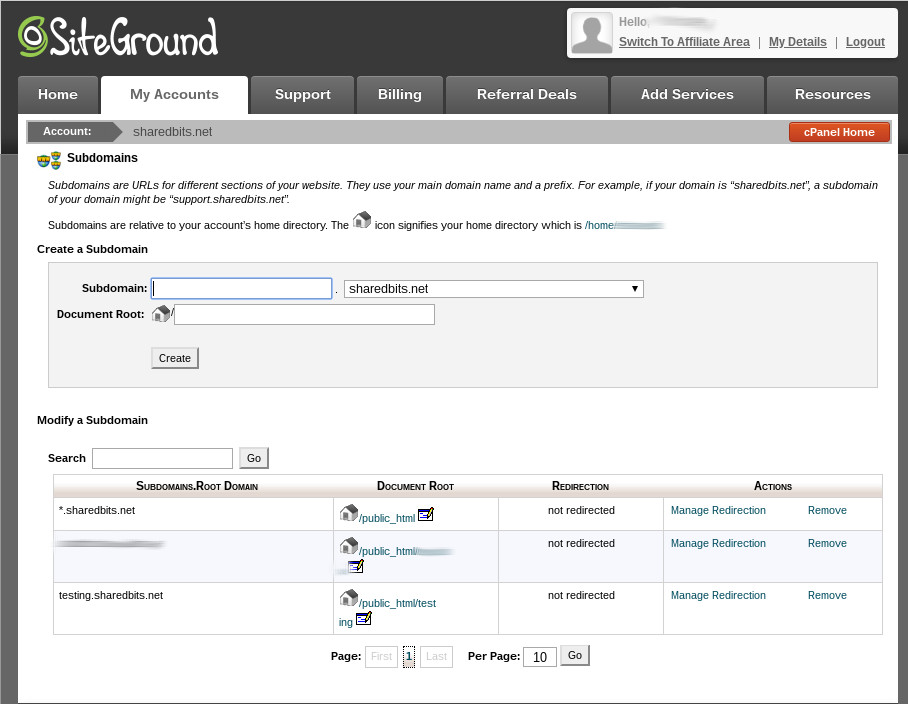
You should receive a confirmation that the subdomain was successfully created. Click the Go Back button.

The new subdomain should now appear in the list of subdomains.
Click the red cPanel Home button in the upper right corner.
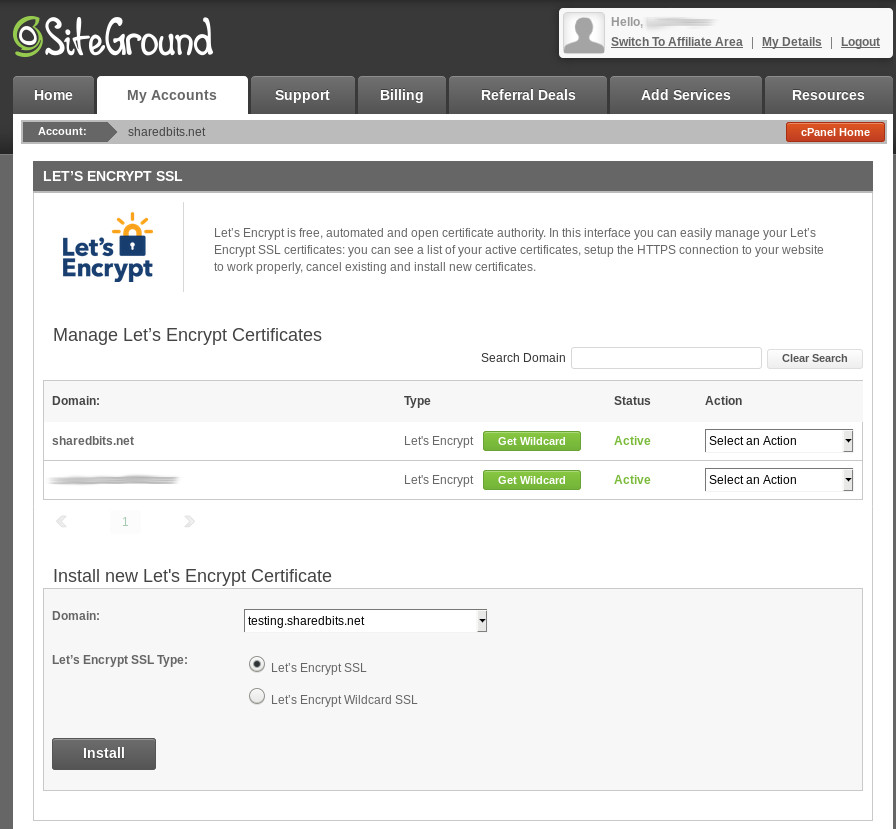
Step 2 – Add a Let’s Encrypt Certificate to Your Subdomain
Under cPanel, scroll down to the Security section (second section from the bottom of the page) and click the Let’s Encrypt link.

The Let’s Encrypt SSL page should appear. The subdomain you created in Step 1 should appear in the Domain field in the Install New Let’s Encrypt Certificate section. By default, the Let’s Encrypt SSL radio button should be selected. If not, select it and then click the Install button.
You should receive a confirmation whether or not the certificate installation was succcessful.
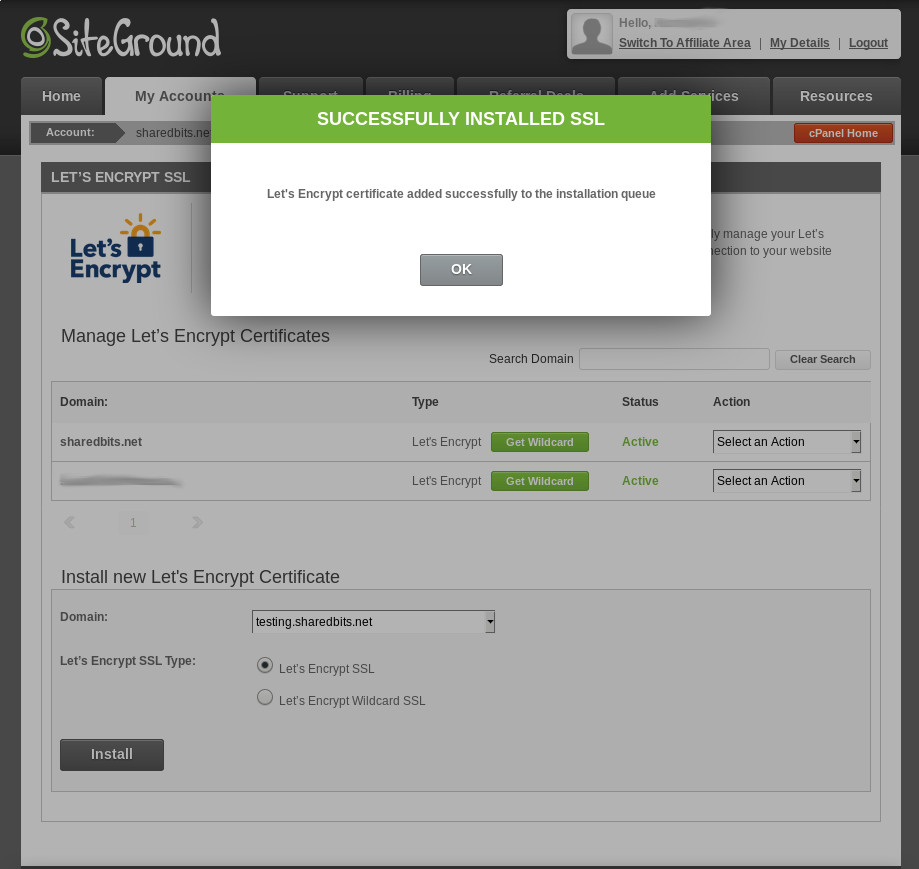
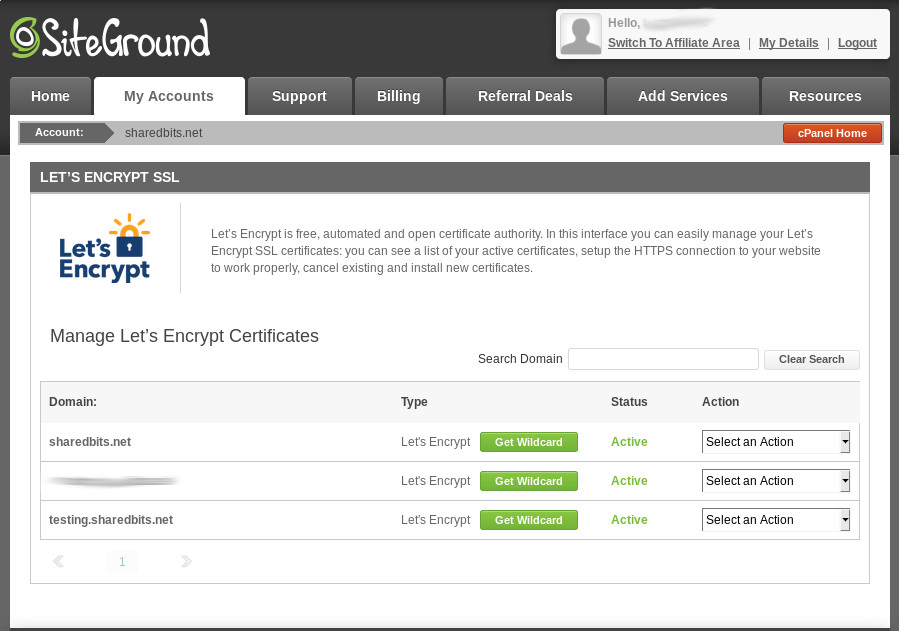
Click the OK button in the certificate creation confirmation window and your new subdomain should now be listed under the Manage Let’s Encrypt Certificates section on the Let’s Encrypt SSL page.
Click the red cPanel Home button in the upper right corner.
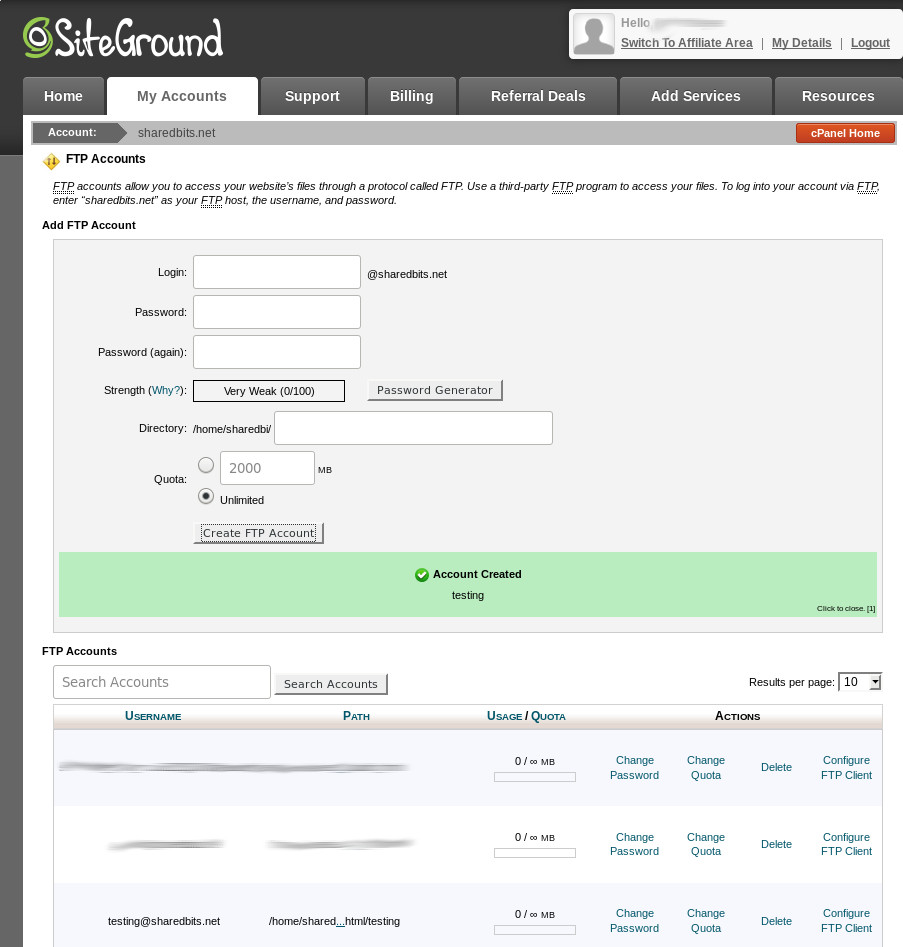
Step 3 – Create a Separate FTP Account for Your Subdomain
An FTP account enables you to transfer files to and from your staging/testing site. To be honest, I haven’t used FTP yet for any of my sites, but I have everything setup should the need arise.
Under cPanel, scroll down to the Files section and click on the FTP Accounts link.

You should now see the FTP Accounts page.
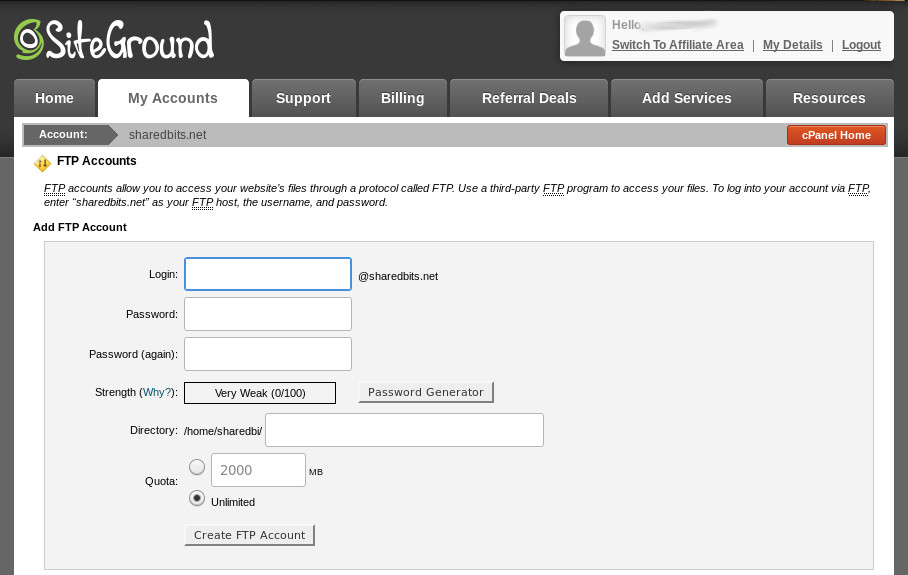
For the Login field, I recommend using the same name you used for your subdomain name. After entering the Login name and tabbing out of the field, the Directory field should automatically populate. Enter a password twice and then click the Create FTP Account button. A password generator (Password Generator button) is provided if you don’t have a password generation program.

You should receive a confirmation that the FTP account was created and the account should appear in the FTP Accounts section.
Click the red cPanel Home button in the upper right corner.
Step 4 – Clone the WordPress Installation for Your Live Site
Under cPanel, scroll down to the WordPress Tools sections and click the WordPress Installer link.

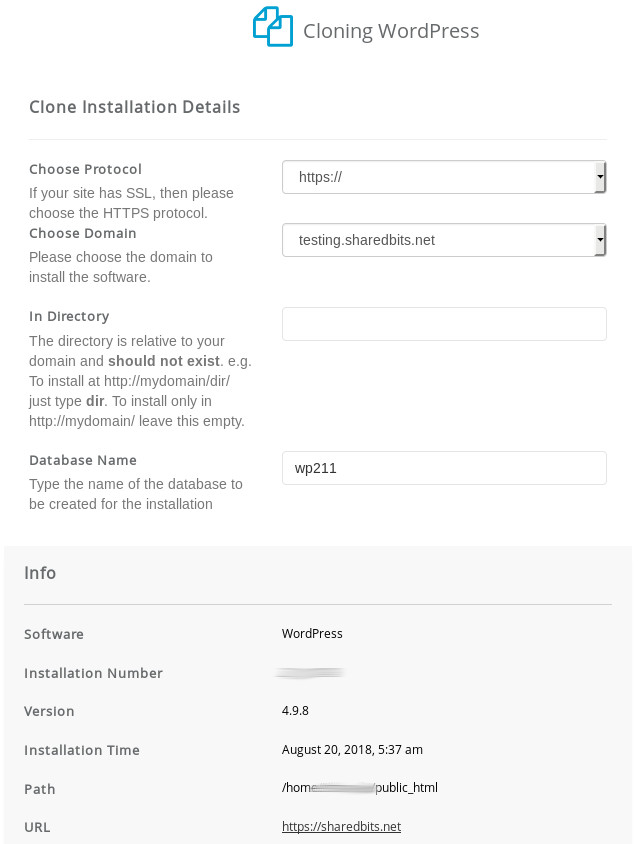
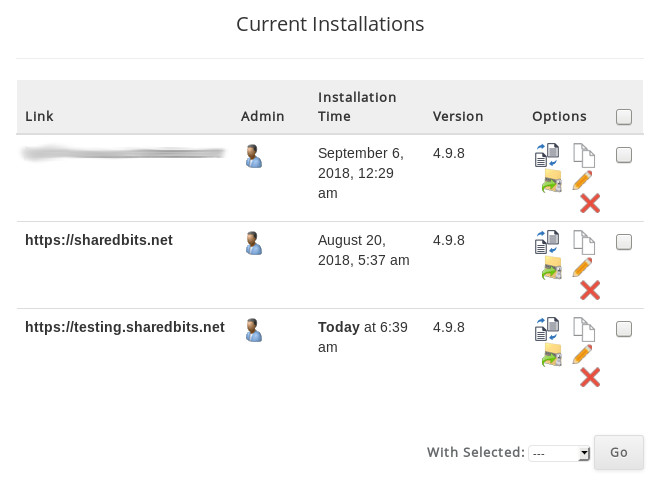
On the WordPress Installer page, scroll down to the Current Installations section and locate the installation for your live site. Click what looks like a copy icon to clone the WordPress installation on your live site.
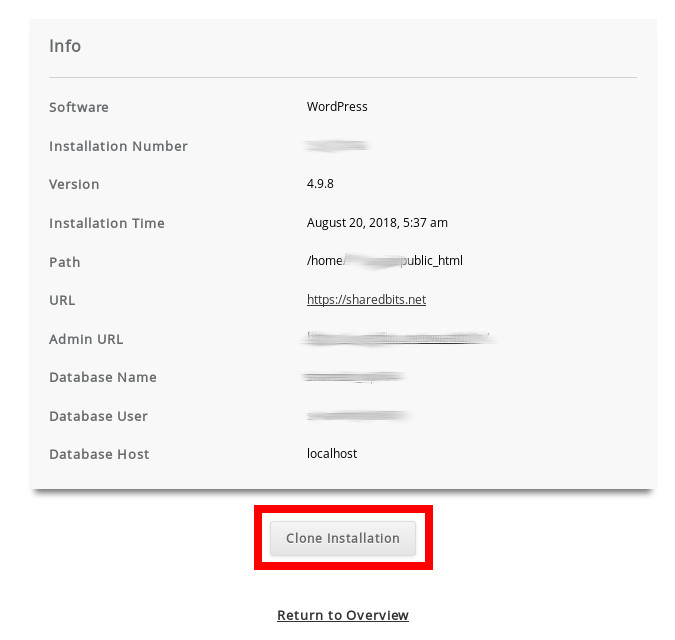
The Cloning WordPress page should appear. Select the appropriate secure protocol, select the subdomain you created in Step 01, leave the Directory field blank or add the appropriate subdirectory if applicable, and you can accept or change the default database name provided. I’ve accepted the default in the past, but I have read that it may be better to change the default for security reasons. The information shown in the Info section pertains to the current WordPress installation on your live site.
Click the Clone Installation button that appears below the Info section.
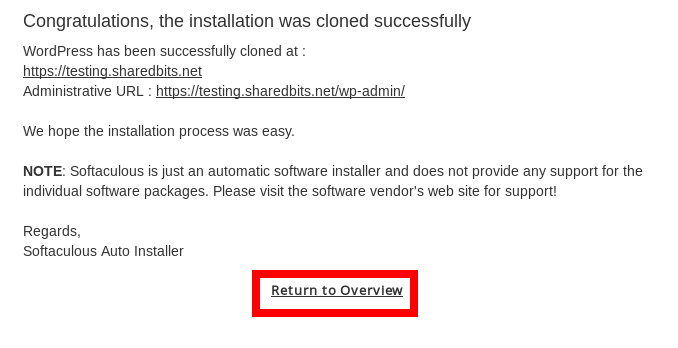
A progress indicator should be displayed letting you know the progress of the cloning process.
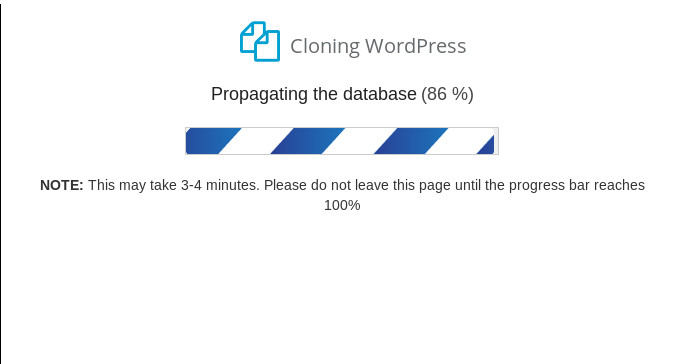
You should receive a notification once the cloning process has completed. Click the Return to Overview link at the bottom of the cloning process notification page.
Your staging/testing site should now show up as a current WordPress installation.
Click the orange cP graphic link on the right side of the Softaculous banner near the top of the screen to return to cPanel Home.
Your staging/testing site has now been created. There are a few more things to do to lock down your staging/testing site though. Go ahead and logout of your SiteGround account.
Step 5 – Add and Remove Plugins, Plugin Settings, Change WordPress Admin Password, Test
Logon to the WP Admin area of your staging/testing site; the site link should be <your staging/testing link>/wp-admin. The username and password should be the same as for your live site. I don’t mind the username being the same, but I think it’s more secure to use a separate password. Therefore, I reccommend changing the password for your staging/testing site.
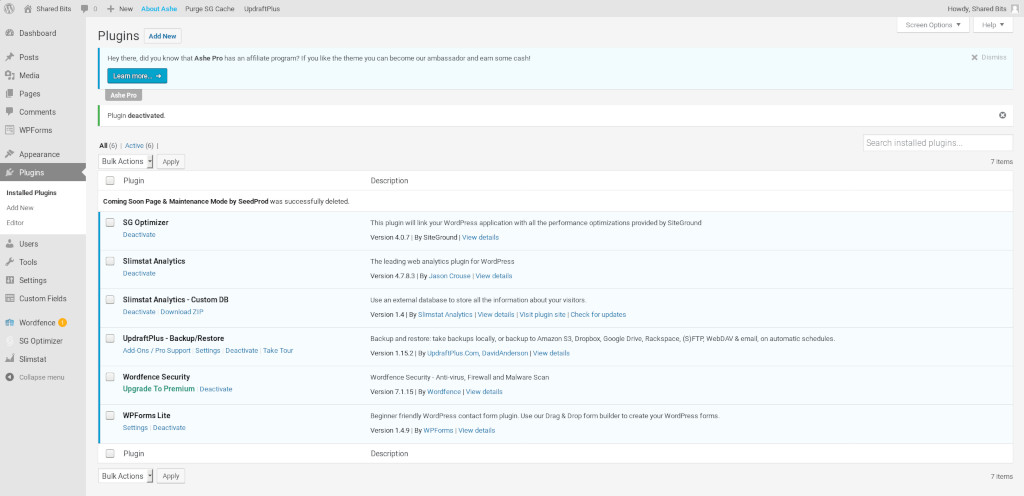
First, delete any plugins that you will not need in the testing environment. Click the Plugins link in the left panel.
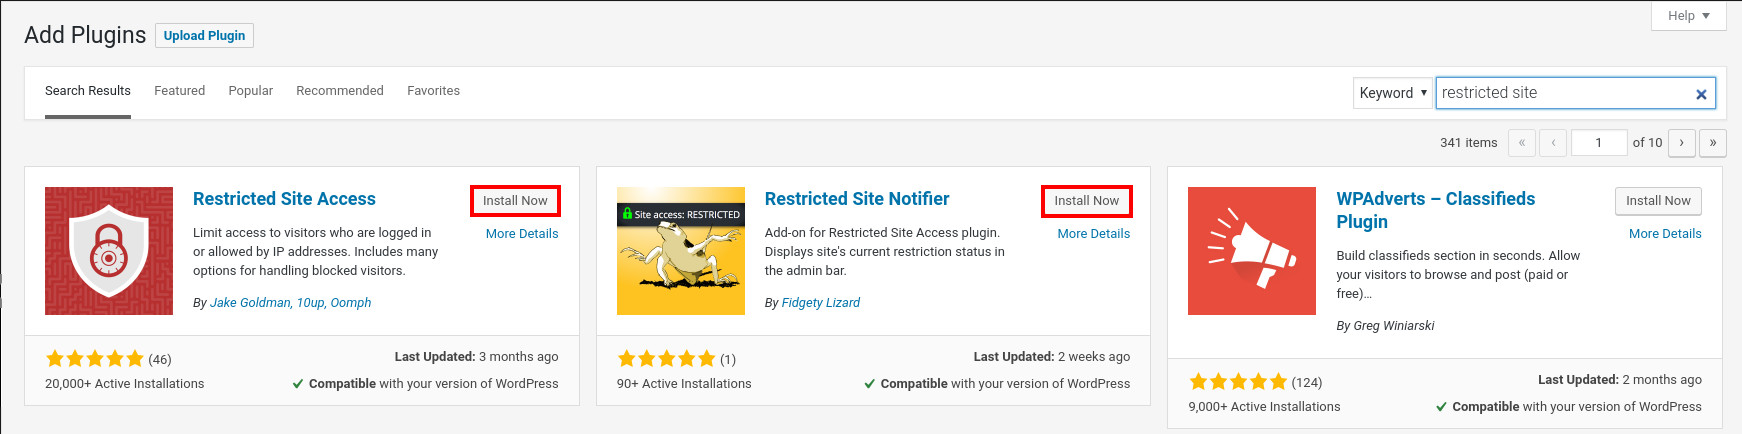
Next, I recommend adding the free Restricted Site Access and Restricted Site Notifier plugins. The Restricted Site Access plugin prevents others from accessing your staging/testing site. The Restricted Site Notifier plugin adds an indicator at the top of your WP Admin screen letting you know that access to your staging/testing site is restricted.
Click the Add New button next to the word Plugins near the top of the screen (reference previous screenshot) and then enter restricted site in the Search field.

The Restricted Site Access and Restricted Site Notifier plugins should be the first two plugins displayed in the search results. Go ahead and click the Install Now button for each plugin.
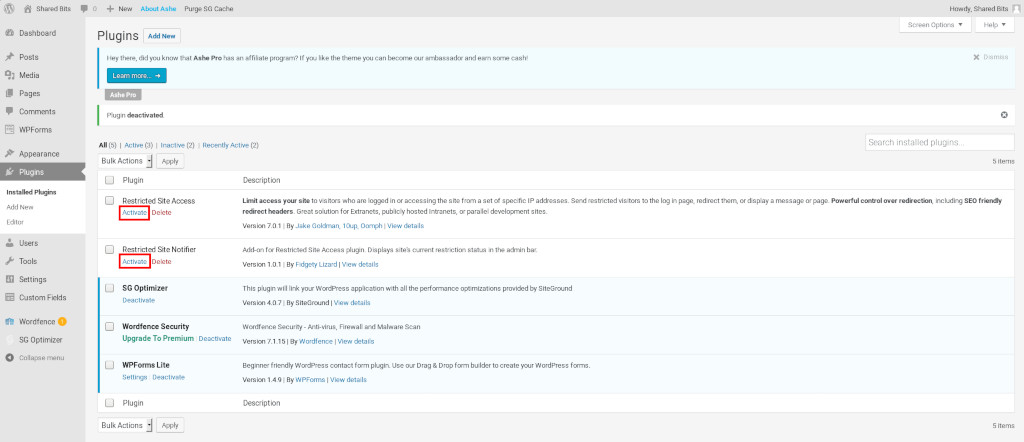
Next, click the Plugins link in the left panel. The Restricted Site Access and Restricted Site Notifier plugins should be included in your list of plugins. Go ahead and click the Activate link for each plugin.
Next, you want to redirect anyone attempting to access your staging/testing site. To do that, access the Restricted Site Access settings by clicking the Settings link (next to the Deactivate link) for the Restricted Site Access plugin.

Under the Handle restricted visitors section, click the Redirect them to a specified web address radio button and then enter the site in the Redirect web address field that appears . I use my live site as the redirect site. Click the light blue Save Changes button in the lower left of the page to save your changes.

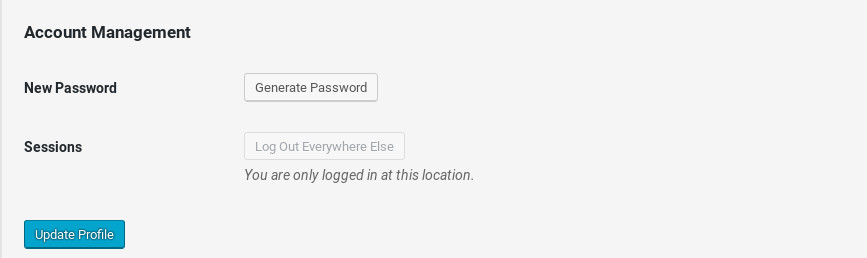
I recommend testing access to your staging/testing site to make sure it can’t be accessed externally. Before logging out of your WordPress admin account though, I recommend changing the password for the WordPress admin account for your staging/testing site.
Click the Howdy, <username> link up in the upper right corner and you should be taken to your user profile page.

Scroll down to the very bottom of the Profile page and click the Generate Password button to the right of the New Password text.
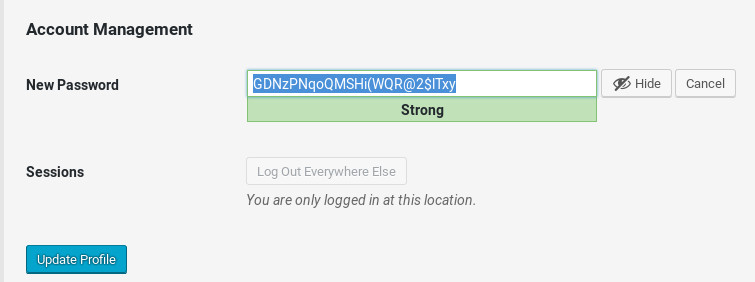
You can use the generated password provided or overwrite the created password with one of your choosing. Once you are satisfied with the password, click the light blue Update Profile button in the lower left.
Logout, clear the browser cache, close the browser, re-open the browser and attempt to access your staging/testing site. You should be redirected to the site you entered above. I would also test logging back into the WP Admin area of your staging/testing site to make sure your new password works.
To date, I’ve used my staging/testing site for testing purposes only. Based on one of the sources I consulted on how to create a staging/testing site, you would have to manually copy over elements of your staging site to your live site. I have successfully copied over single posts, but not a whole site.
Sources consulted for this tutorial:
- How to Create a Staging Environment for a WordPress Site, Editorial Staff, 02/21/2014, WPBeginner
- Beginner’s Guide: How to Setup a WordPress Staging Site, Colin Newcomer, 04/26/2018, themeisle
Post header image is courtesy of user geralt at Pixabay.
2018-008


You May Also Like

Shared Bits 5-Year Anniversary

Short Bits 2024